User Roles
This chapter describes how to create new user roles and edit existing ones. Each user has to be assigned a user role. The user role determines the permissions that a user is allowed to perform. The overview contains a complete list of all permissions.
If a permission is not available, functions are deactivated (on the register interface) or hidden completely (main menu).
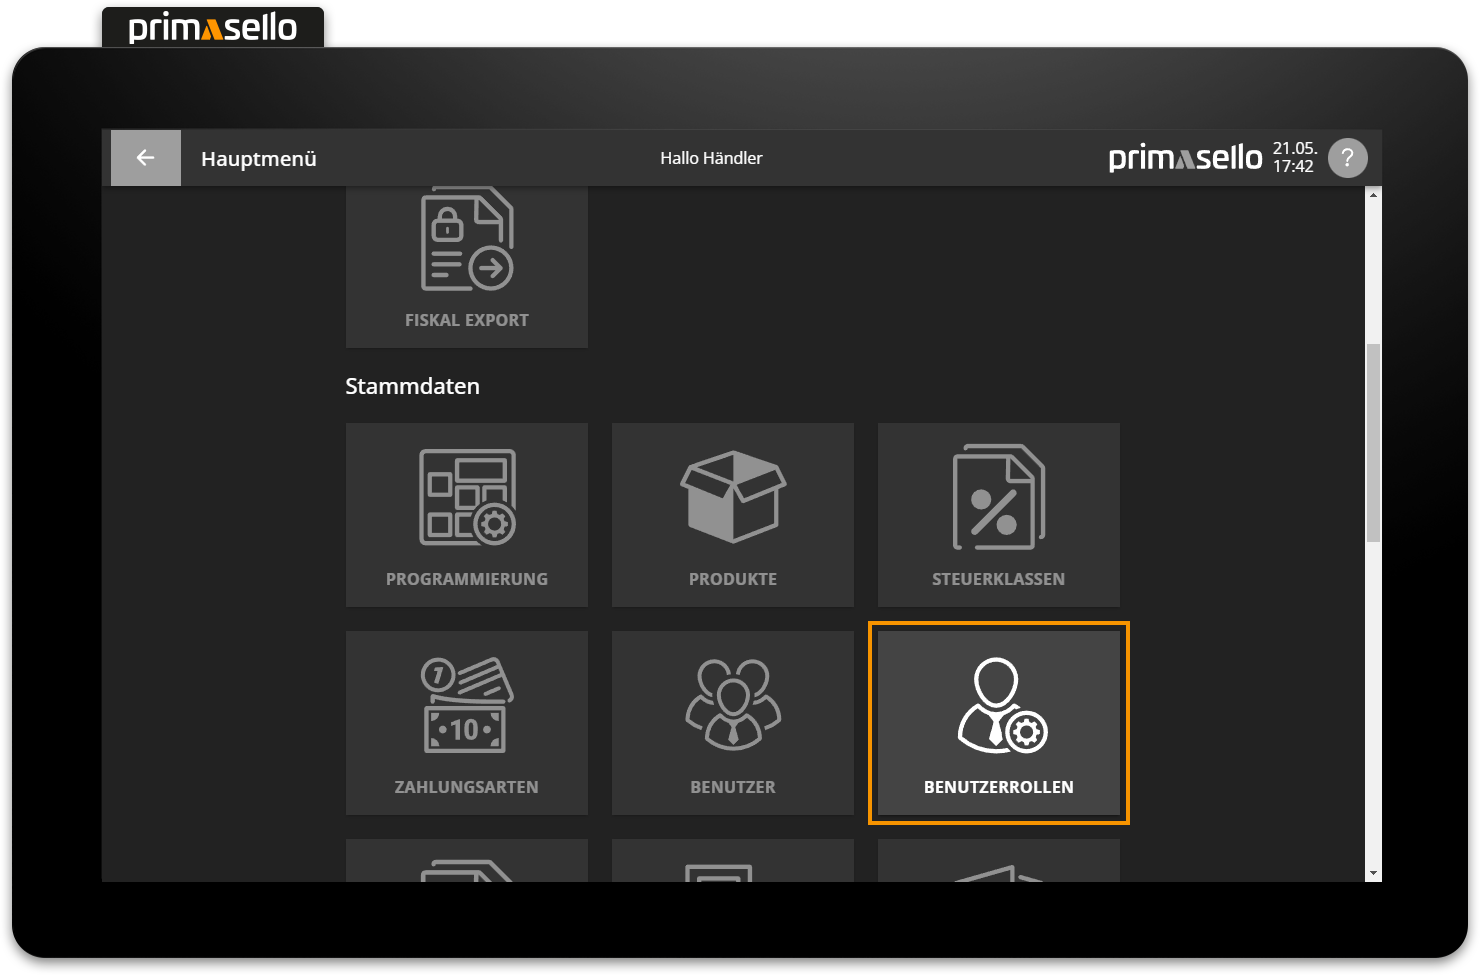
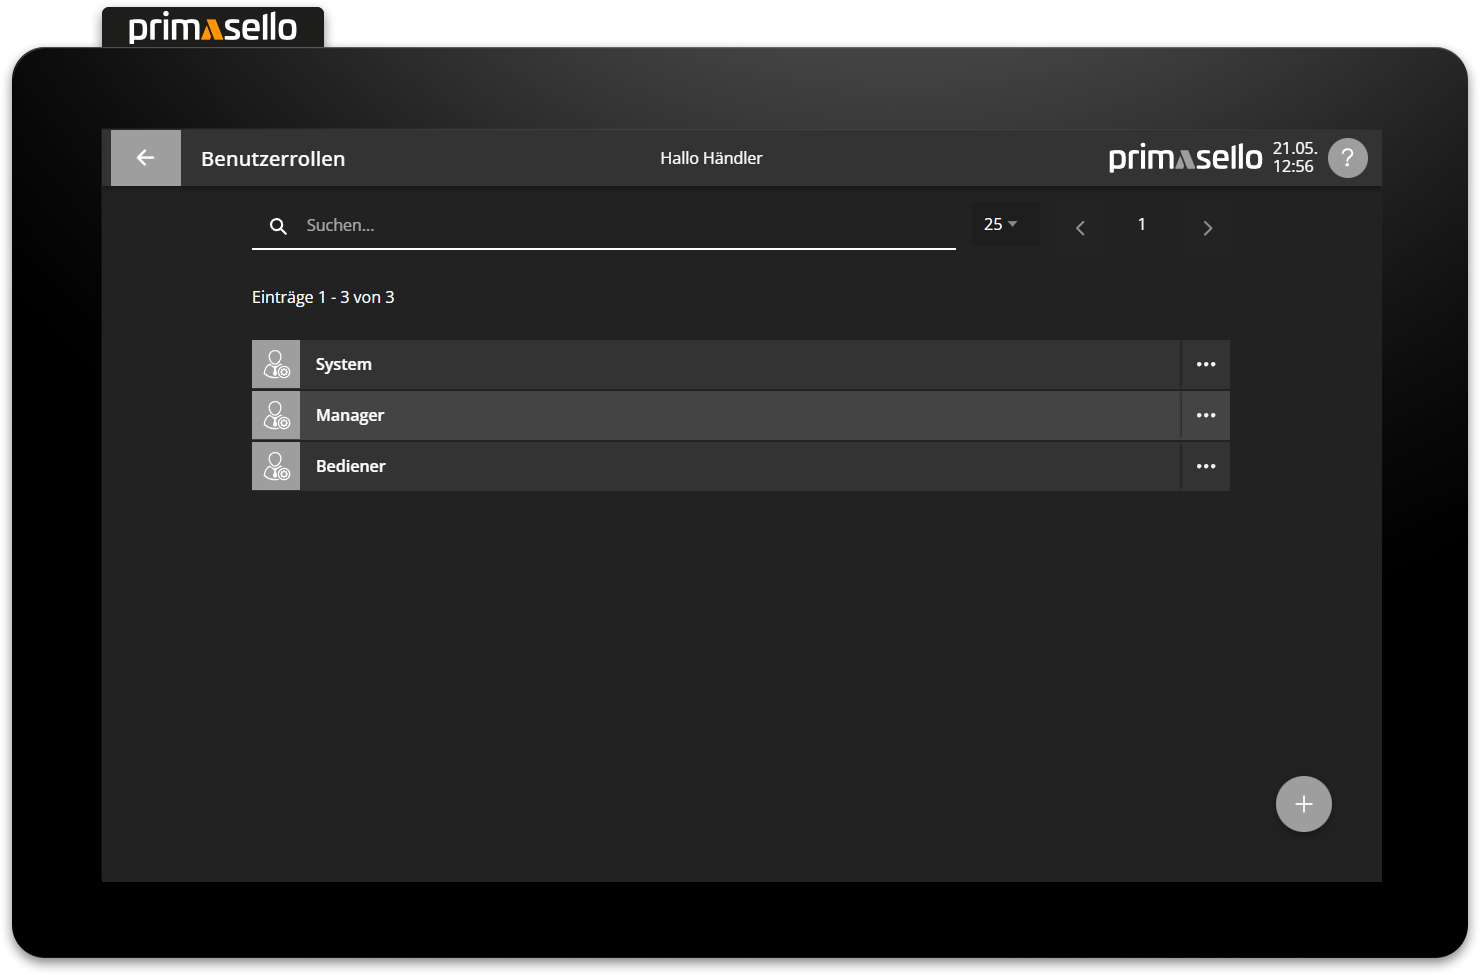
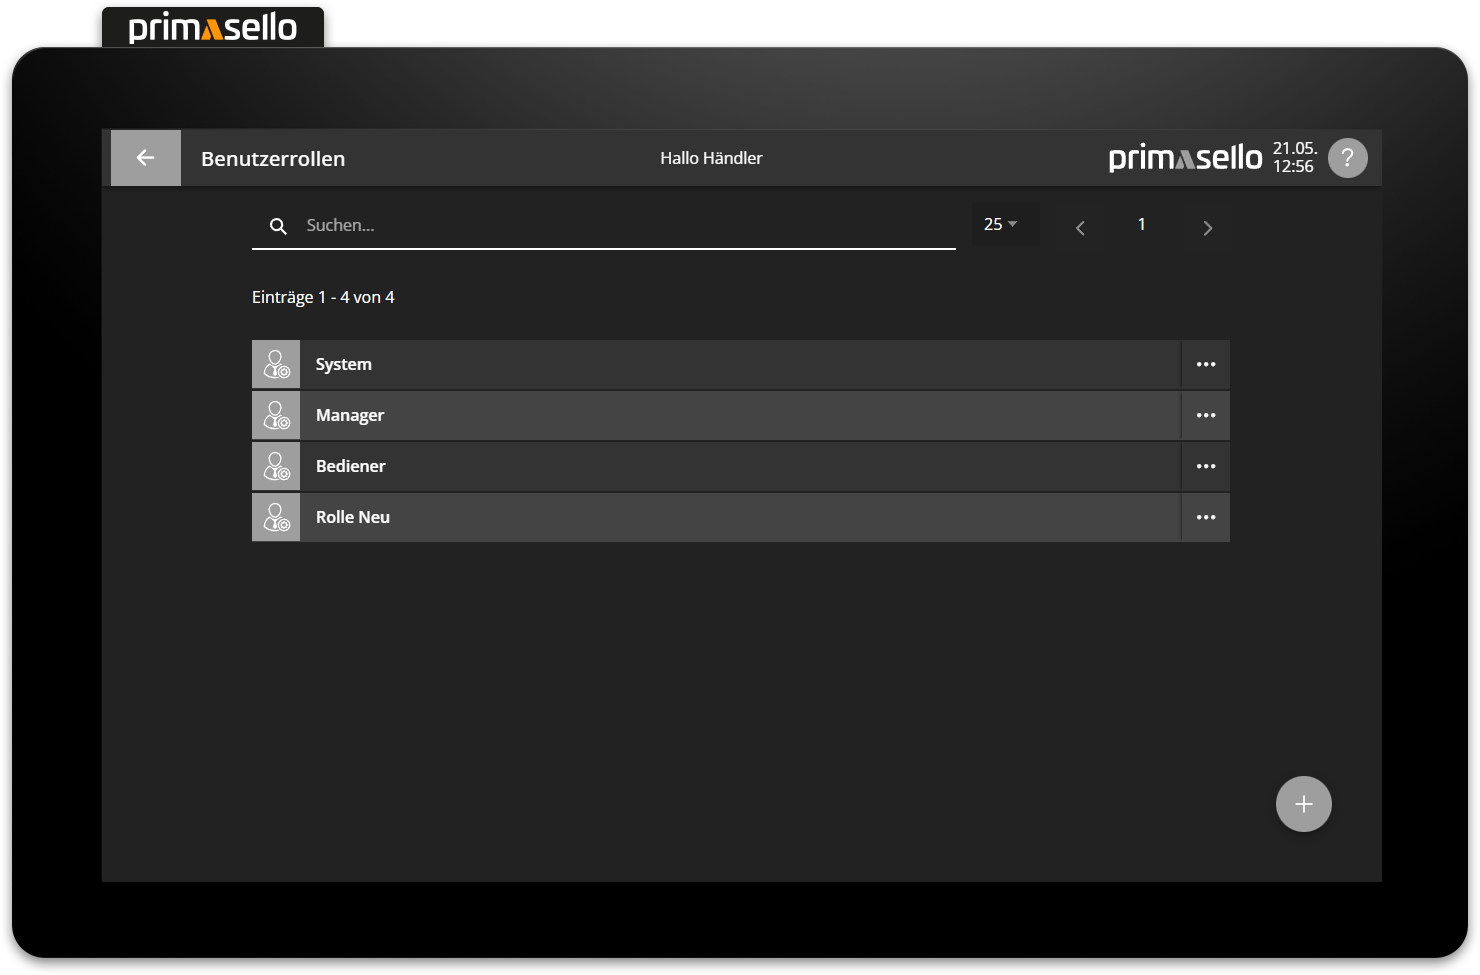
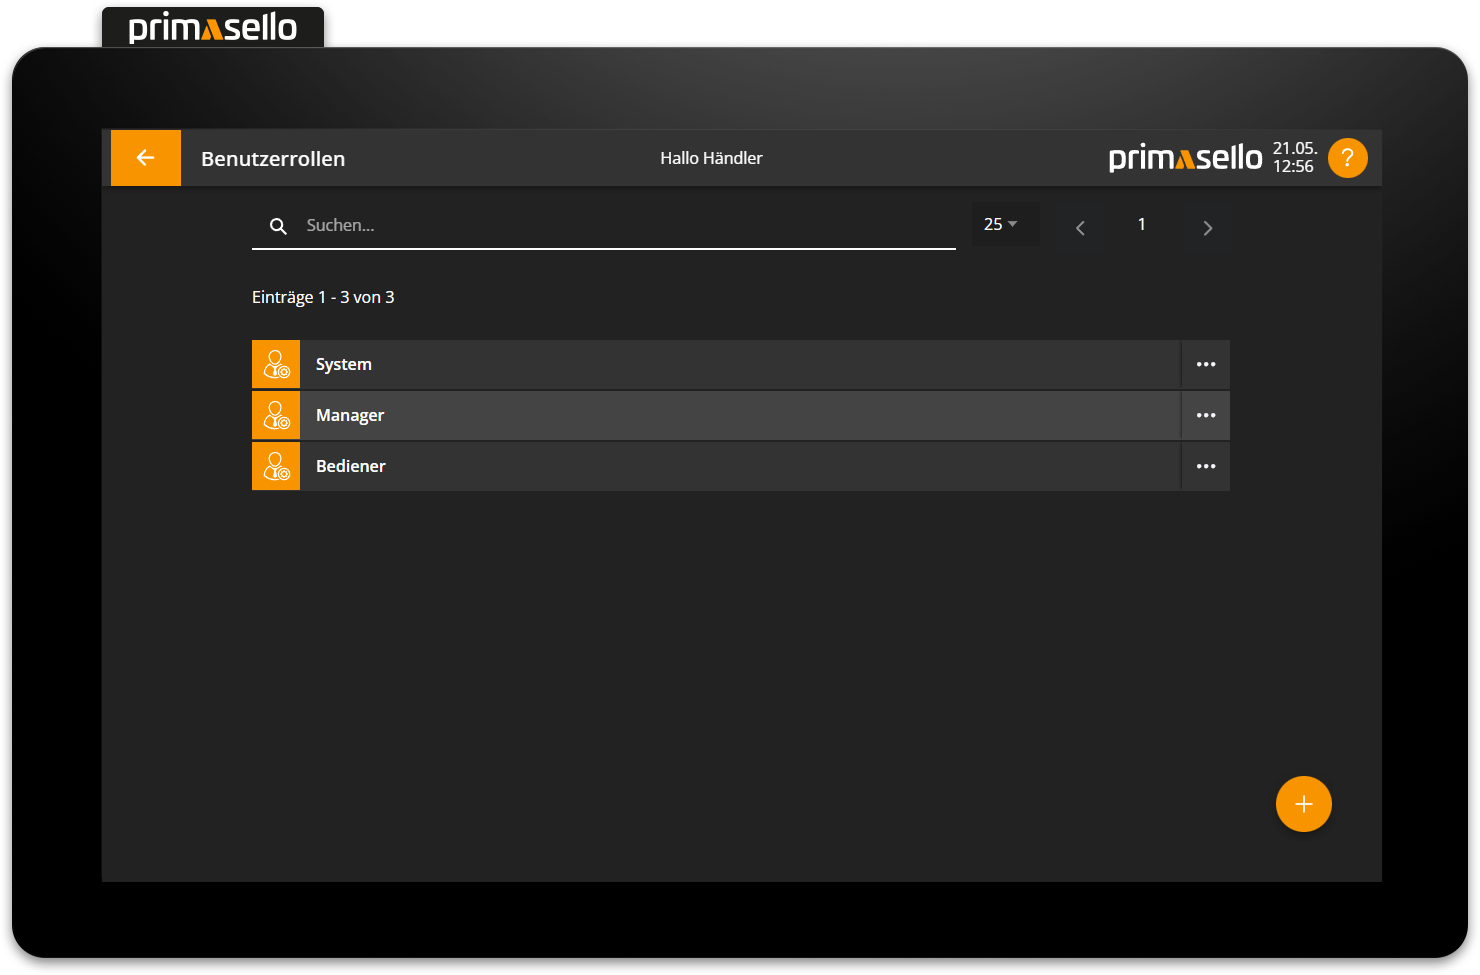
The user roles can be accessed in the main menu in the ‘Master data’ section via the ‘User roles’ button.
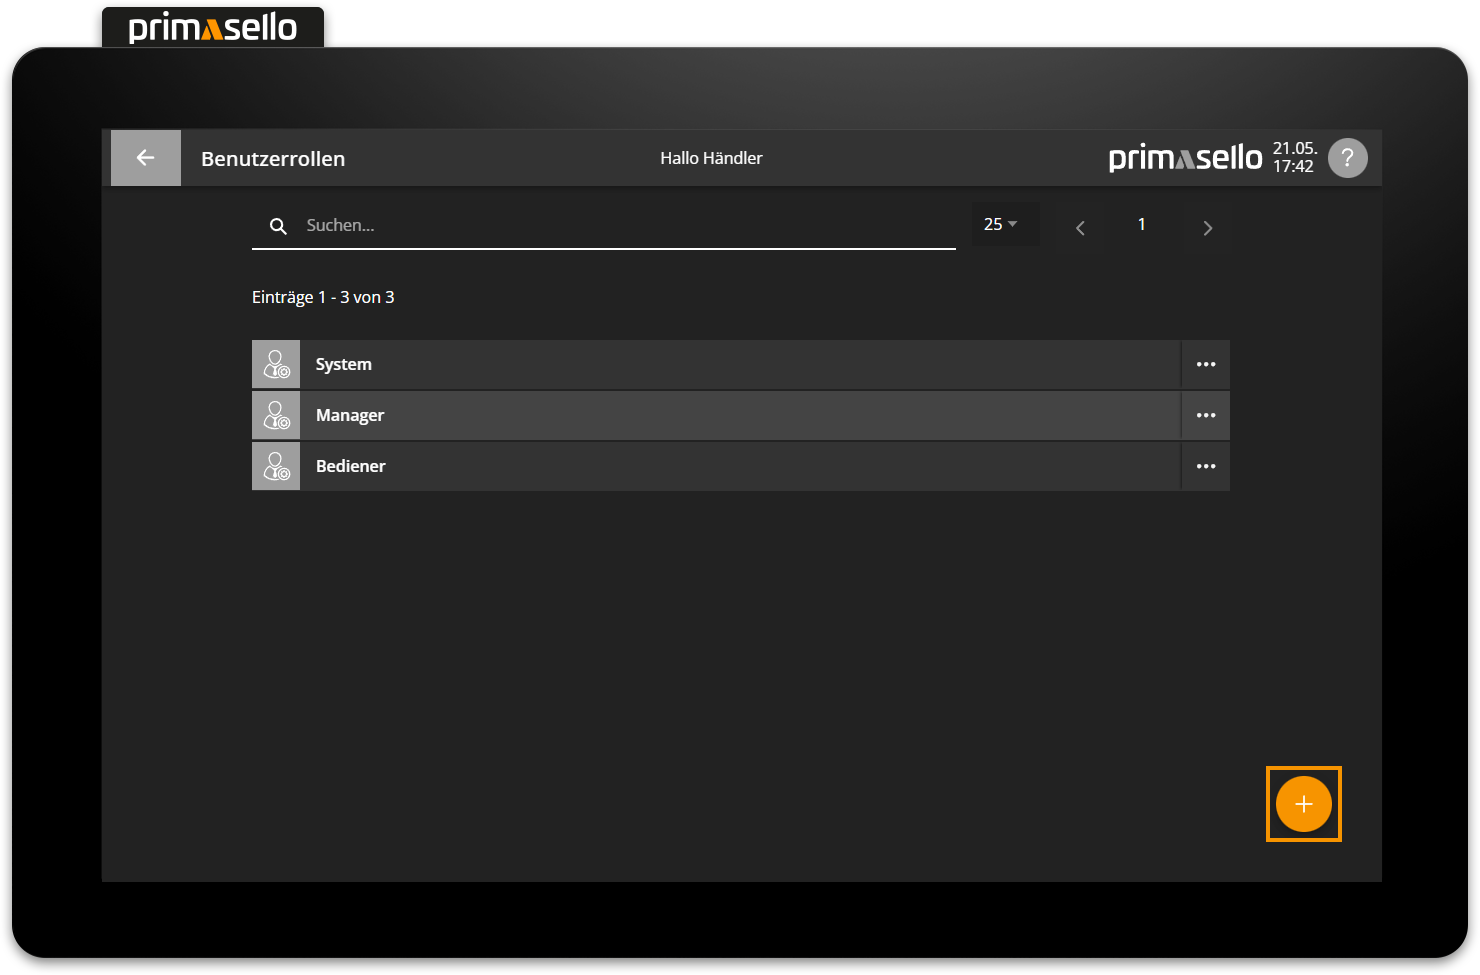
The manager and operator user roles are predefined in the standard database.

A total of up to 10 user roles can be created.
Create new user role
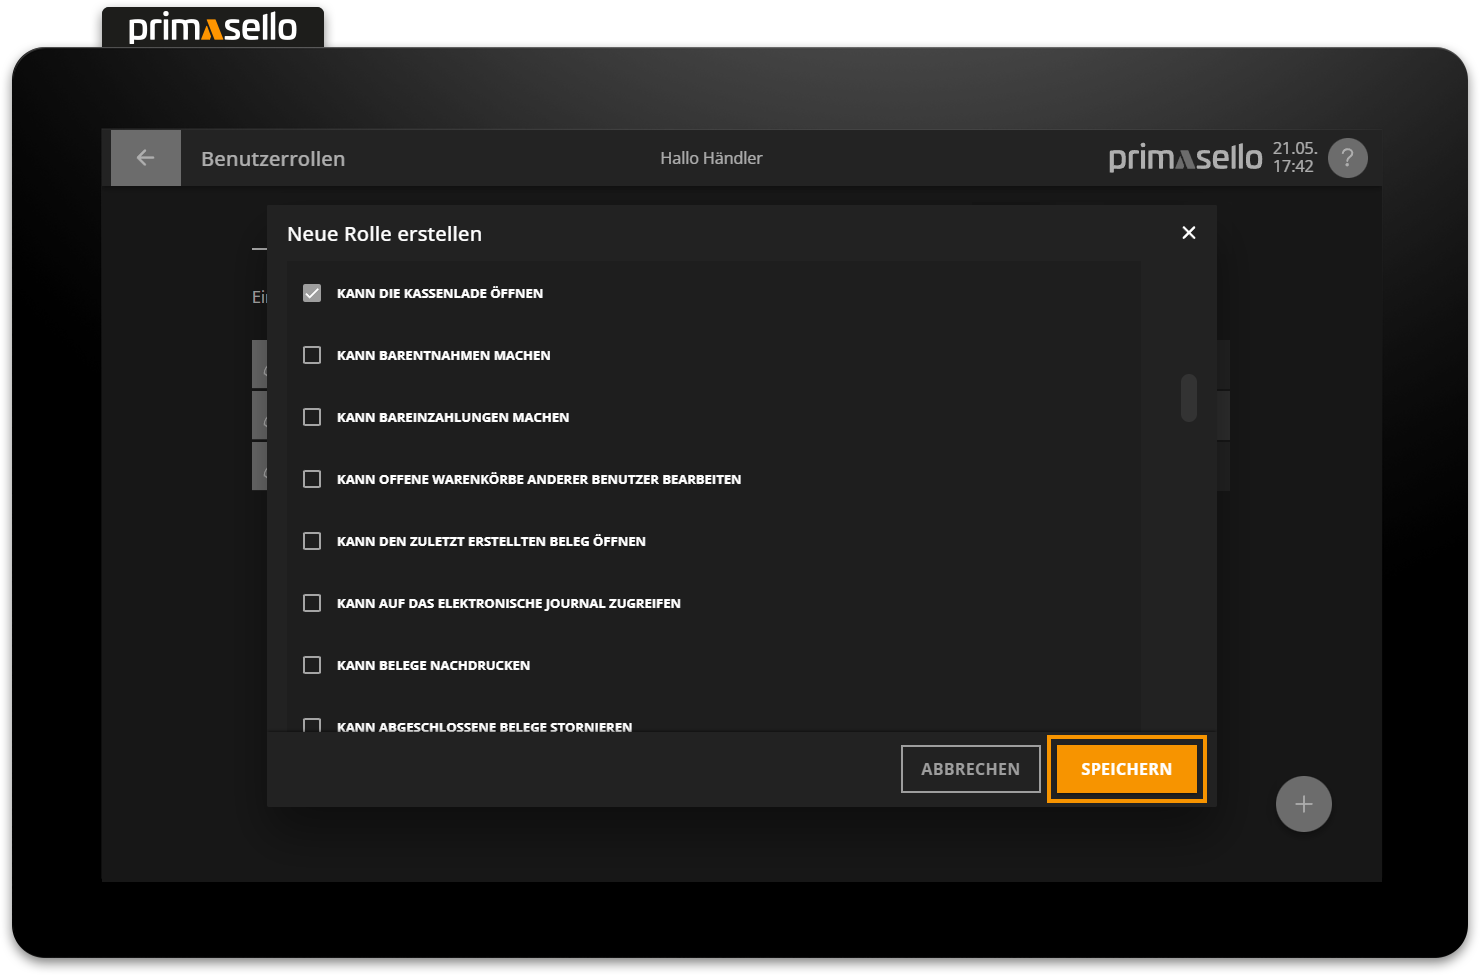
In the list view of user roles, you have to press the orange ‘plus’ button at the bottom right of the screen to create a new user role.
A separate window opens with information about the new role. The name field is automatically pre-filled and can be edited by clicking on it.
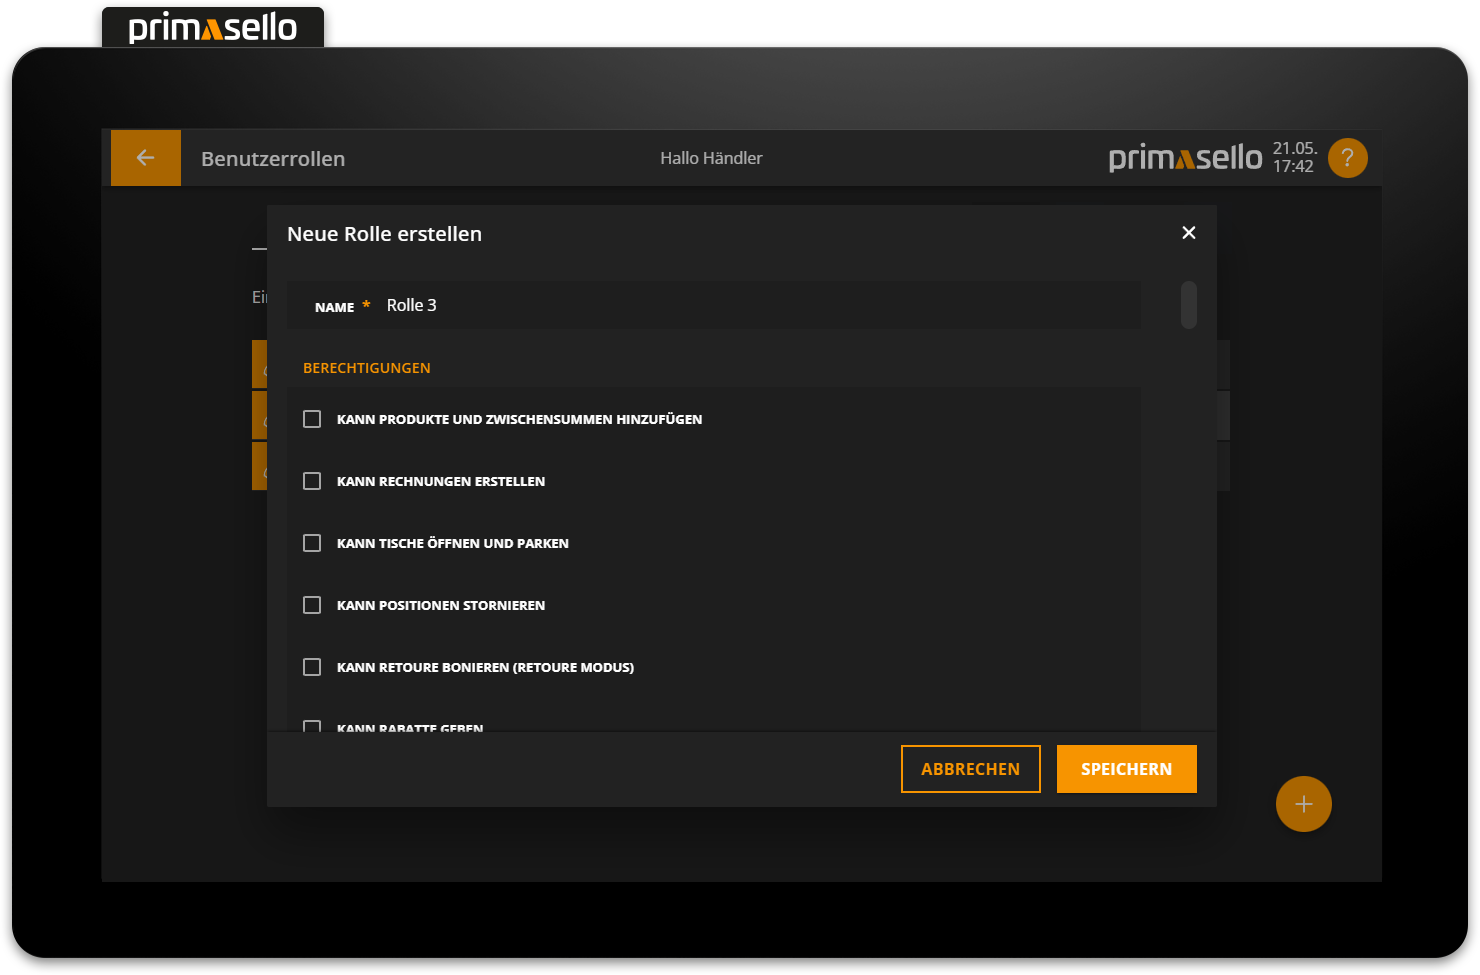
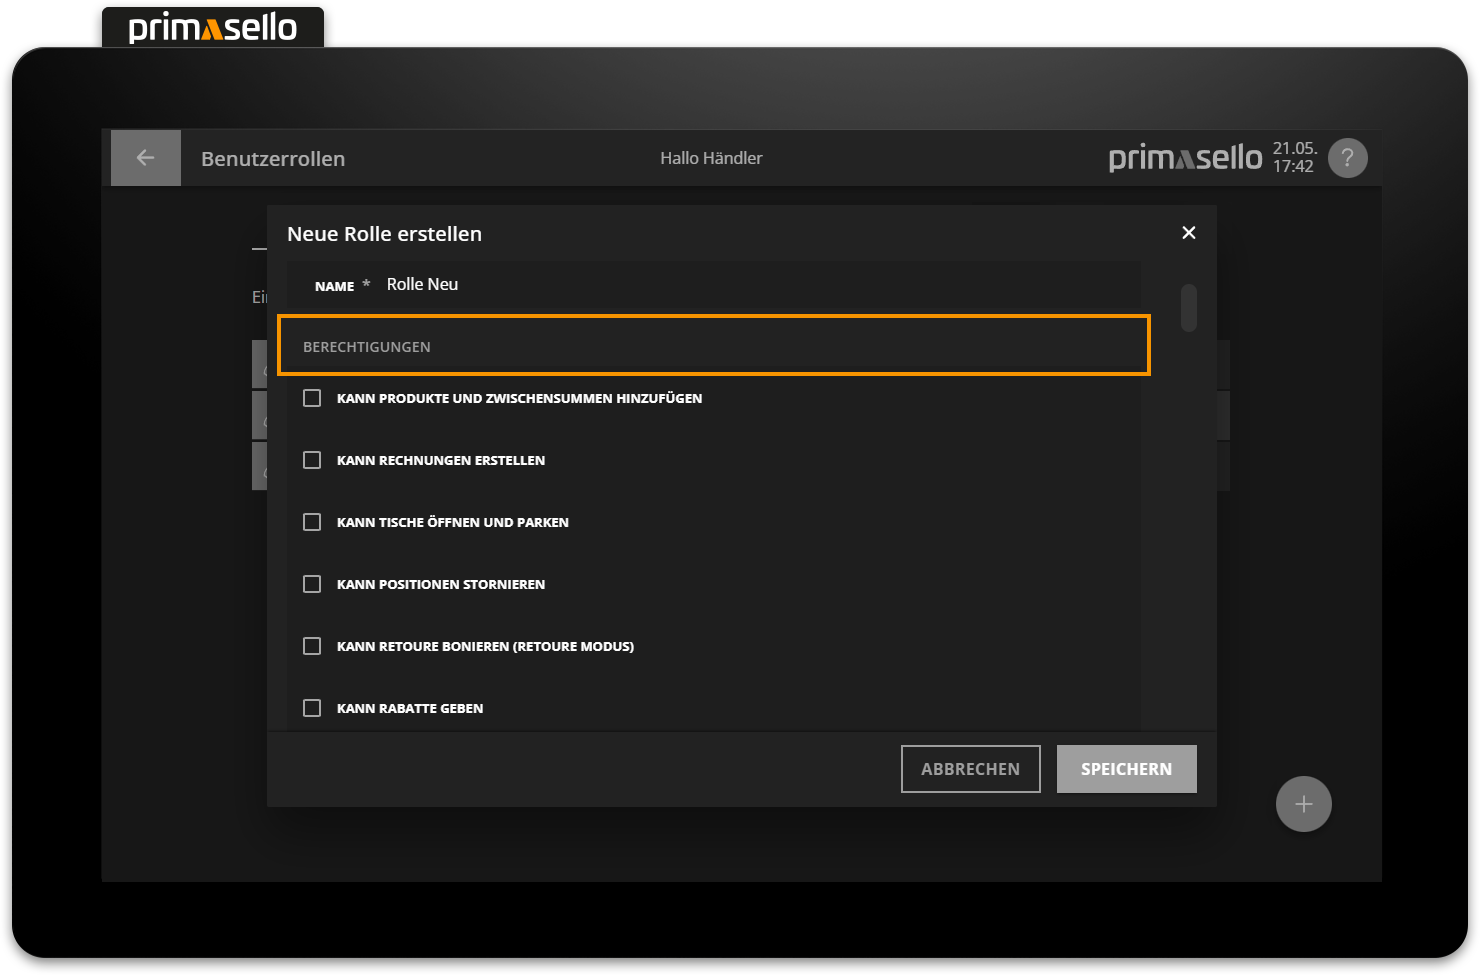
When creating a new user role, all permissions are deactivated. By clicking on the line of the desired permission, the box is ticked and the permission is activated for this role. A list of all available permissions can be found in the overview below.
Pressing the orange ‘Save’ button in the lower right corner creates the new user role and closes the window. Creating a new user role can be cancelled by pressing the 'Cancel' button or by pressing the ‘x’ button in the upper right corner – all settings will be lost.
Edit user role
To edit an existing user role, you have to press the relevant entry in the list or alternatively press the button with the three dots at the end of the line.
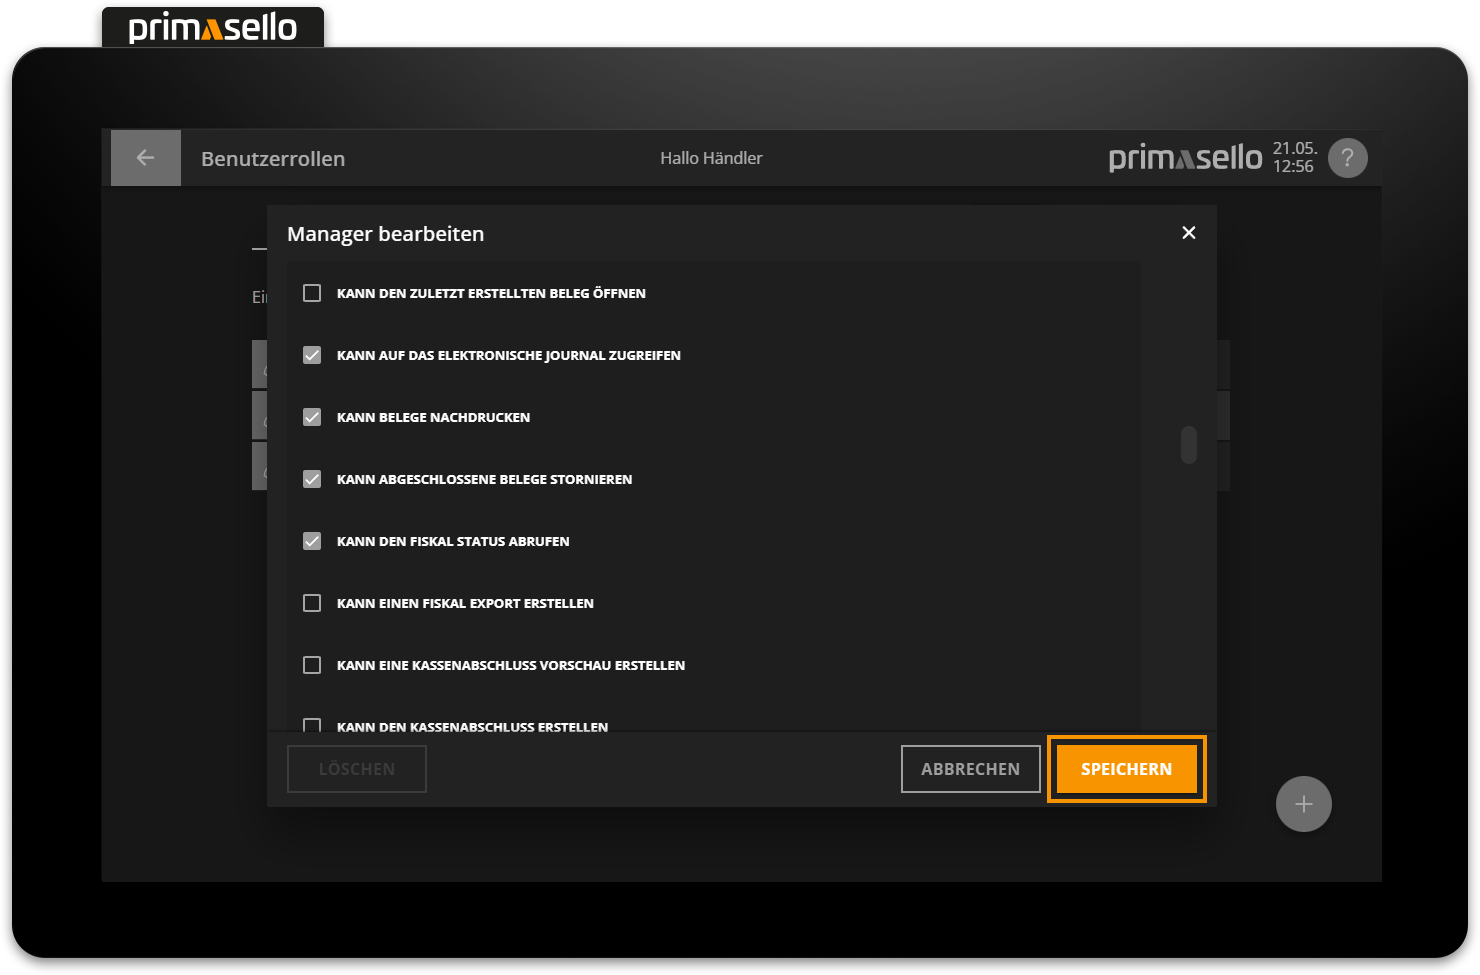
A separate window opens with information about the selected user role. At the top of the window, an orange bar shows how many users are currently using the selected user role.
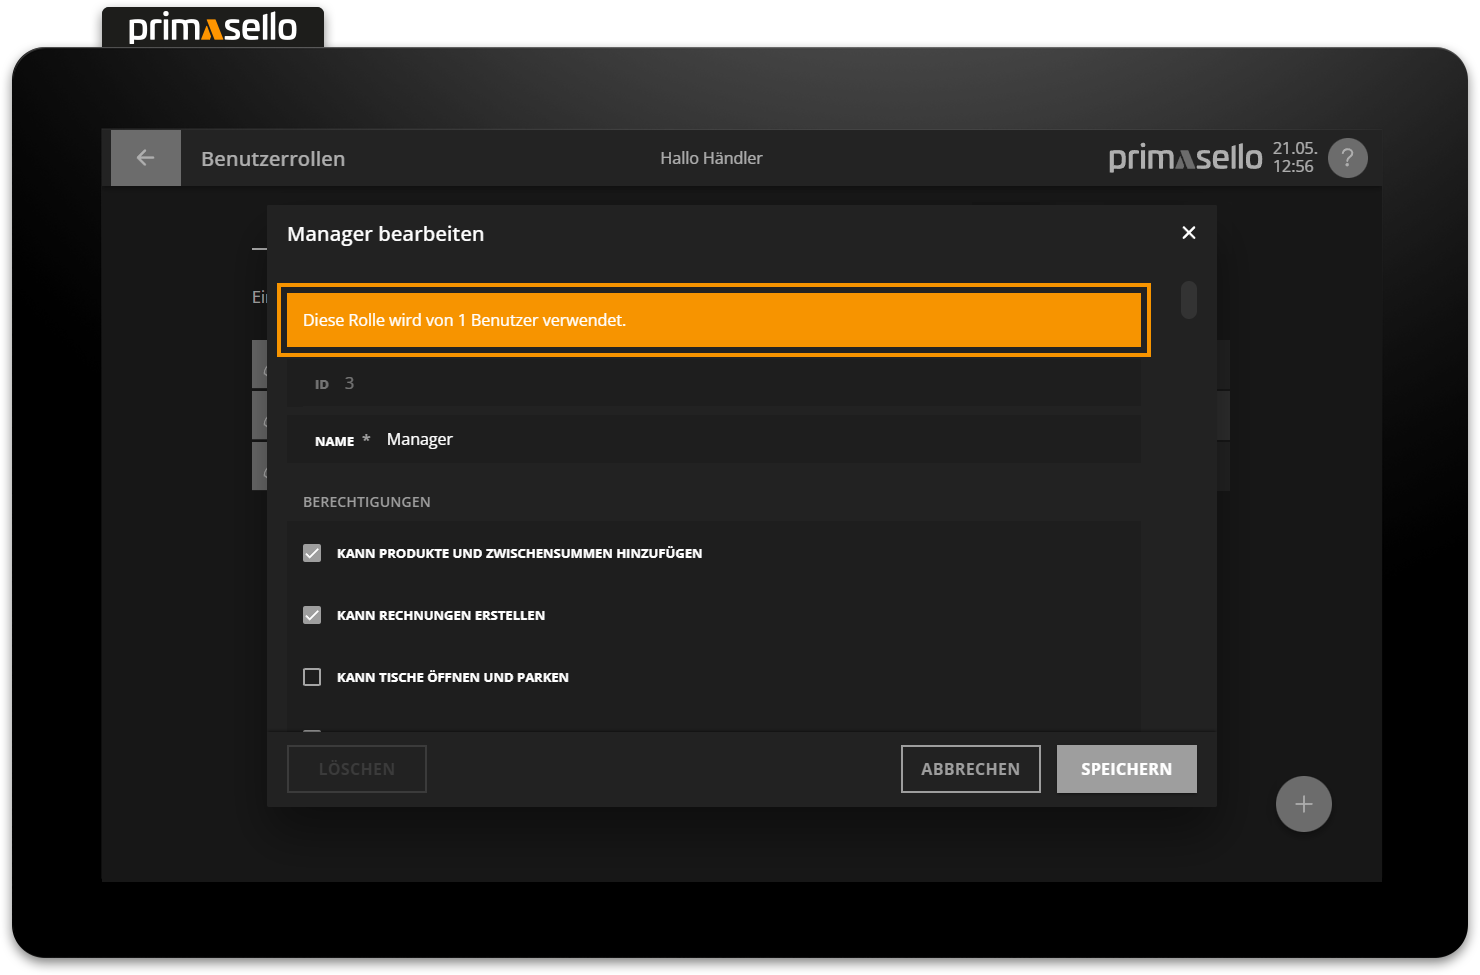
You can edit the name field by clicking on it. Active permissions have an orange tick in front of the name. All permissions can be activated or deactivated by clicking on the name.
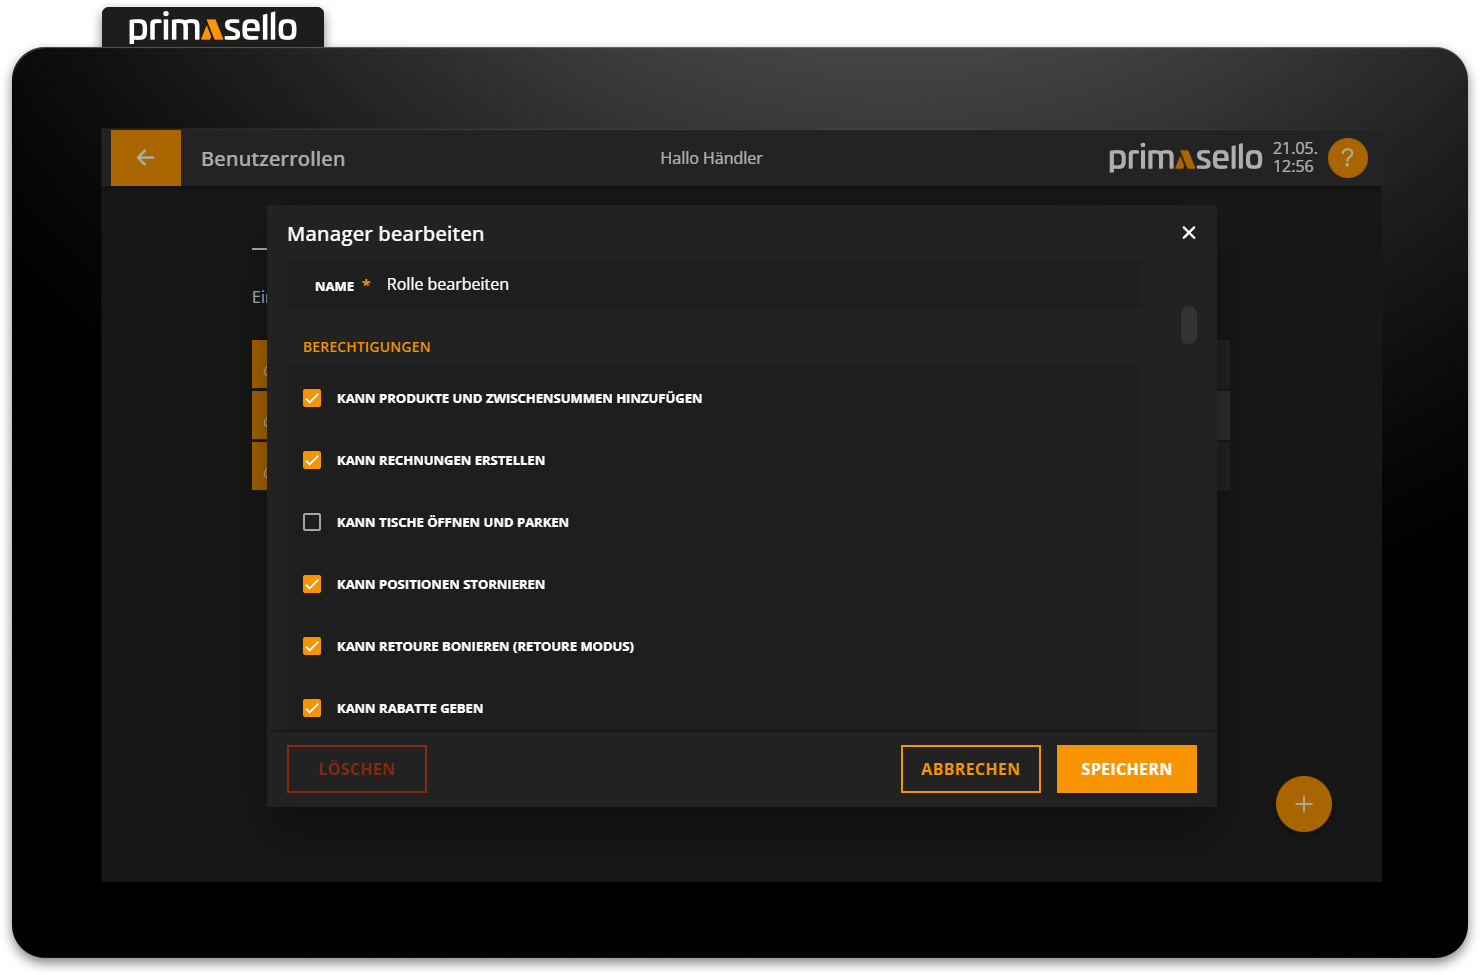
Pressing the orange ‘Save’ button in the lower right corner applies the changes to the user role and closes the window. Editing a role can be cancelled by pressing the “Cancel” button or by pressing the ‘x’ button in the upper right corner - all changes will be lost.
Delete user role
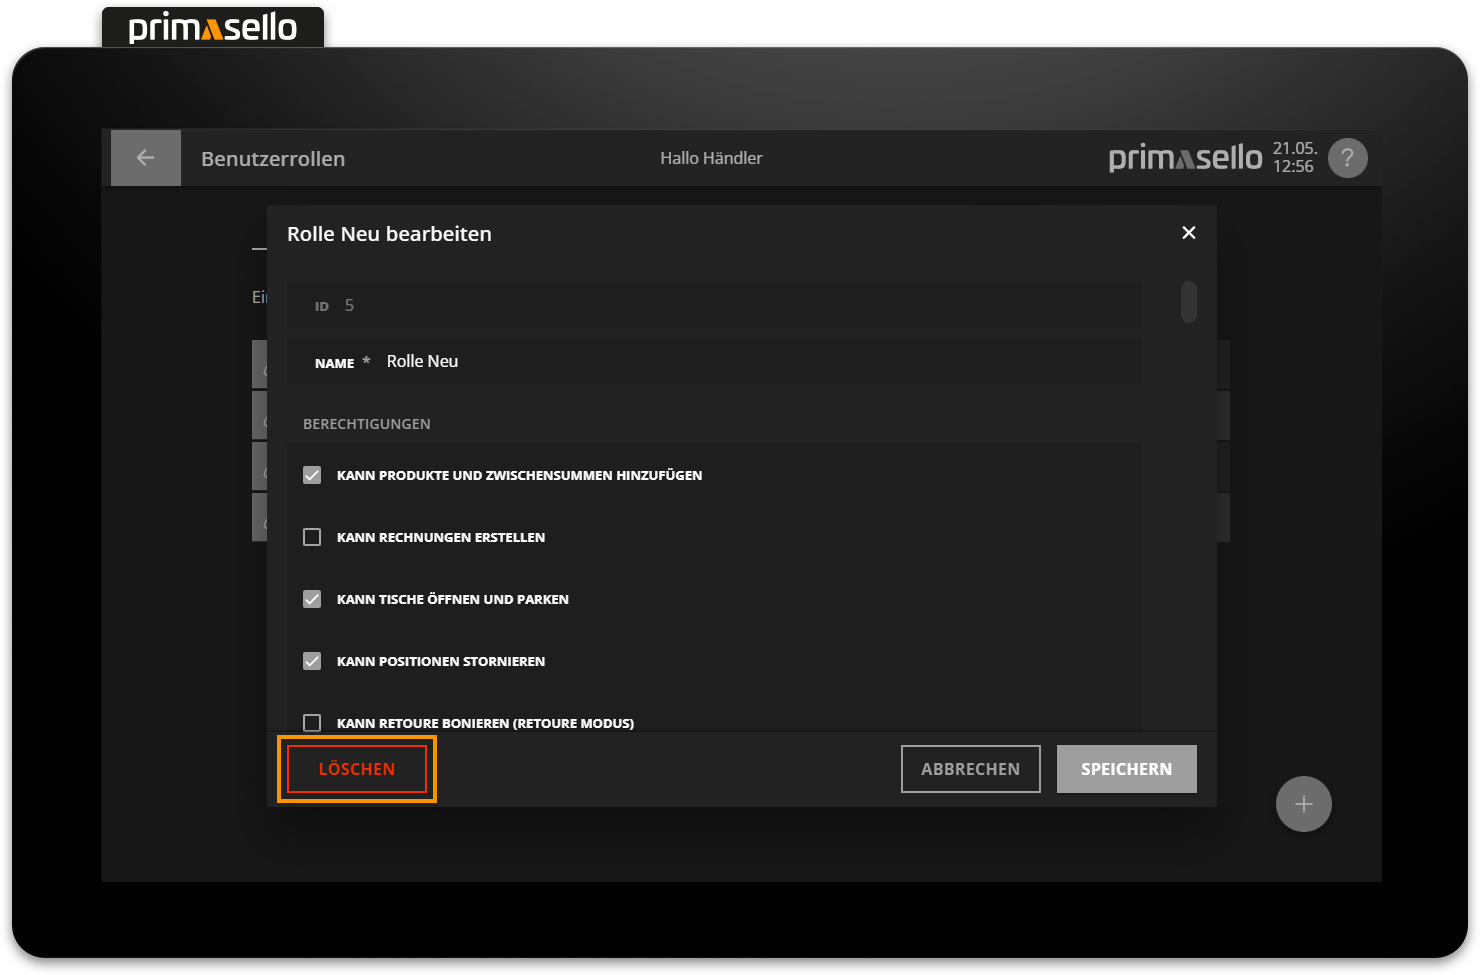
To delete a user role, you have to select it from the list to open the detail window for the desired user role.
The red ‘Delete’ button is located in the lower left corner.
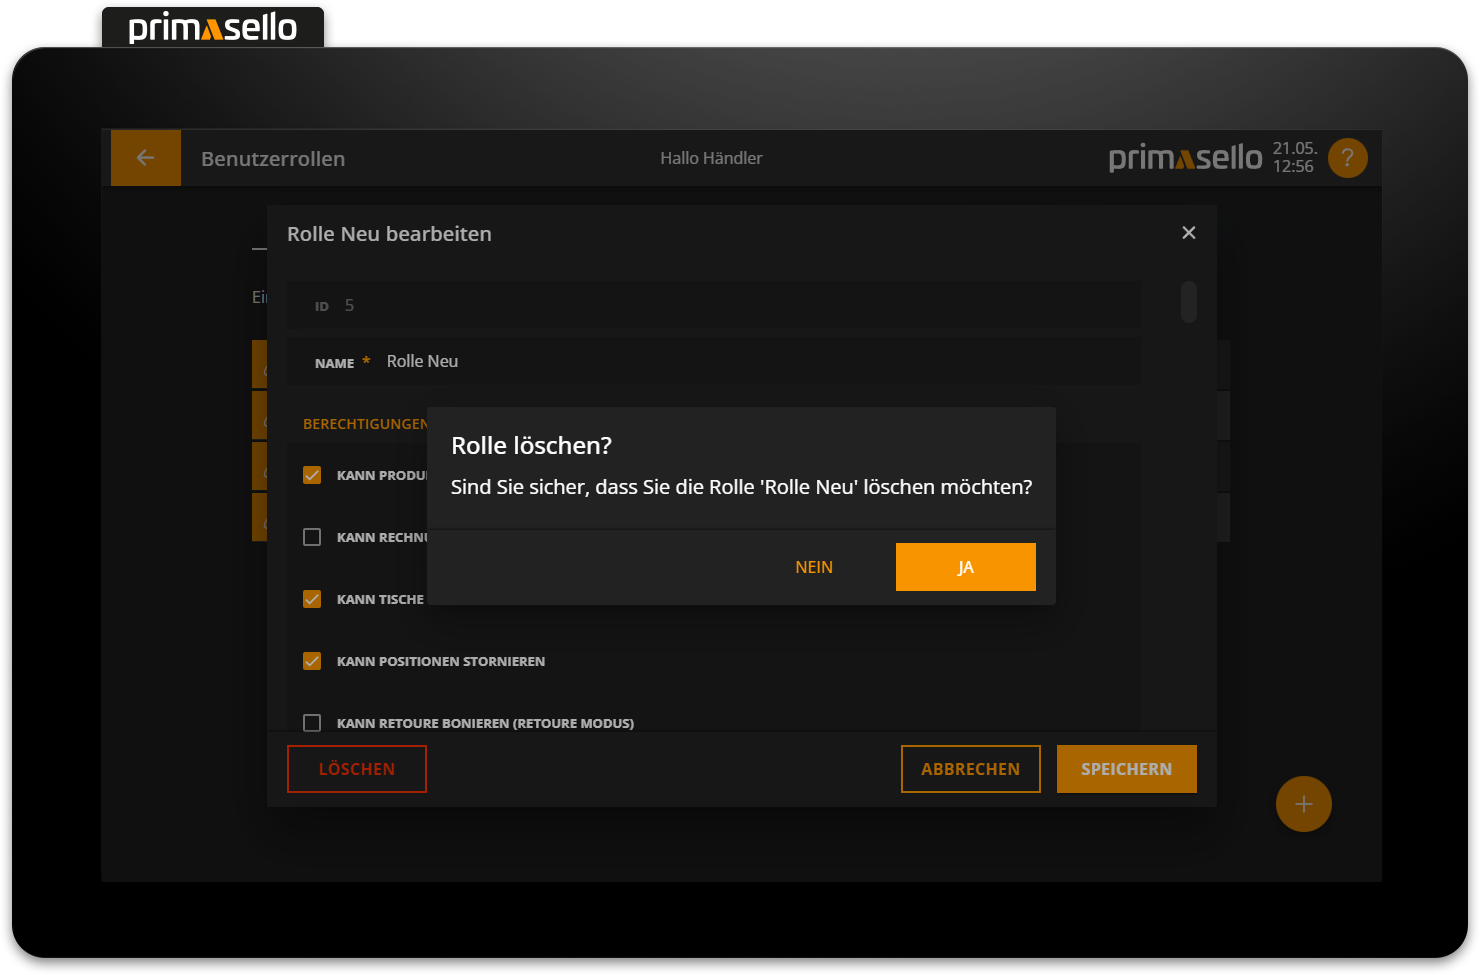
When this button is pressed, a security prompt appears, which has to be confirmed with the ‘Yes’ button. The user role is then deleted and the window closed. To cancel the deletion process, press the ‘No’ button.
User roles in use
User roles that are in use by users cannot be deleted! All users have to first be assigned a different role. How to assign user roles is described in the chapter User.
List of permissions
This overview lists all possible permissions that can be assigned to a role:
Permission | Impact | Standard role | |
|---|---|---|---|
Can add products and subtotals | Items and subtotals can be added to the shopping cart in any mode. | Operator, Manager | |
Can create invoices | Invoices can be settled using the available payment methods. | Operator, Manager | |
Can open and park tables | Parked tables can be opened positions can be parked on tables. | Operator, Manager | |
Can remove lines | All items in the shopping cart can be deleted using the 'Remove line' function. Open receipts can be cancelled using the 'Cancel' button. | Operator, Manager | |
Can register returns (return mode) | The returns mode can be activated and returns receipts can be created with the available payment methods. | Operator, Manager | |
Can give discounts | Discounts can be given on items and total invoices in euros or percentages. | Operator, Manager | |
Can open the cash drawer | The cash drawer can be opened at any time using the 'Open cash drawer' function. | Operator, Manager | |
Can make cash withdrawals | A cash withdrawal can be recorded. | Operator, Manager | |
Can make cash deposits | The change deposit can be recorded. | Operator, Manager | |
Can open the last created receipt | The window with the detailed view of the last created receipt can be opened from the register interface. | Manager | |
Can access the electronic journal | The electronic journal can be opened in a separate window with an overview of all receipts created from the register interface and in the main menu. | Manager | |
Can reprint receipts | The last receipt can be reprinted in the open window, and older receipts can be reprinted in the electronic journal. | Manager | |
Can cancel completed receipts | The last receipt can be cancelled in the open window, and older receipts can be cancelled in the electronic journal. | Manager | |
Can retrieve fiscal status | The window containing information about the fiscal security device can be opened using the 'Fiscal Status' button on the register interface and in the main menu. | Operator, Manager | |
Can create a fiscal export | The fiscal export can be created in DSFINV-K or DFKA taxonomy format. | Manager | |
Can create a cash up preview | A preview of the cash up and the user report can be created and printed. | Operator, Manager | |
Can prepare the cash up | The cash up can be created and printed. | Operator, Manager | |
Can access the reports | The reports can be accessed and printed from the main menu. | Operator, Manager | |
Can program the register interface | Changes can be made to the programming of the register interface. | ||
Can create and edit products / product groups | New products and product groups can be created, and existing products and product groups can be edited or deleted. The 'Products' button is visible in the main menu. | ||
Can create and edit tax classes | New tax classes can be created, and existing tax classes can be edited or deleted. The 'Tax Classes' button is visible in the main menu. | ||
Can create and edit payment methods | New payment methods can be created, and existing payment methods can be edited or deleted. The 'Payment Methods' button is visible in the main menu. | ||
Can create and edit users | New users can be created, and existing users can be edited or deleted. The 'Users' button is visible in the main menu. | ||
Can create and edit user roles | New user roles can be created, and existing user roles can be edited or deleted. The 'User roles' button is visible in the main menu. | ||
Can edit the receipt template | The print template for the receipt can be edited. The 'Receipt template' button is visible in the main menu. | ||
Can configure the cash up document | The various sections of the cash register statement and the user report can be shown or hidden. The 'Configuration' button in the main menu is visible. | ||
Can create and edit company data | Company data can be opened and edited via the 'Company data' button in the main menu. This permission also allows the digital receipt to be configured. | ||
Can print the data log | The data log can be created and printed with all configurations. | Manager | |
Can edit dine in / takeaway configuration | The user can configure the settings for dine in / takeaway. The 'Dine in / Takeaway' button is visible in the main menu. | ||
Can change own PIN | The PIN of the logged-in user can be changed using the 'Change PIN' button on the register interface or in the main menu. | Operator, Manager | |
Can open database information | Information about the databases can be accessed by clicking on the 'Database' button in the main menu. | ||
Can back up databases | Backups of projects and databases can be exported from the main menu. | ||
Can restore databases | Backups of projects and databases can be imported from the main menu, thereby replacing existing ones. | ||
Can delete databases | The existing projects and databases can be deleted. | ||
Can terminate app | The primasello app can be terminated on the primasello A1050 cash register. | Operator, Manager |
Error messages
The following error message may occur. The error messages are always displayed next to the affected input field. The field and the message are highlighted in red.
Error message | Meaning | Solution |
|---|---|---|
Maximum input exceeded. | The input may only have a certain character length. The maximum length is displayed at the end of the line (e.g. 13 / 100). | Shorten the input to the maximum value. |