Parking Tables
This section describes how items can be parked on a table if they are not to be charged immediately. Tables can also be split or transferred. For easier operation, tables with fixed table numbers can be placed on the register interface in the programming.
Configure tables
How tables and table functions can be placed on the register interface and even how a table plan can be created is described in the chapter Programming.
Park items on the table
There are several ways to park an open shopping cart on a table.
Parking with free table selection
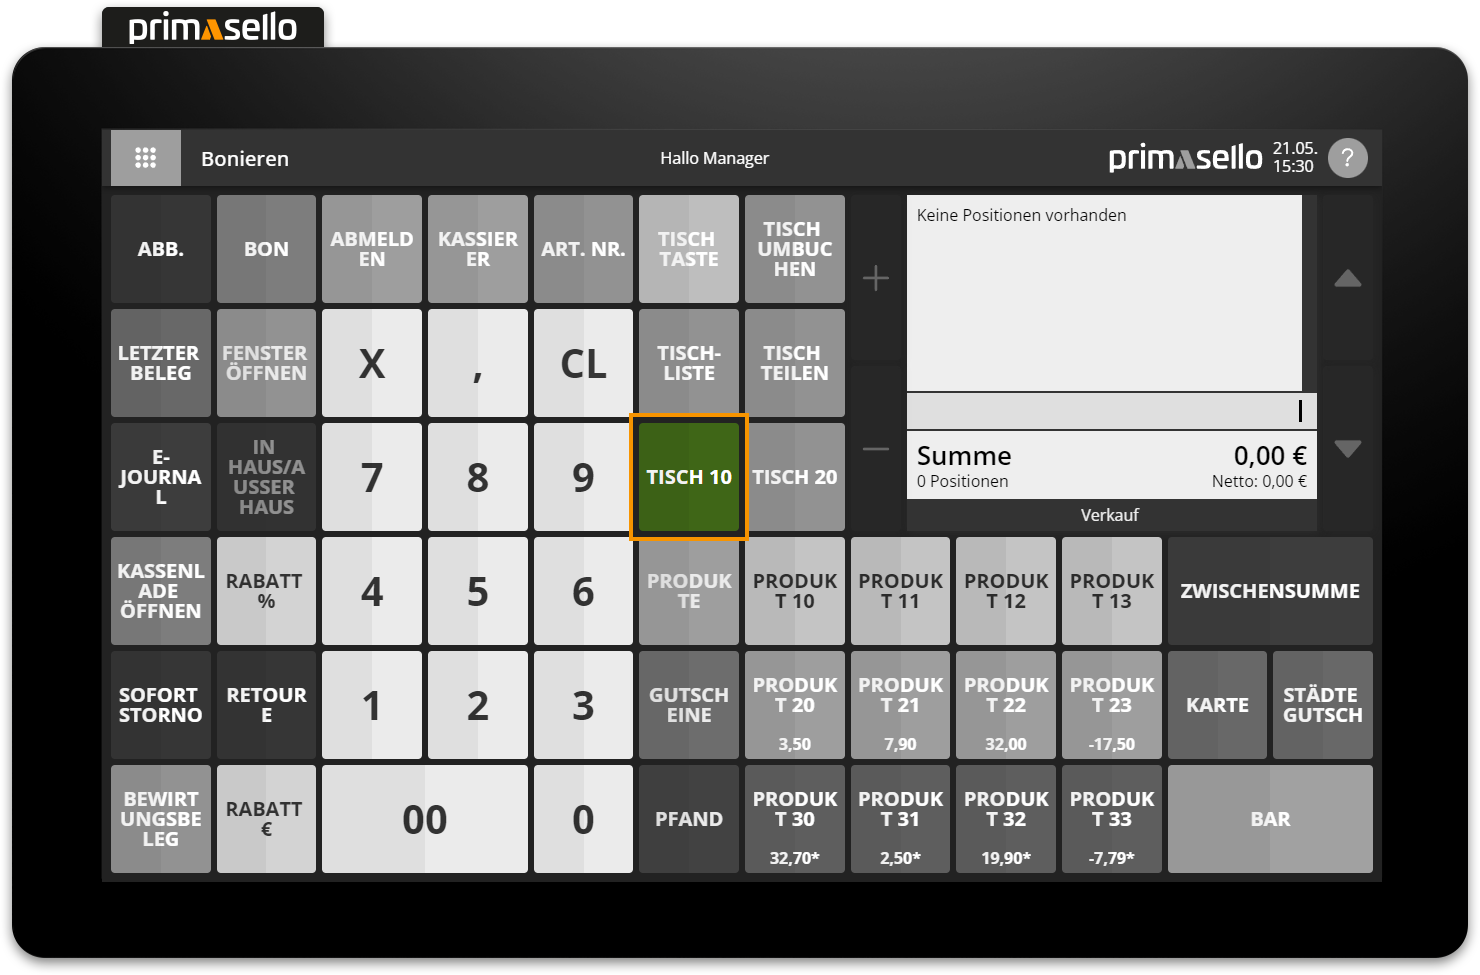
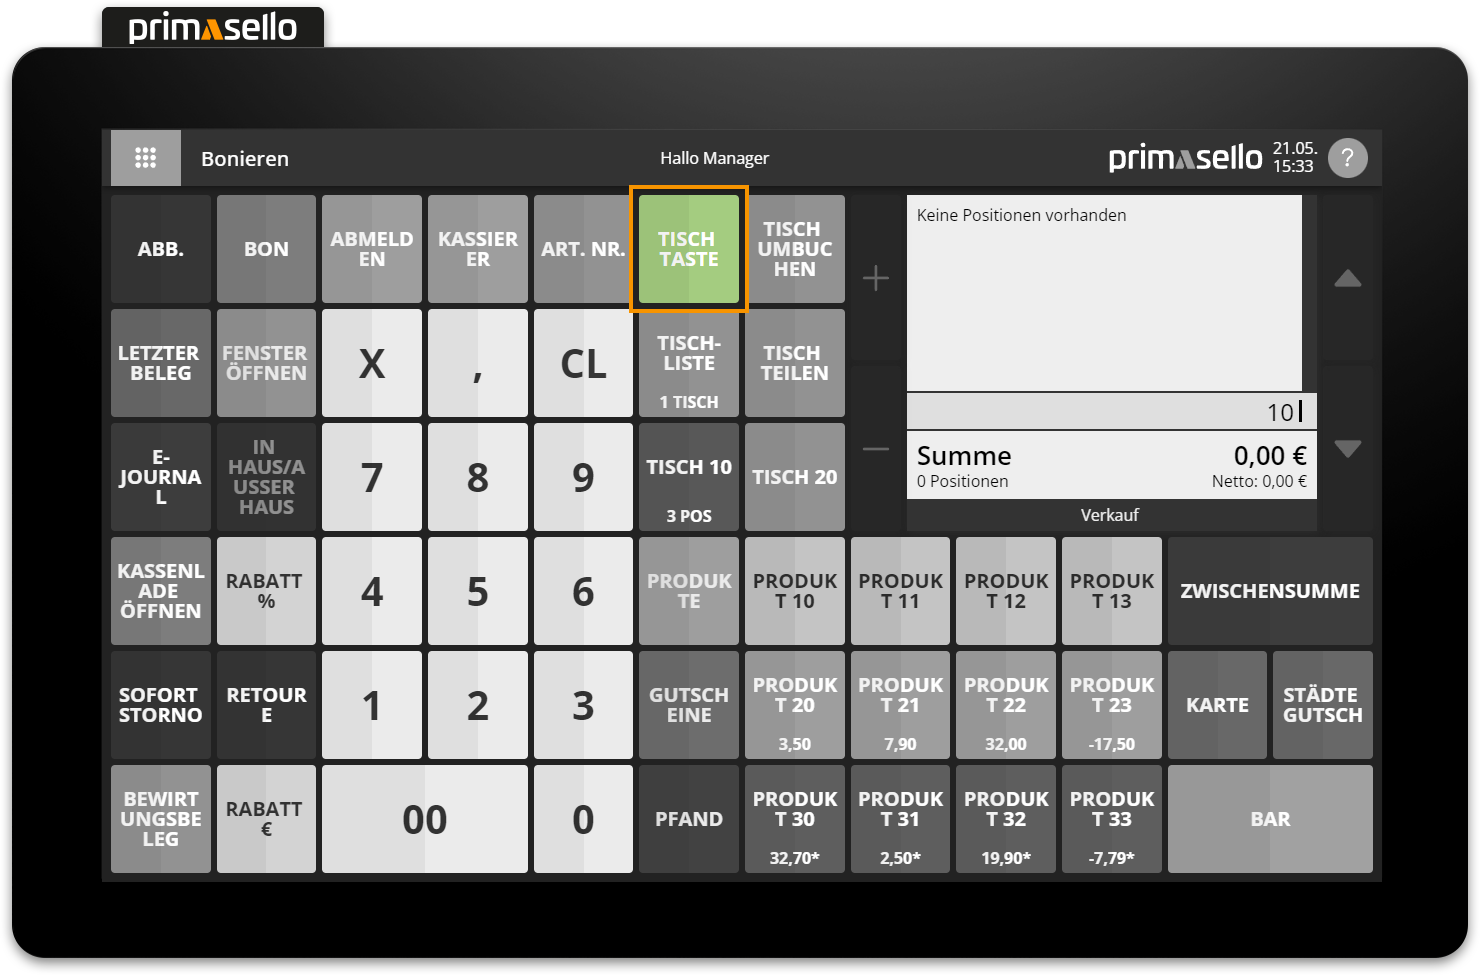
To park items from the shopping cart, you have to first open a table. To do this, enter the desired table number using the numeric keyboard and then press the ‘Table’ button. Table numbers can be freely selected from the range 1 - 999.

When a table is open, it is displayed in the shopping cart in the mode bar at the bottom left; the ‘Table’ button changes its appearance and displays the text ‘Park’. After opening a table, items can be added to the shopping cart as usual. To finally park the items on the open table, press the ‘Park’ button (previously the ‘Table’ button).
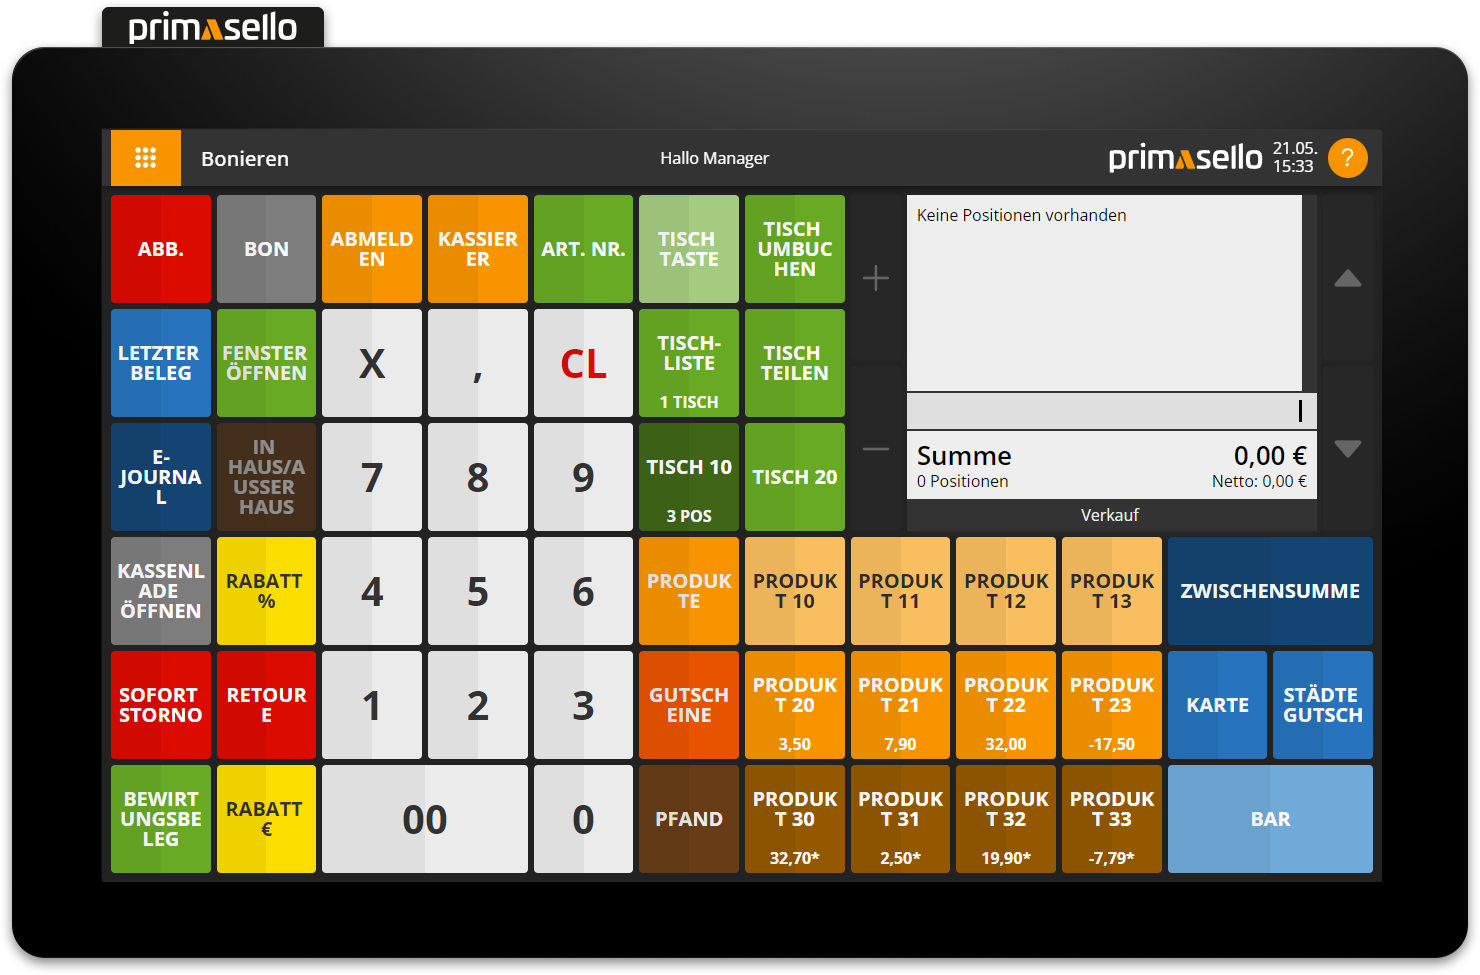
The open table is closed and the table tag disappears from the shopping cart's mode bar. If items are parked on a table, the quantity of parked tables is displayed on the ‘Table List’ button.
Parking with configured table buttons
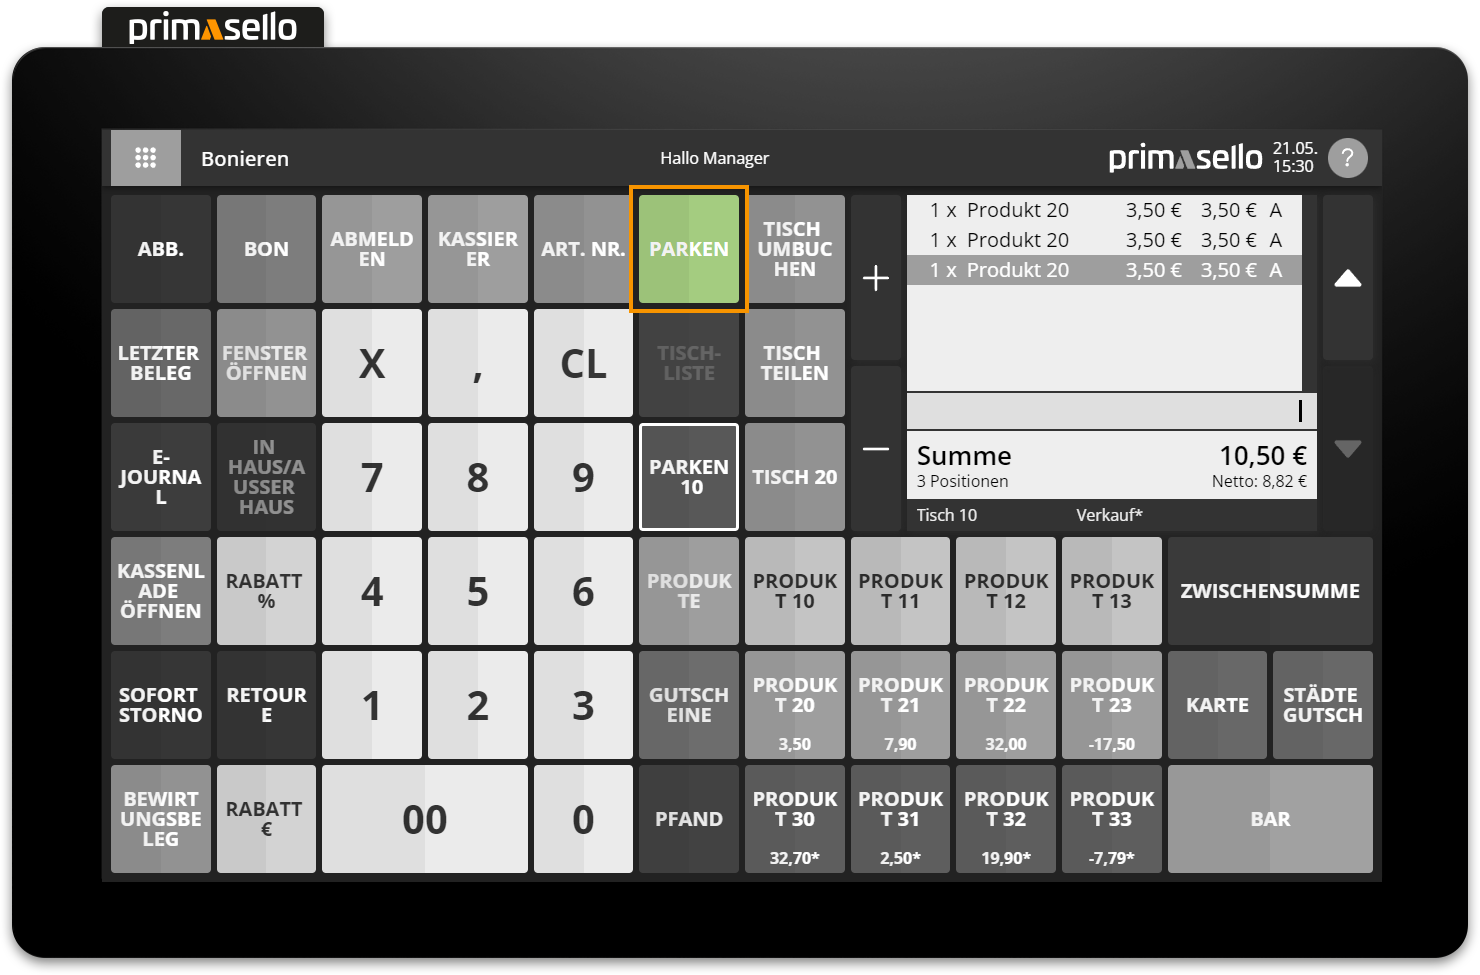
As an alternative to the input of the table number and pressing the ‘Table’ button, table buttons with fixed numbers can be configured in the programming. To open table 10, press the configured ‘Table 10’ button and table 10 will open.
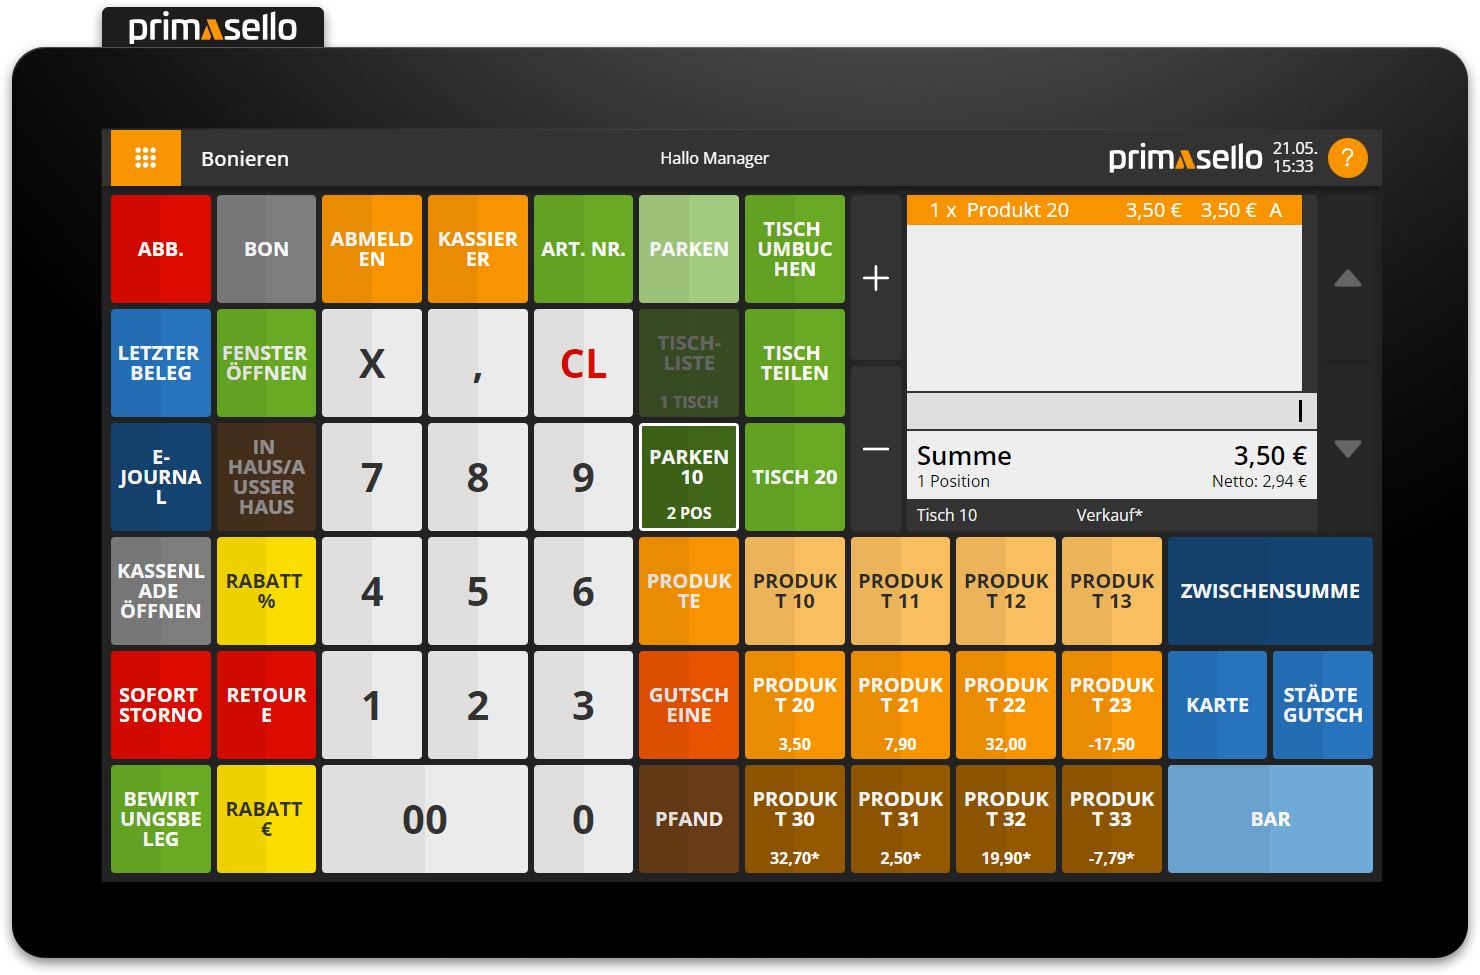
When a table is open, it is displayed in the shopping cart in the mode bar at the bottom left; the ‘Table 10’ button changes its appearance and displays the text ‘Park 10’. After opening a table, items can be added to the shopping cart as usual. To finally park the items on the opened table, press the ‘Park 10’ button (previously ‘Table 10’ button).
The open table 10 is closed and the table tag disappears from the mode bar of the shopping cart. The quantity of parked items is displayed on the ‘Table 10’ button and the quantity of parked tables is displayed on the ‘Table List’ button.

Quick parking
For situations where speed is required, the primasello cash register has a quick park function. To use this, first open a table and add items to the shopping cart. Then enter a new table number using the numeric keyboard and press the ‘Park’ button (previously the ‘Table’ button). The items in the shopping cart are automatically parked at the first table and the new table is opened. This allows you to jump back and forth between different tables without having to open and close the tables individually.
Parking by logging out
Similar to the quick park function, items on an open table are also parked if you log out before closing the table. If a table is open and items have been added to the shopping cart, you can then press the ‘Log out’ button or remove the magnetic key from the magnetic lock. The registered items are parked on the selected table and the user is logged out. This means that it is not necessary to press the ‘Park’ button to close the table.
Receipt
If a receipt printer has been configured in the programming, the corresponding receipts with the table number are printed out after parking.
Park additional items on table
Additional orders can be added to an already occupied table at any time. As with parking on a new table, the desired table has to be opened by entering the table number using the numeric keyboard and then pressing the ‘Table’ button. The items already parked on this table appear in the shopping cart and the table is marked in the shopping cart in the mode bar at the bottom left.
After opening the table, new products can be added to the shopping cart as usual. A black line is displayed between the items that were already parked and the new items. To park the new order on the table, press the ‘Park’ button (previously ‘Table’ button). Alternatively, new items can also be parked using one of the other methods described above.
Edit parked positions
When a table is opened using the ‘Table’ button, the items already added to the shopping cart appear. Items added to the shopping cart can be edited in the same way as any newly added items:
Increase/decrease quantity
Cancel with ‘Remove line’
Give discount in euro or percentage
Cancel parking
If the wrong table has been opened or if no table should have been opened, the table can be easily closed again by pressing the ‘Park’ button (previously ‘Table’ button) or by one of the other methods described above. No positions will be registered on the table if no products have been added to the shopping cart.
You can see whether a table is open by the mark in the mode bar of the shopping cart at the bottom left. If a ‘Table’ button has been assigned a table number, this is additionally marked with a border. When the table is closed again, both marks disappear.
Parking without table selection
If no table has been selected beforehand and items have been added to the shopping cart, they can still be parked at a table at any time. To do this, simply enter the respective table number using the numeric keyboard after adding the desired items and then press the ‘Table’ button. Alternatively, a configured ‘Table’ button with a stored table number can also be pressed.
If there are no parked items on the table yet, the open shopping cart will be parked on the selected table.
If a table is selected that already has items on it, a security prompt appears asking whether the open shopping cart should be parked on that table. Parking can be confirmed by pressing the orange ‘Yes’ button or cancelled by pressing the ‘No’ button.
Bookings
Every time an open shopping cart is placed on a table, a booking is saved in the electronic journal. The booking includes all items that have been added to or removed from the table. It is a legal requirement to record these bookings in an unalterable manner. These bookings are intended to document the transactions that took place when the cart was placed on the table.
By default, the entries are not displayed in the electronic journal. To display the entries, use the filter button in the top right-hand corner to change the type of receipts displayed to ‘All’ or ‘ Bookings’.
Complete table
To complete a table, it has to be opened first. All items that were parked on the table are displayed in the shopping cart and the table is marked in the mode bar at the bottom left. The table can then be completed in various ways, just like any normal open shopping cart:
Complete as cash receipt (cash, card, partial payment)
Cancel as cancellation receipt
When a table is closed, the table number is printed on the receipt and stored in the electronic journal. This means that each receipt can be assigned to a table and evaluated.
Table list
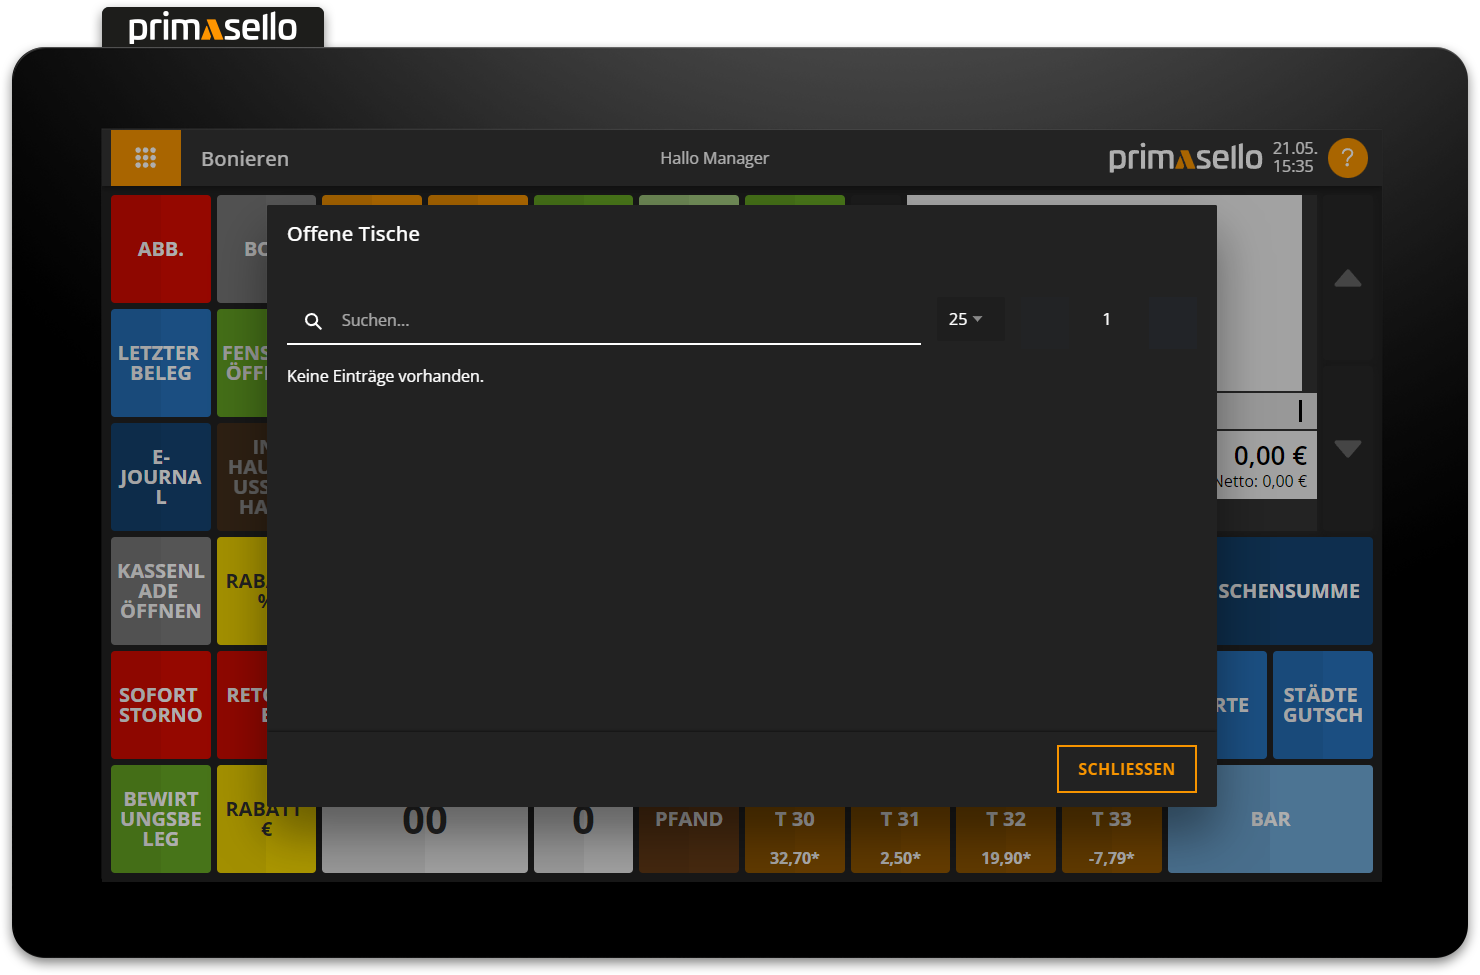
All open tables can be accessed via the 'Table List' button. If there are open tables, the quantity will be displayed on the 'Table List' button.
Pressing the ‘Table List’ button opens a new window displaying a list of all open tables. For each open table, the user, table number, time of last change and total of all items are displayed.
When you click on an open table in the list, it opens, the reserved items appear in the shopping cart, and the table is marked in the shopping cart in the mode bar at the bottom left.
Split table
If not all items on a table are to be processed or completed together, the table can be split. This function is mainly used when guests at a table wish to pay separately.
To share a parked table, it has to be opened first. The parked items are displayed in the shopping cart.
The table can then be split by pressing the ‘Split table’ button.

A new window opens displaying a list of all items on the open table. For each item, the quantity parked on the table is displayed on the left, the name and unit price with tax code in the middle, and the quantity to be divided from the parked table on the right.
By pressing the quantity on the right-hand side, the item with quantity 1 is removed from the table and added to the new shopping cart. By pressing the quantity again, the quantity is increased by 1. To return an item to the parked table, press the quantity on the left-hand side. The item with quantity 1 is removed from the new shopping cart and returned to the table.
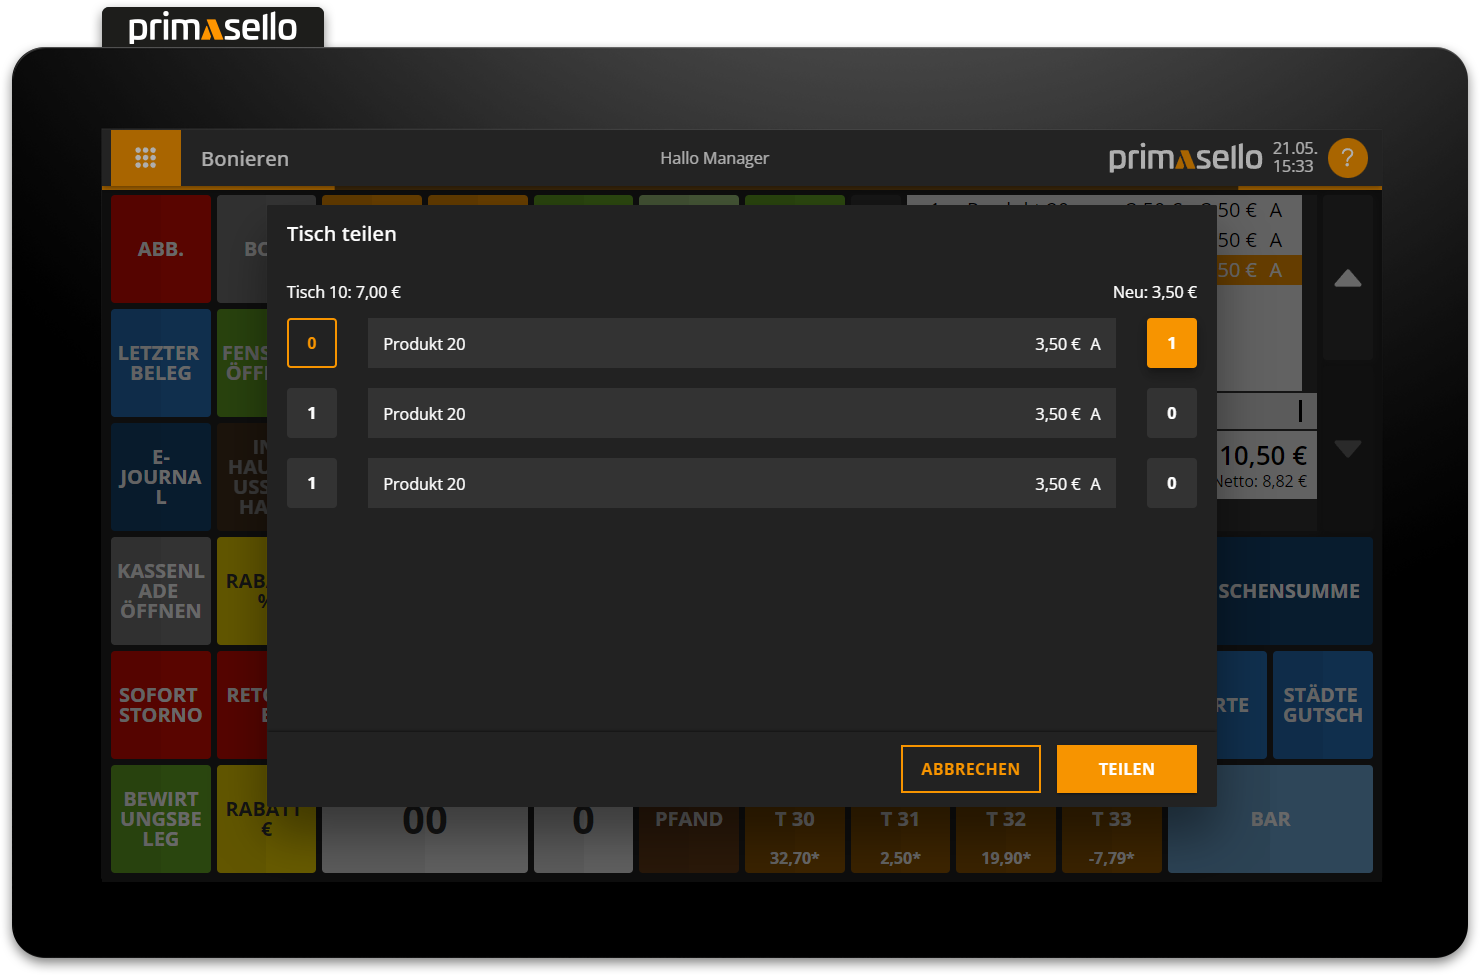
On the left-hand side above the items is the total sum of all items on the parked table. Opposite, on the right-hand side, is the sum of all items to be split from the table. To cancel the split, press the ‘Cancel’ button.
To split the selected items from the table, press the orange ‘Split’ button in the lower right corner. All selected items will be displayed in the shopping cart and the table on which the items were parked will be displayed in the mode bar in the left corner.
The newly opened shopping cart with the split items can be completed (cash receipt) or cancelled (cancellation receipt). The individual items can be edited as usual. All functions of the register interface are available for further processing.
Cancel splitting
If you wish to cancel the splitting after opening the shopping cart, you can return the split items to the table by pressing the ‘Park’ button (previously the ‘Table’ button).
A security prompt appears asking whether the items should be added to the selected table. This can be confirmed by pressing the orange ‘Yes’ button or cancelled by pressing the ‘No’ button.

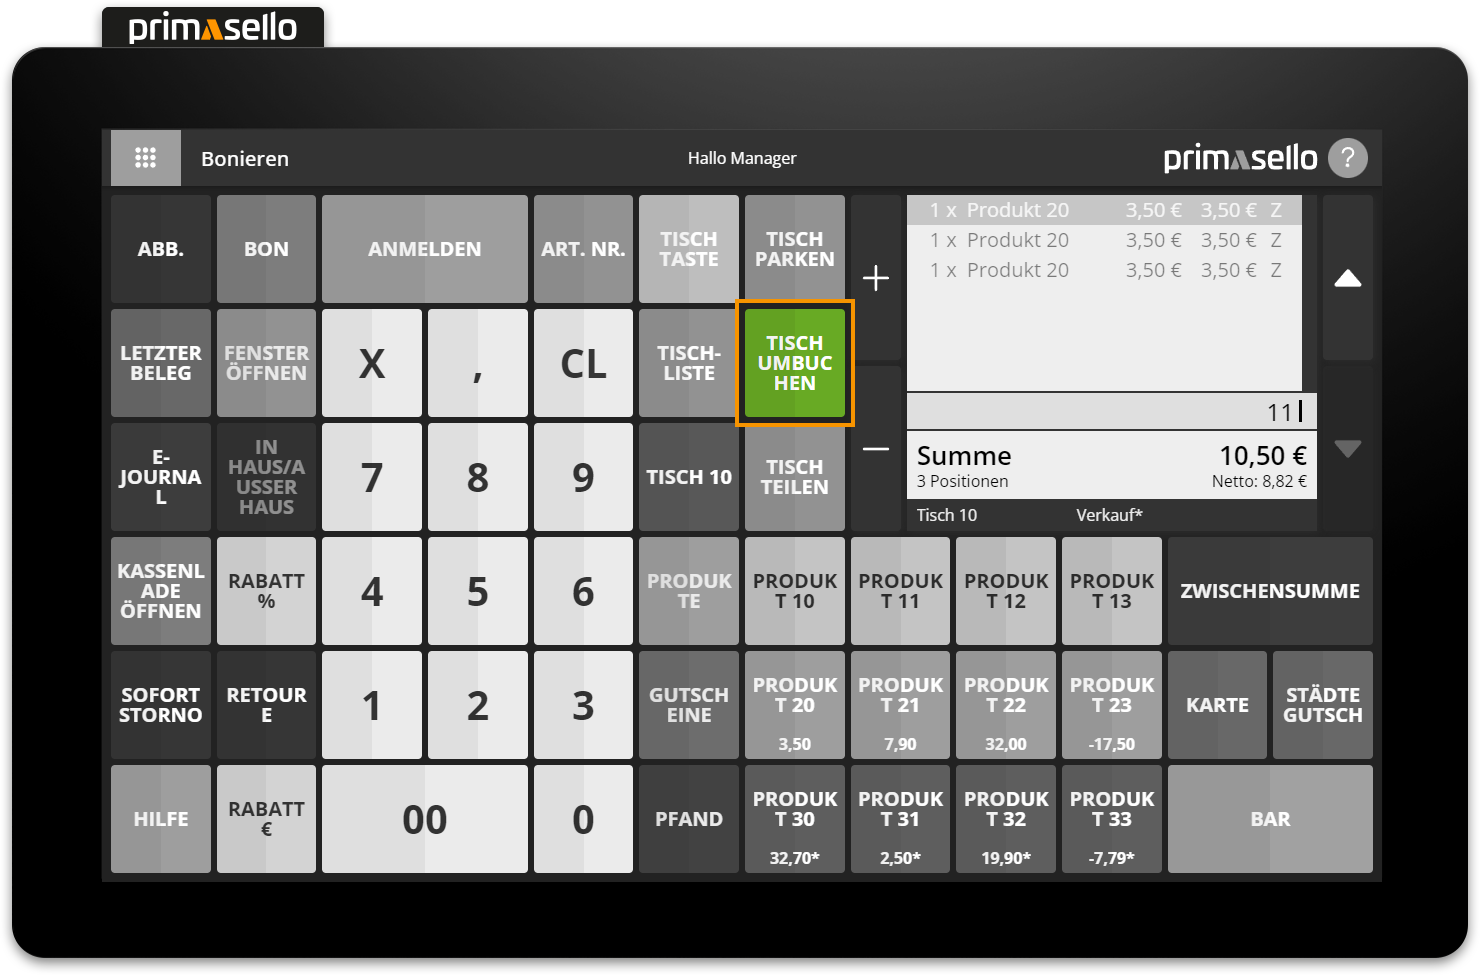
Transfer table
A parked table can be transfered to another table number at any time. This function is mainly used when guests move from one table to another.
To transfer a table, you have to first open it by putting in the table number on the numeric keyboard and then hitting the ‘Table’ button. The parked positions of the table will be opened in the shopping cart and the table will be marked in the mode bar at the bottom left.
To transfer items to another table, enter the new table number using the numeric keyboard and then press the 'Transfer table' button. All items will be removed from the previous table and added to the new table.
If the items are transferred to a table on which items have already been parked, a security prompt appears asking whether the items should be added to the selected table. The process can be confirmed with the orange ‘Yes’ button or cancelled with the ‘No’ button.
Split and transfer table
If you want to move only parts of a table, you can first split the desired items from the table using the ‘Split table’ button and then transfer them to the new table using the ‘Transfer table’ button.
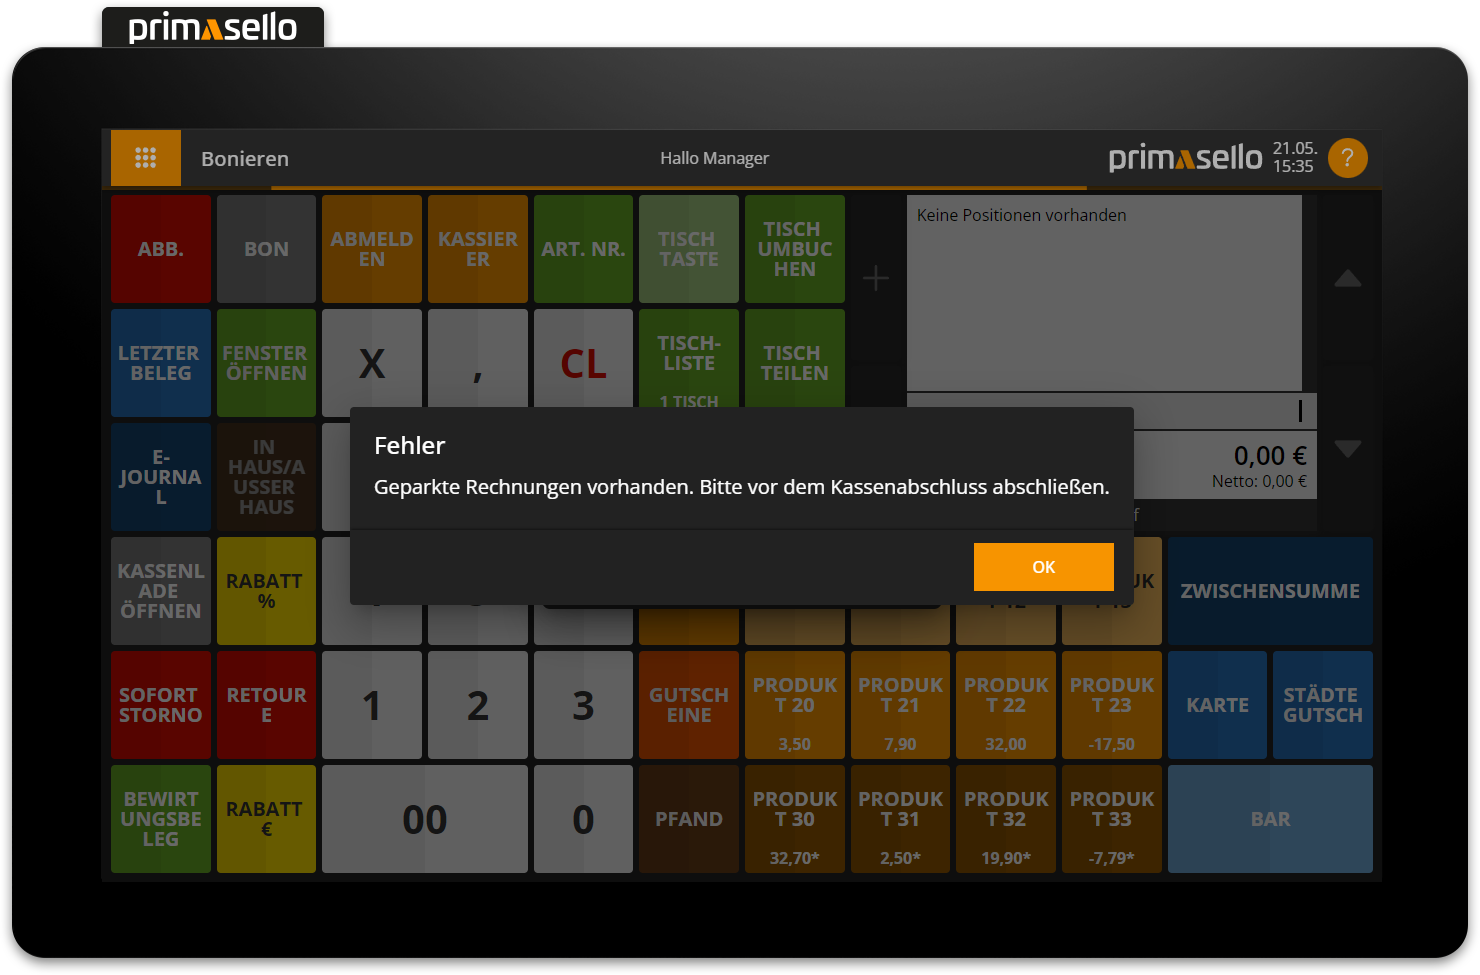
Cash up with open tables
If items are parked on tables and the shopping cart is empty, functions can be performed on the register interface or in the main menu that are not possible with an open shopping cart (e.g. cash withdrawals).
However, in order to cash up, all open tables have to be closed first.