Before you start using your primasello cash register, please read the quick start guide provided carefully. Alternatively, you can also find all the important information in the Getting Started chapter.
Seal
The scale cash register is delivered calibrated and sealed in order to comply with local weighing regulations. It is the responsibility of the owner or operator to ensure that all relevant legal requirements are met in their own business. The scale cash register has been sealed to prevent access to the calibration and measurement settings. Check the integrity of this seal before commissioning.
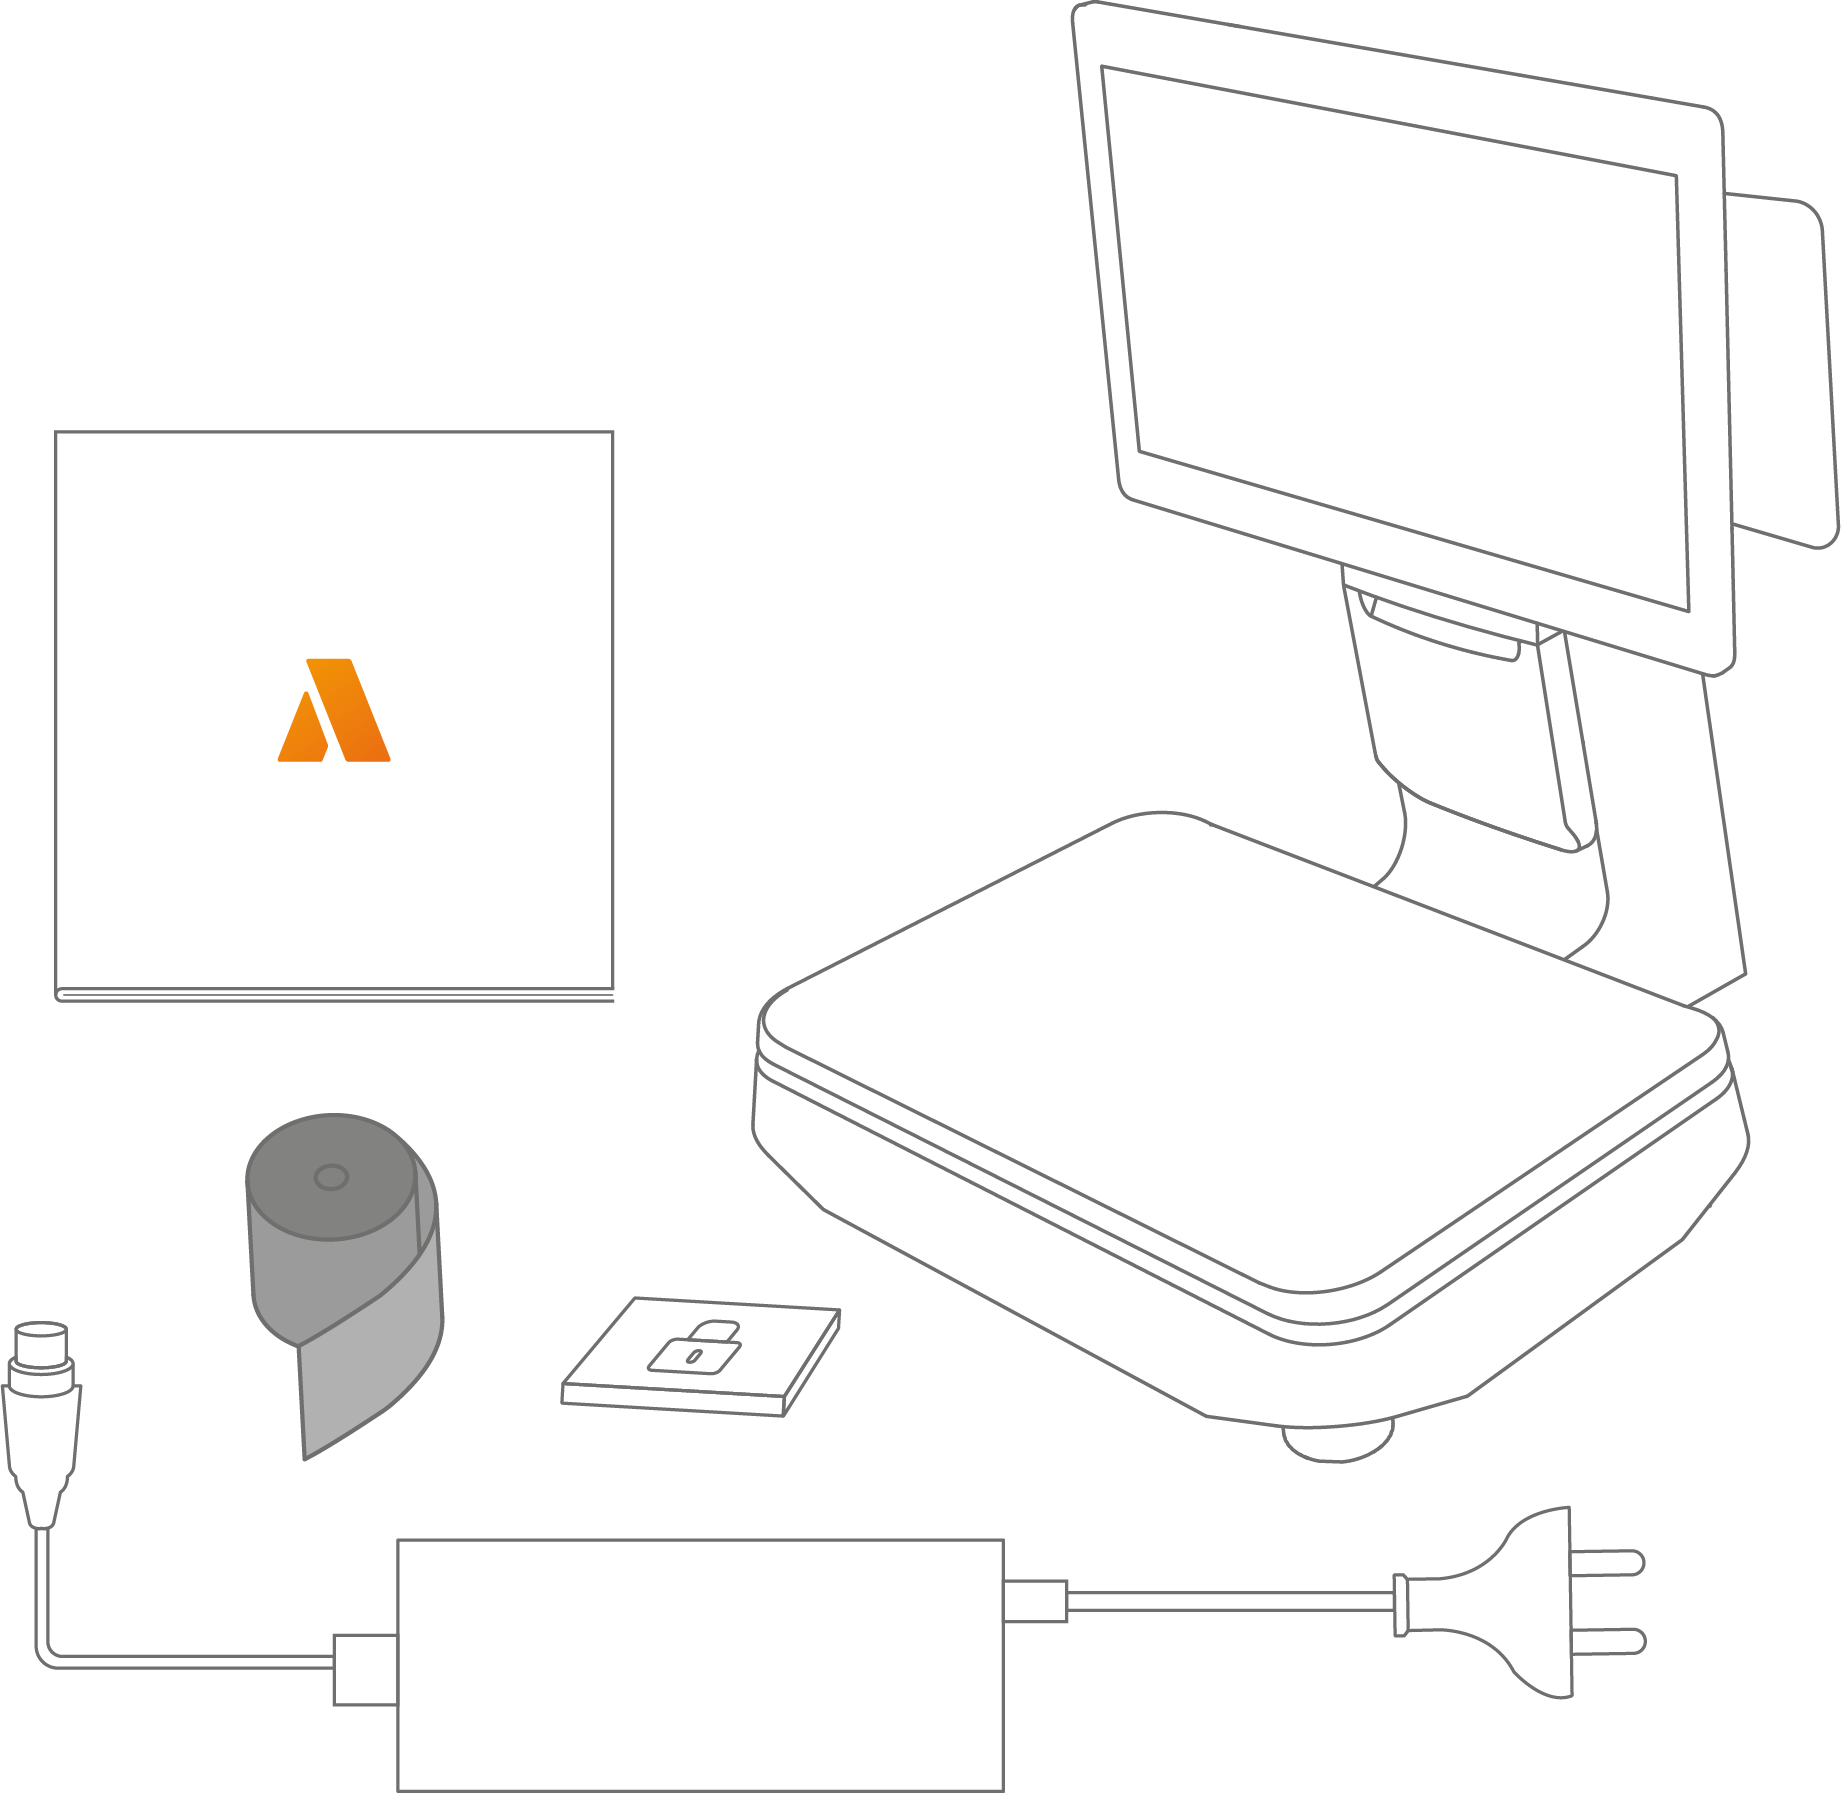
Scope of delivery
The package includes:
-
1x primasello S250 scale cash register
-
1x quick start guide
-
1x power supply unit with power cable
-
1x 80mm thermal paper for printer
-
1x security module
Components

1 - Main screen
Touch screen for operation.
2 - Printer paper output
Paper output of printed receipts with automatic cutting device.
3 - Printer cover
Open to access the paper roll.
4 - Scale cover
This is where the products to be weighed are placed.
5 - USB port
For connecting an external keyboard, mouse, or storage device.
6 - On/off button
If the device is switched off, press briefly to start it up. Press and hold the power button for 2-3 seconds to choose between ‘Shut down’ or ‘Restart’. To force the device to switch off, press and hold the power button for 11 seconds. The system will shut down.
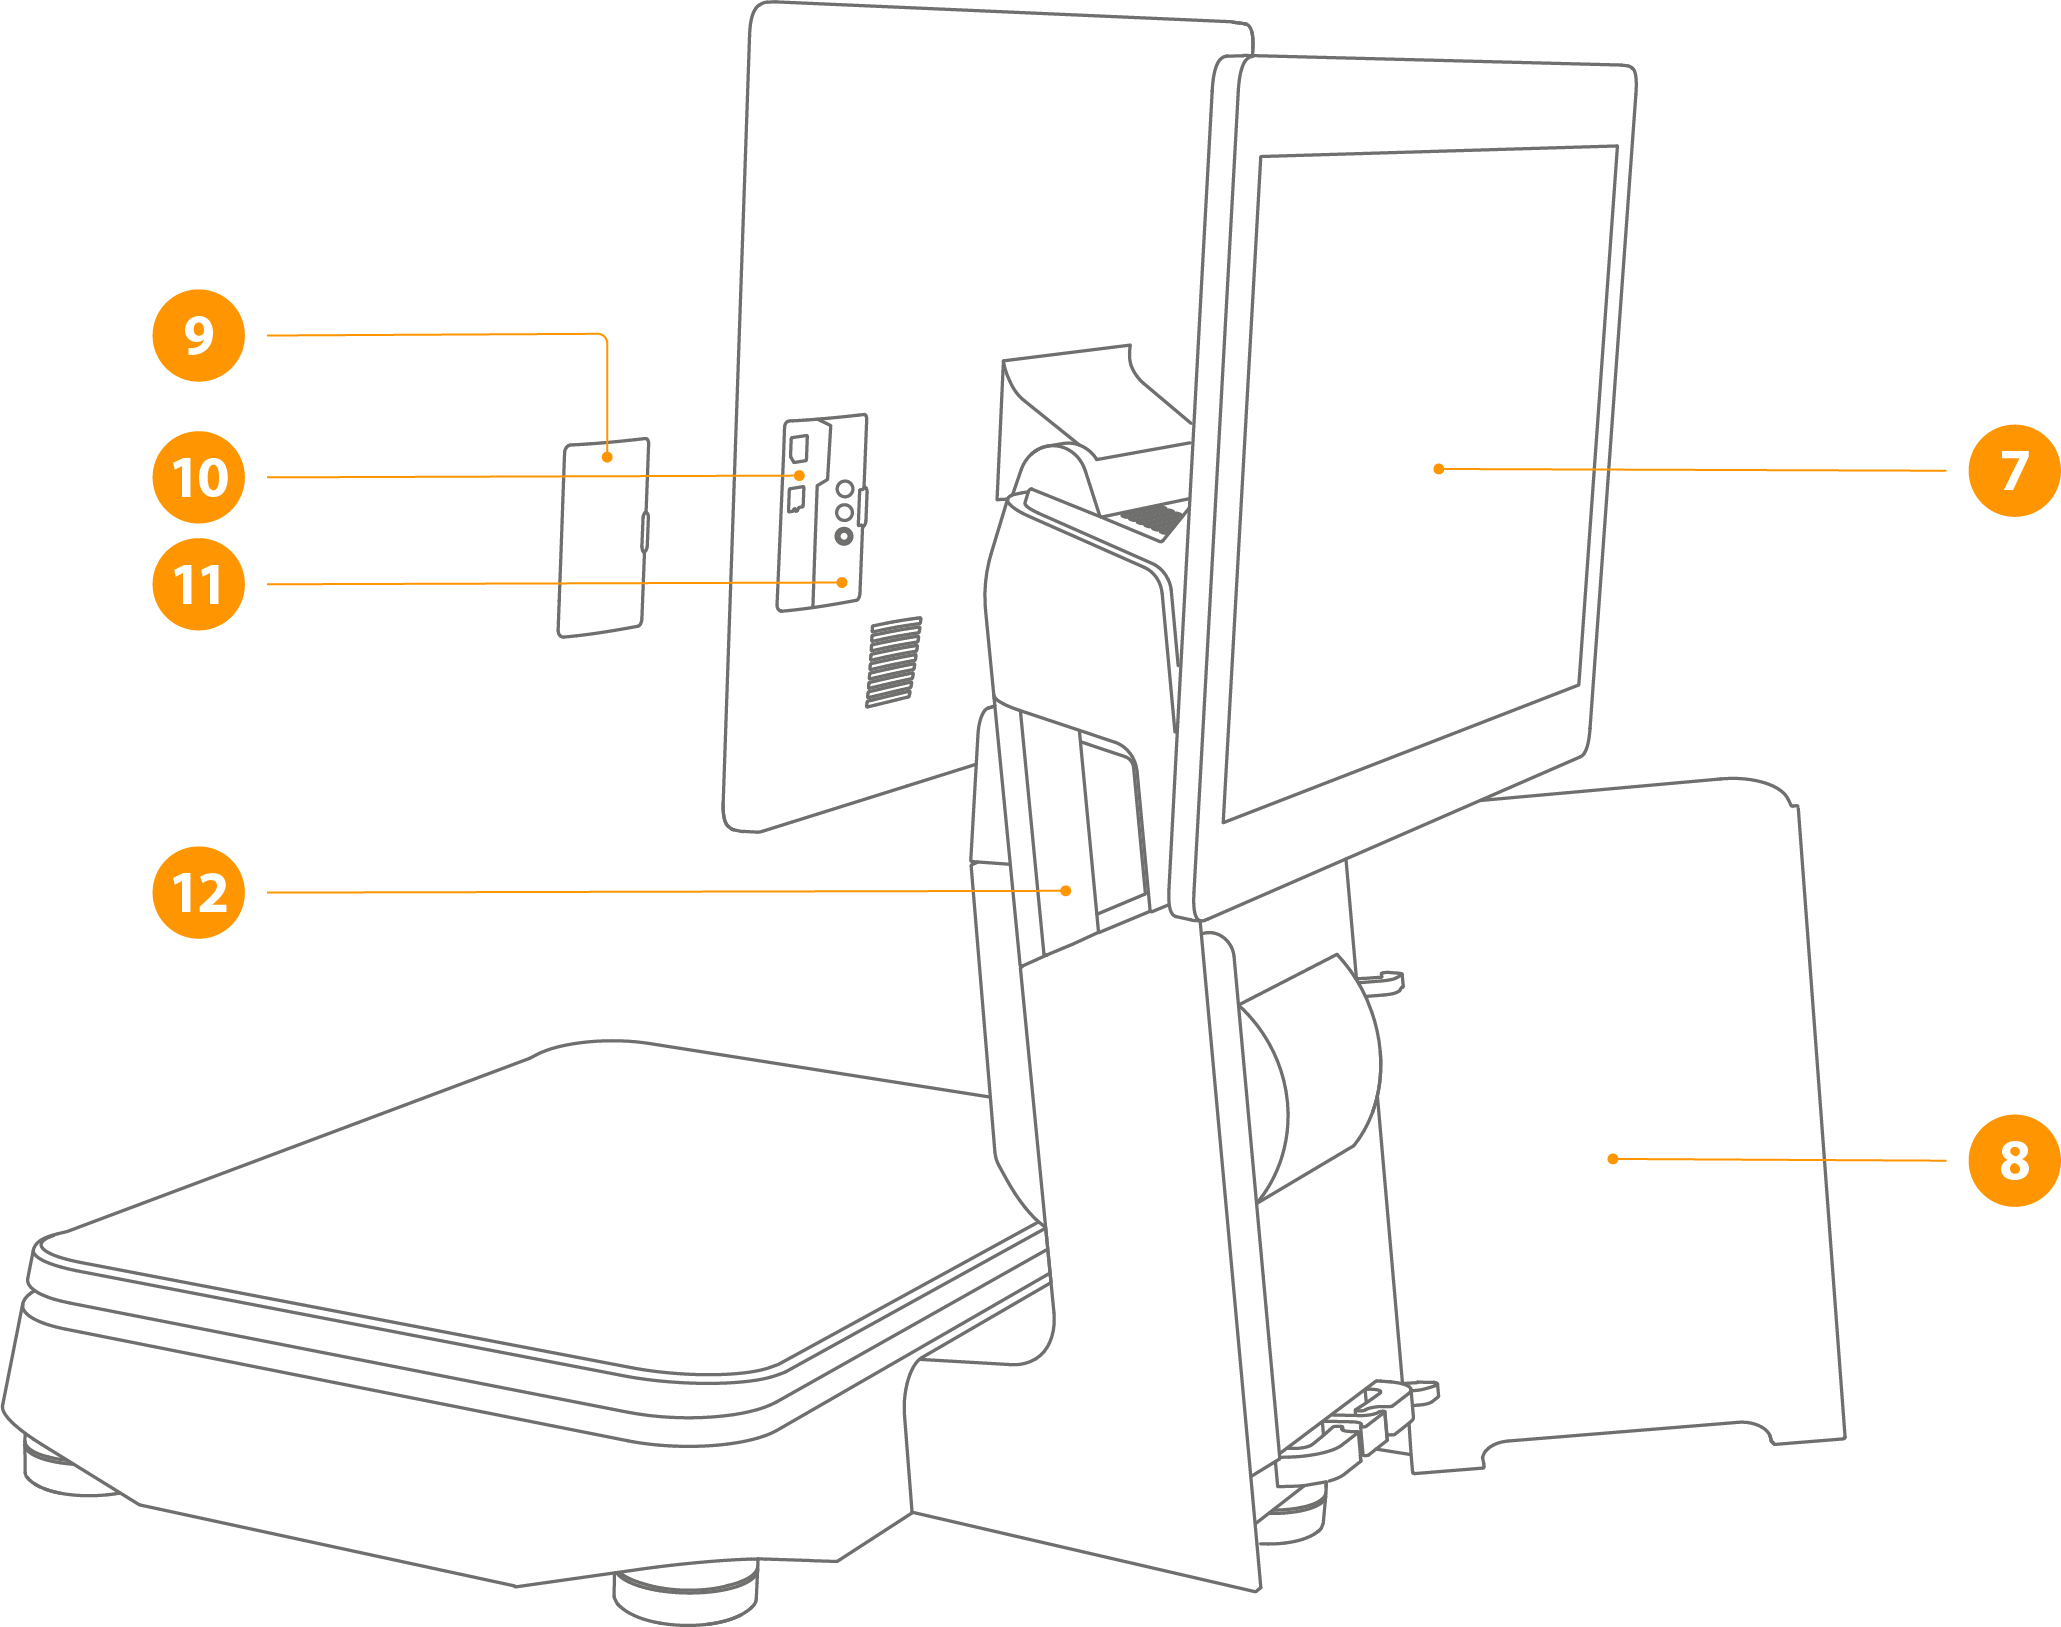
7 - Customer display
Screen for customers with information about the open receipt.
8 - Cover for hidden cables
Hides the cables of connected devices.
9 - Cover for connections
10 - MicroSD card slot
For expanding the internal data storage using a MicroSD card (max. 64GB).
11 - Micro USB DEBUG port
For device troubleshooting only. During debug mode, the USB ports on the bottom of the device do not function.
12 - Cover release
Press the lever outward to open the printer cover.
Connections
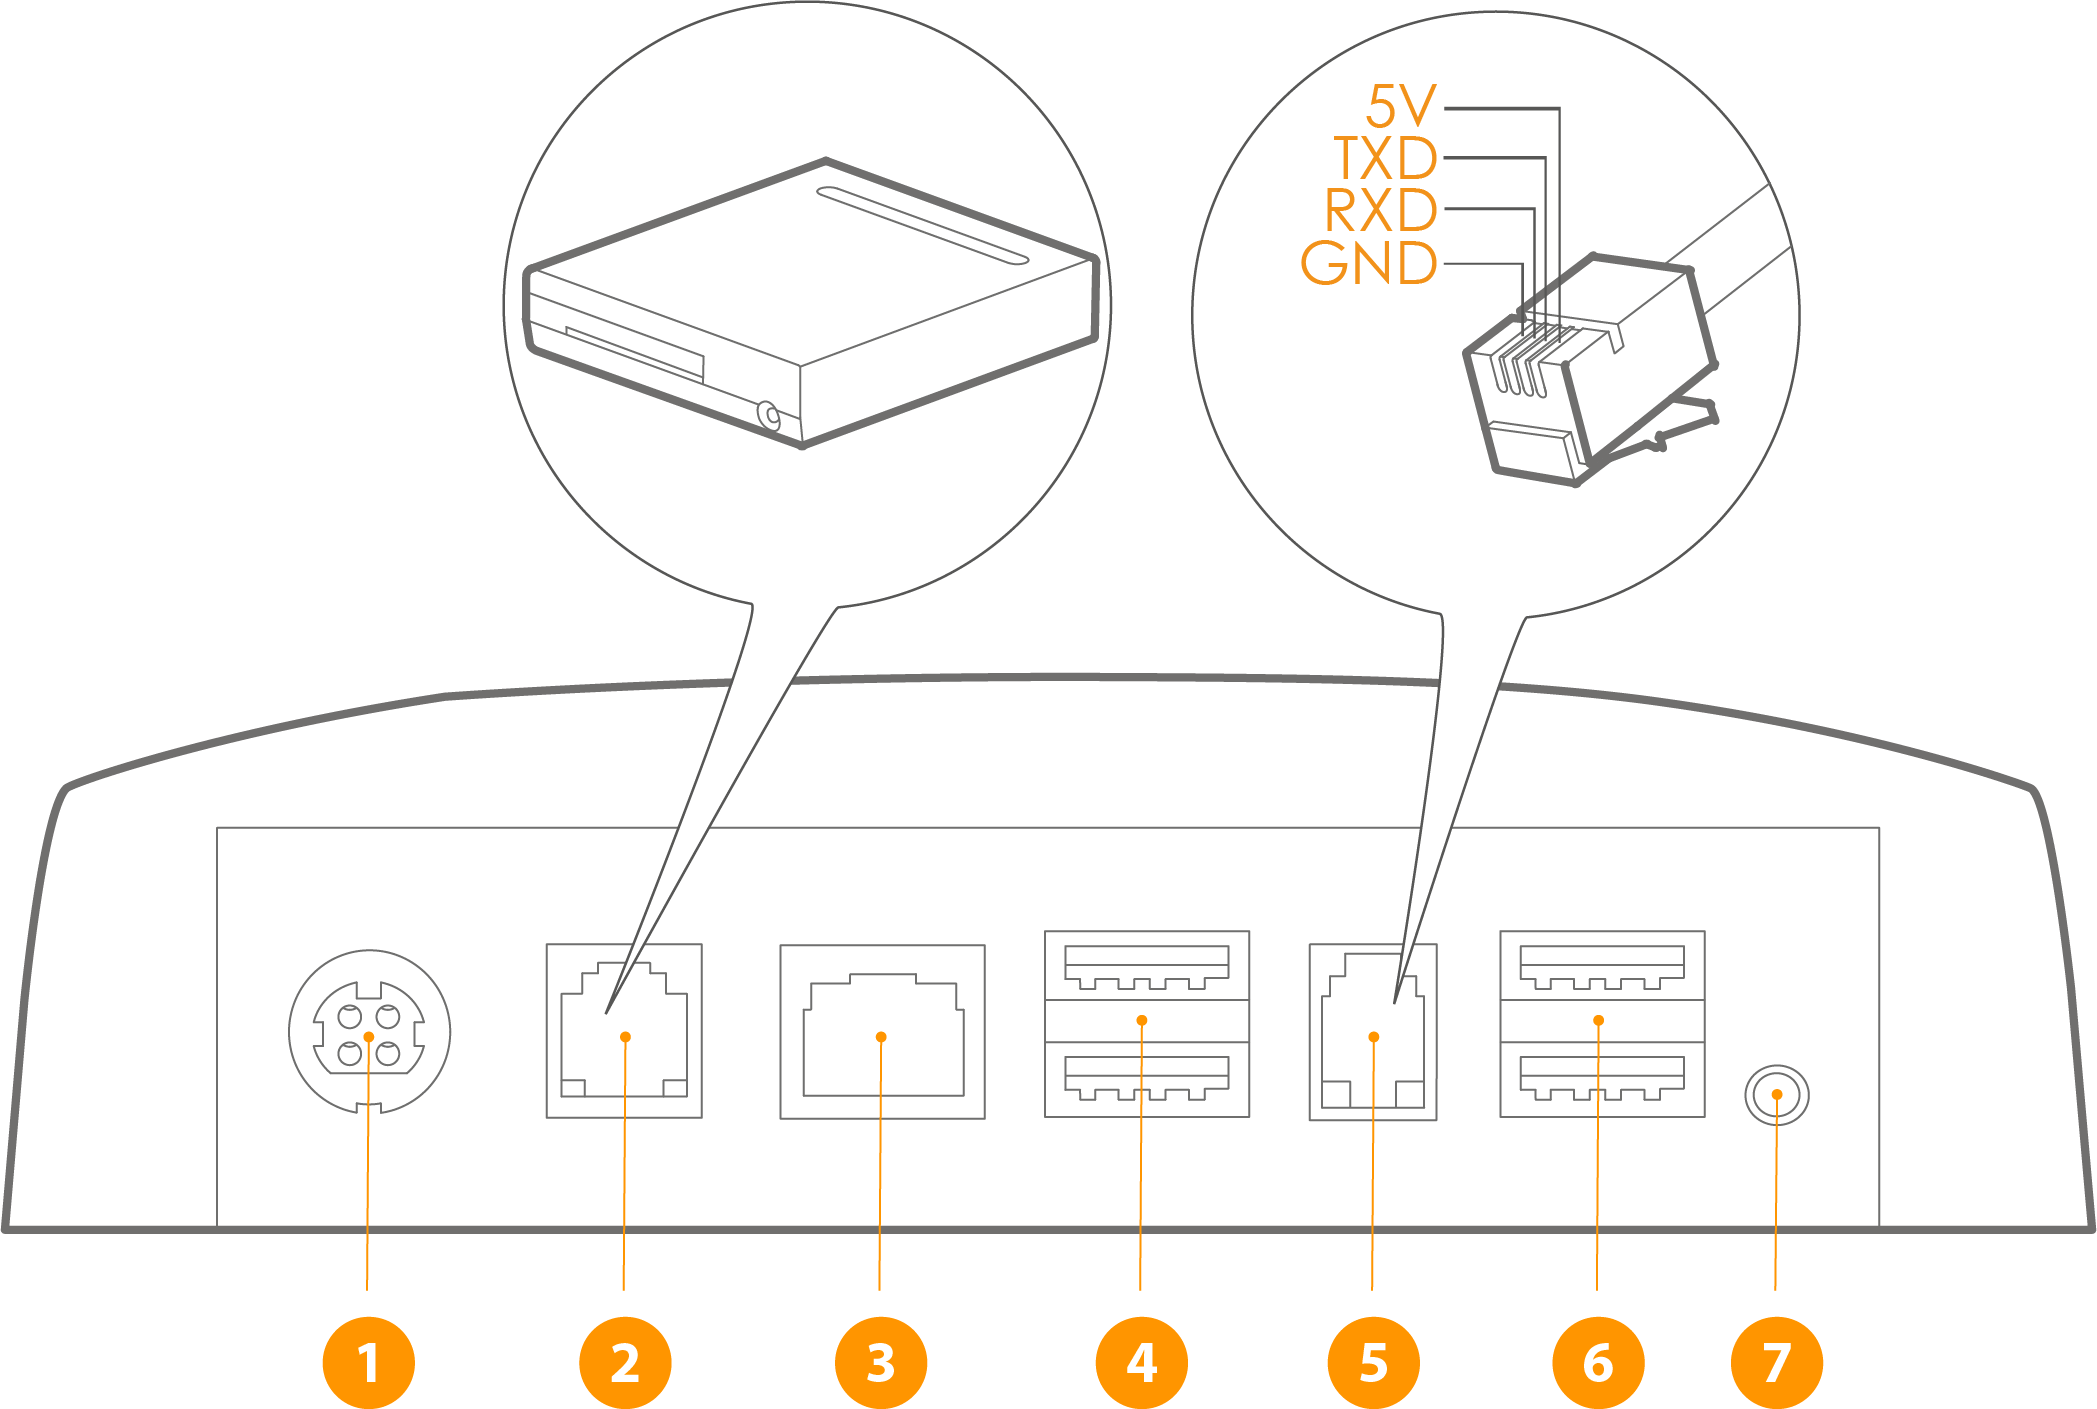
1 - Power connection
Connection of the power supply unit for the power supply.
2 - Cash drawer connection (RJ12)
For connecting an external cash drawer. The connection is not permanently energised, but sends current pulses with a frequency of 100ms. Different types of 9-24V cash drawers are supported.
3 - Ethernet / LAN (RJ45)
Ethernet connection for an internet connection in the local network.
4 & 6 - USB port
USB 2.0 / USB 3.0 port for connecting peripheral devices.
5 - Serial connector (RJ11)
Connection of peripheral devices via a serial port.
7 - Audio jack
An audio jack for connecting external speakers or headphones.
Insert receipt roll
To insert the receipt roll, first open the printer lid in the direction of the arrow, then insert the 80x80mm thermal paper roll and finally close the printer lid.
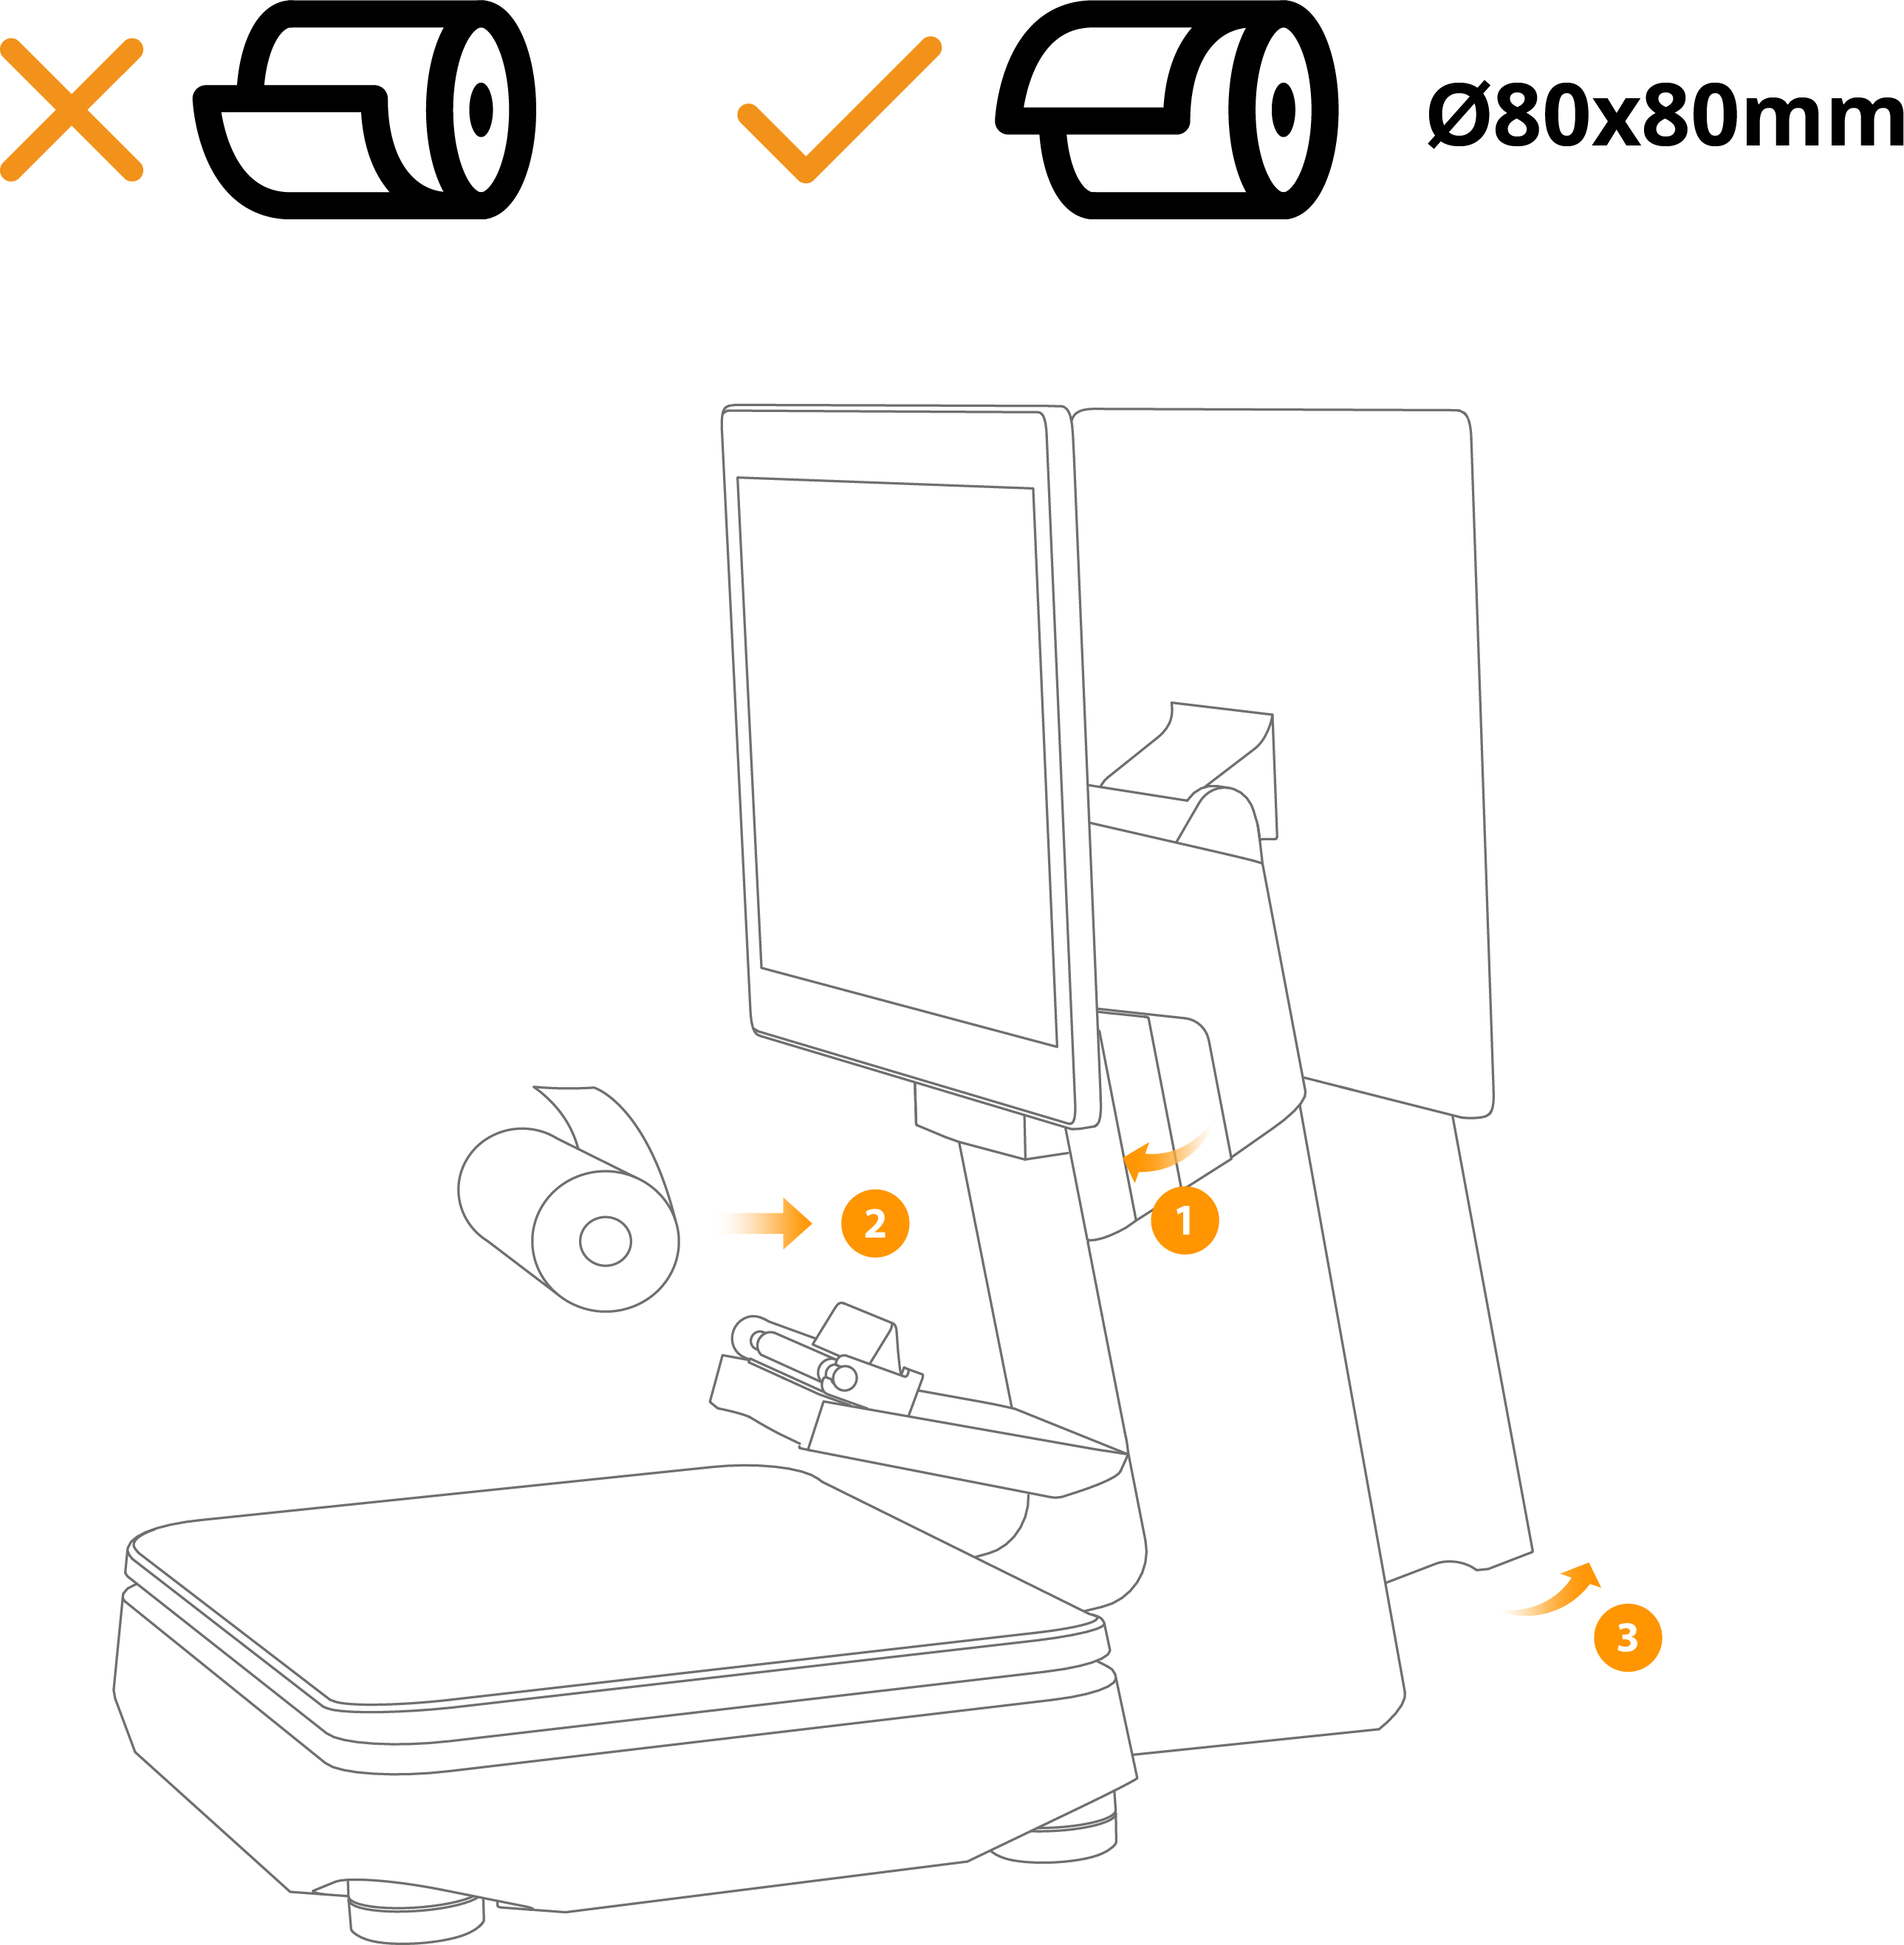
1 - Open the printer cover (pull the lever outward)
2 - Insert the receipt roll and leave a few centimeters of paper sticking out over the edge when closing the cover
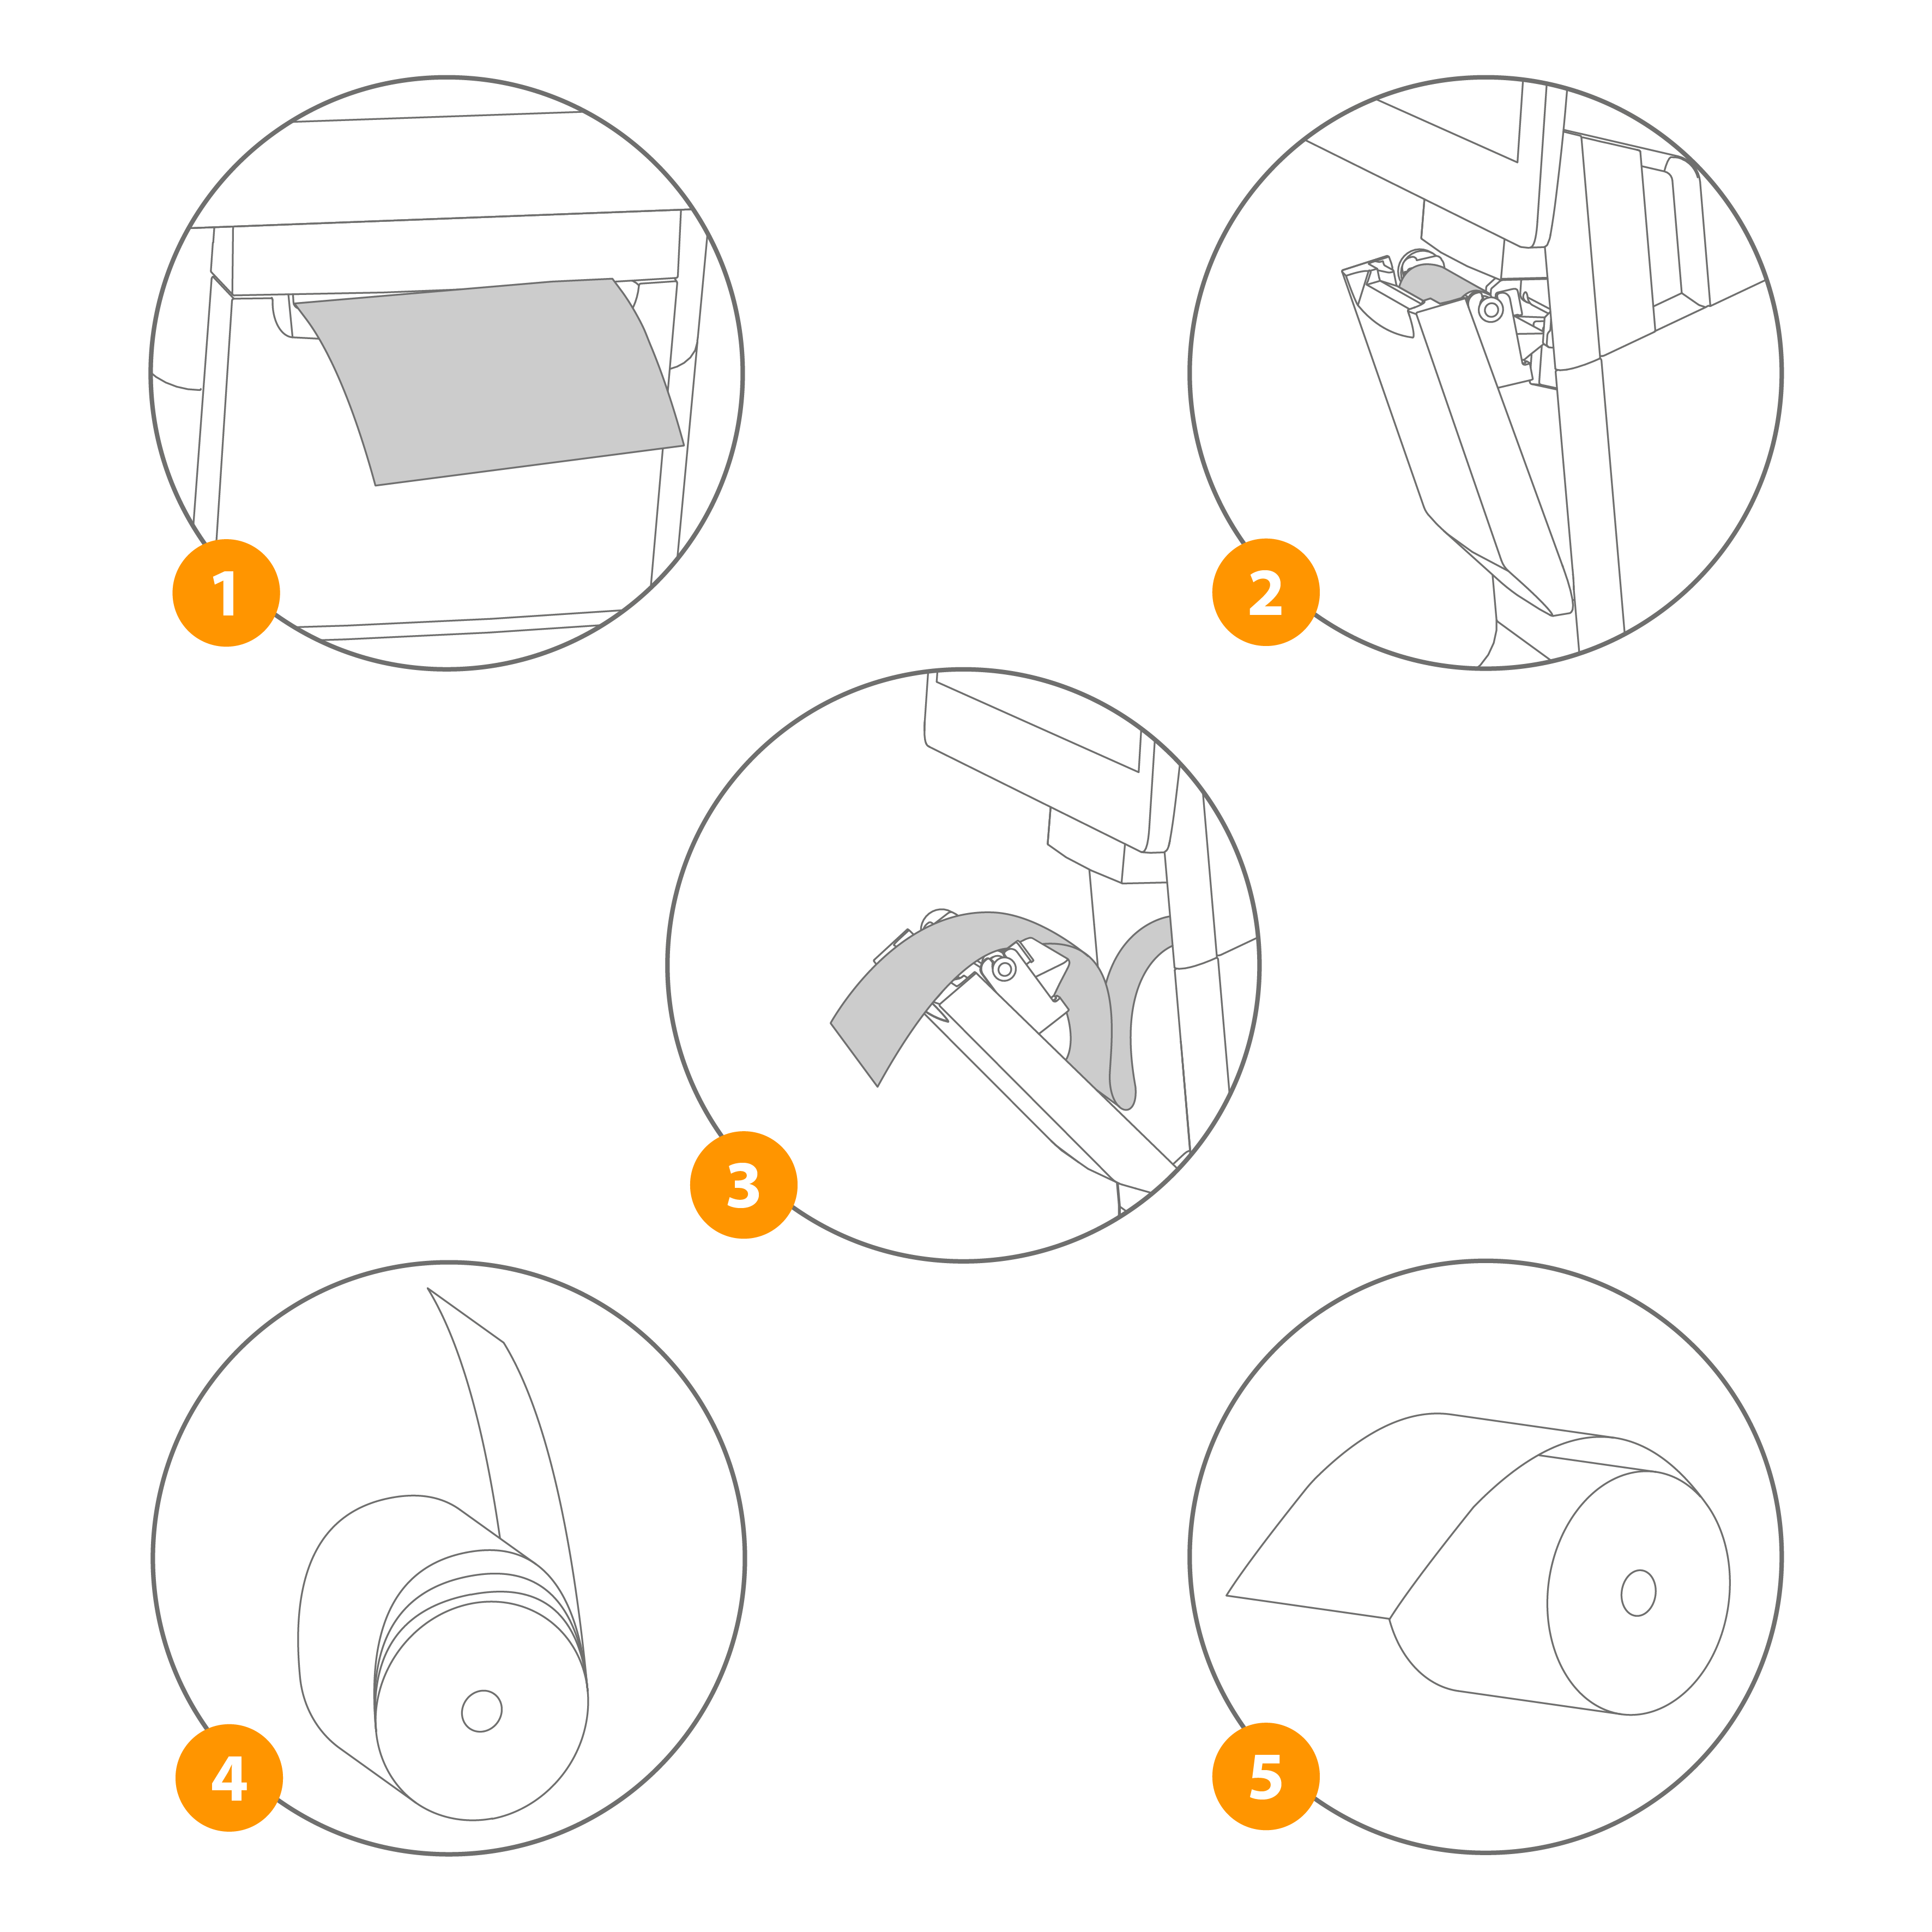
1 - The printer paper should not be inserted at an angle
2 - The paper should always protrude a few centimeters from the output tray and not slide backward
3 - Unwound paper strips should not simply be placed back in the paper tray
4 - Do not place loosely rolled paper rolls in the printer
5 - Ensure that the paper roll is inserted in the correct direction
Note
When changing the receipt roll, please ensure that the core of the last roll has been removed before inserting the new roll.
Quick start
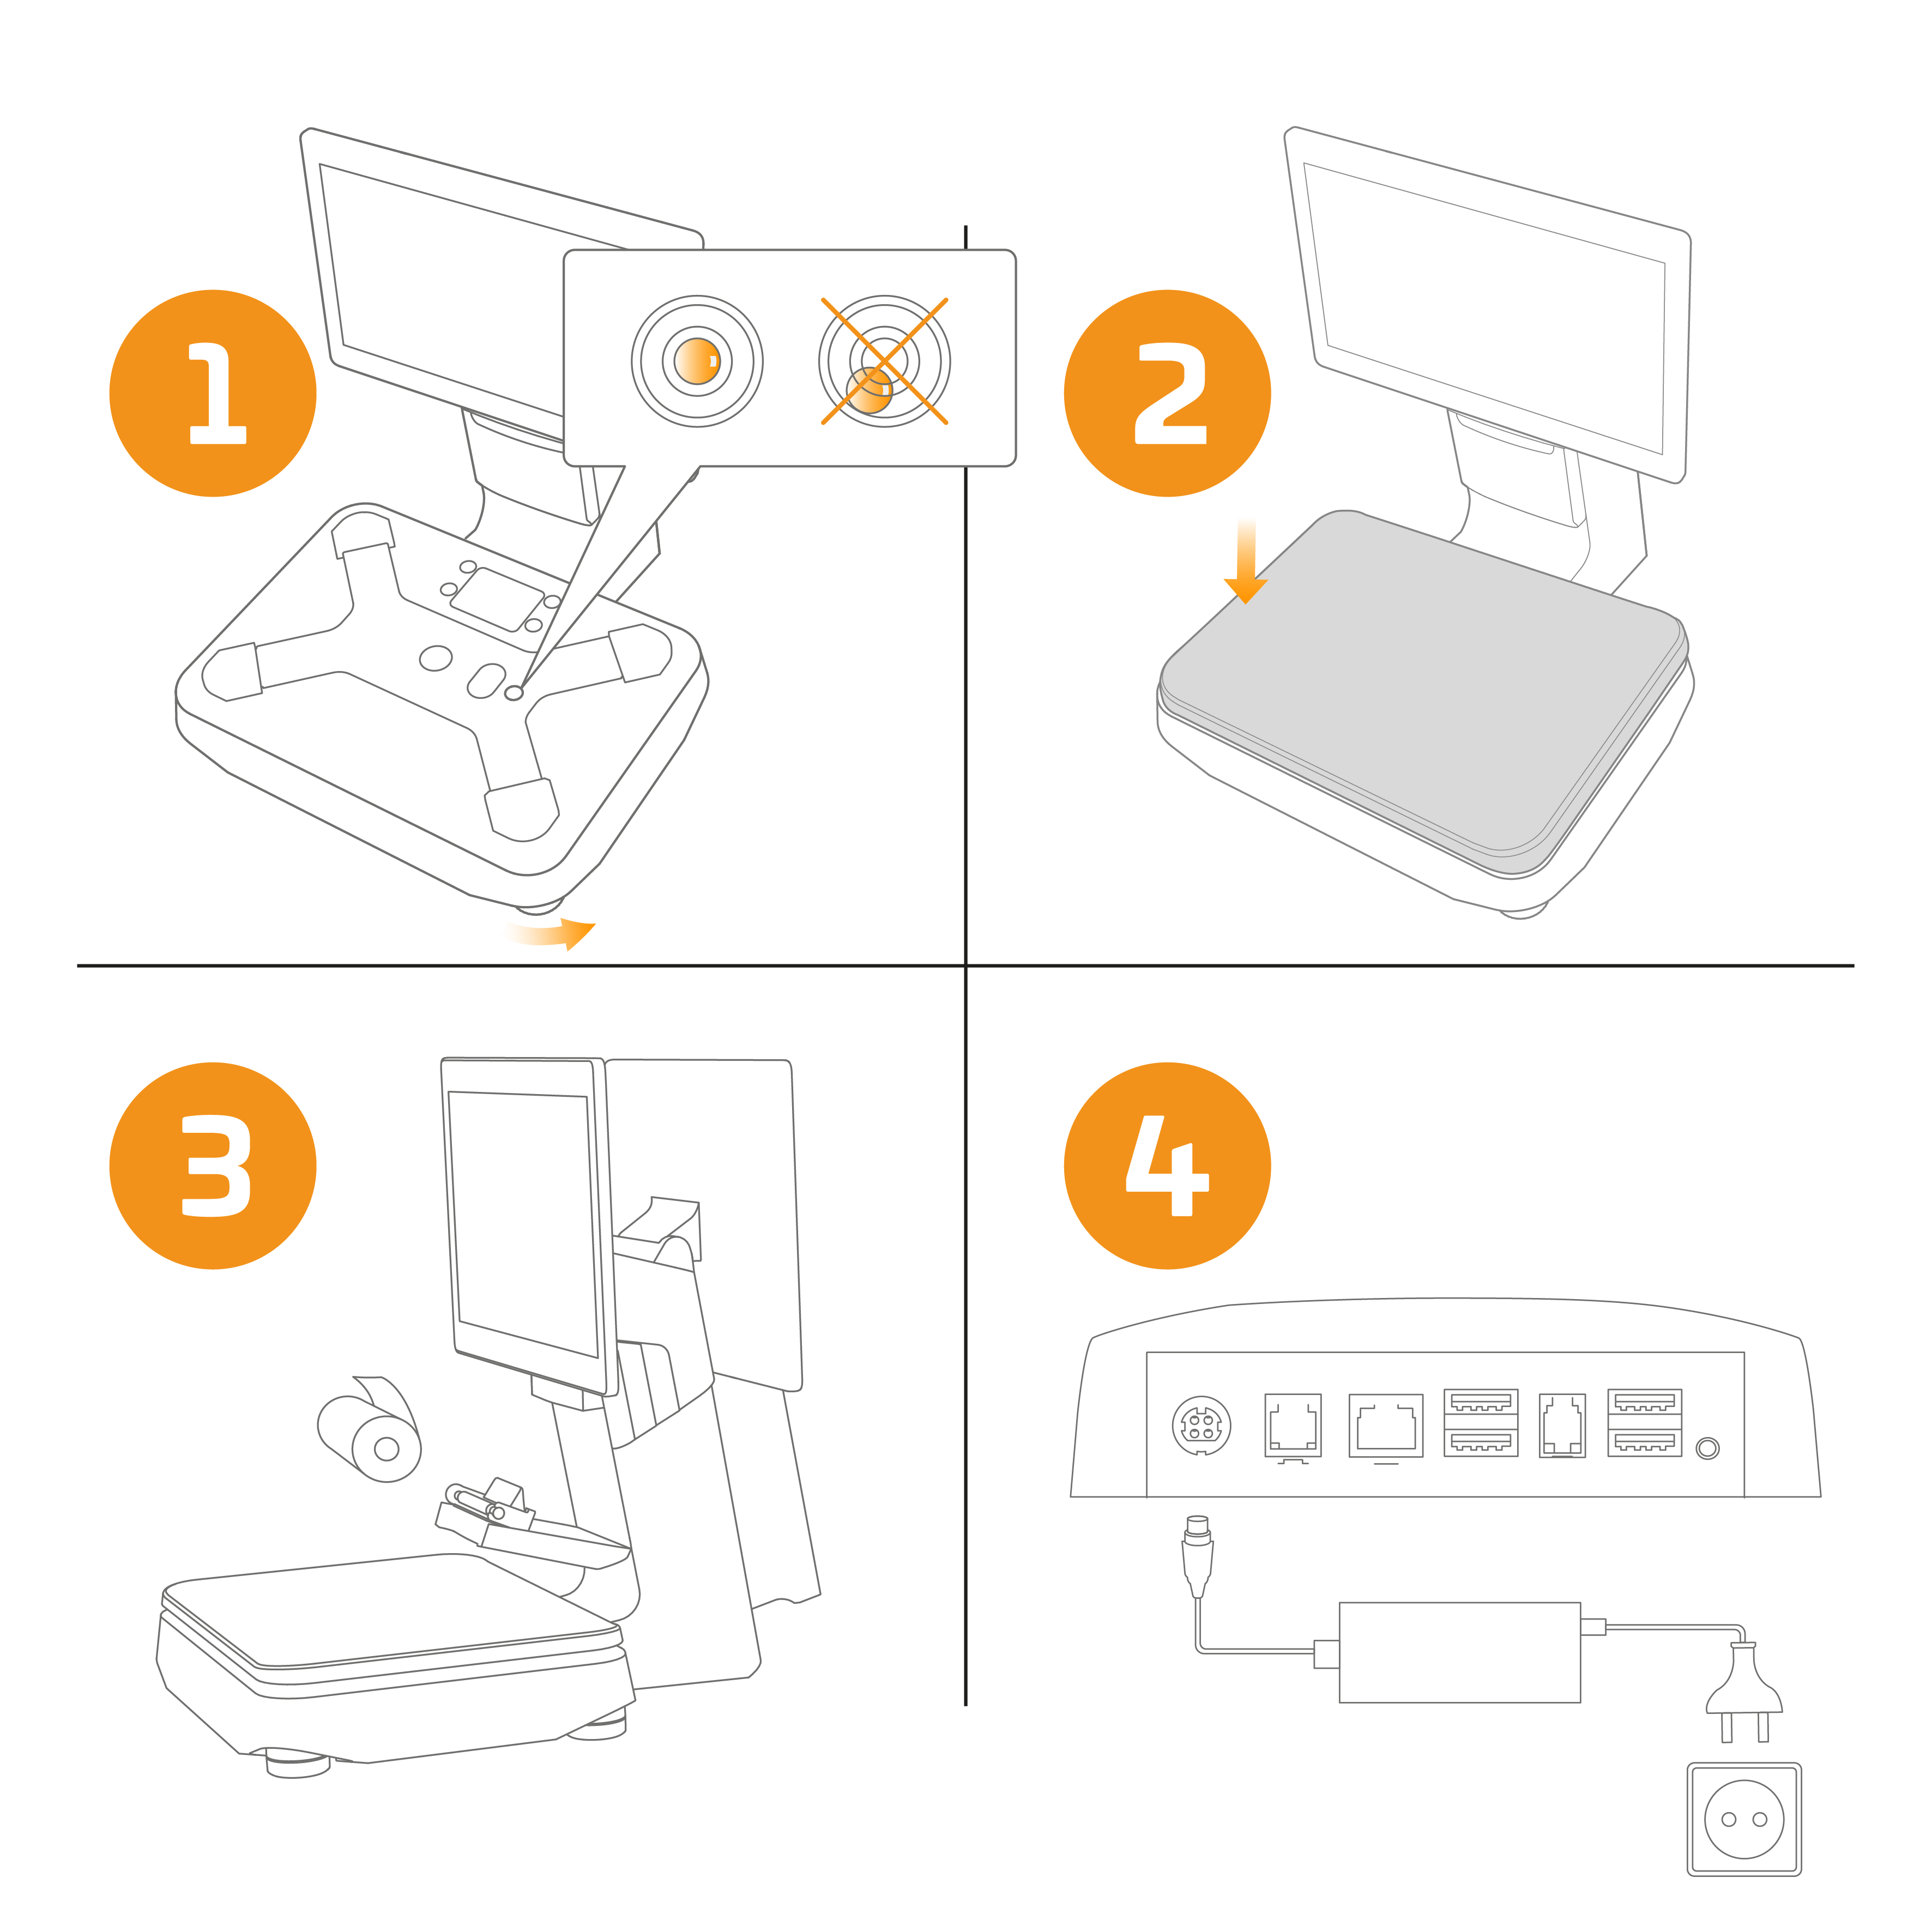
1 - Place the scale cash register on a firm surface. Make sure that the bubble in the level indicator is in the center. Use the 5 feet on the underside to level the scale (only a perfectly level scale can provide accurate weighing results).
2 - Place the weighing cover on the scale.
3 - Insert an 80x80mm thermal paper roll into the printer.
4 - First connect the power supply to the device and then to the mains. To switch on the scale cash register, press the power button on the side of the device.