Functions on Layers
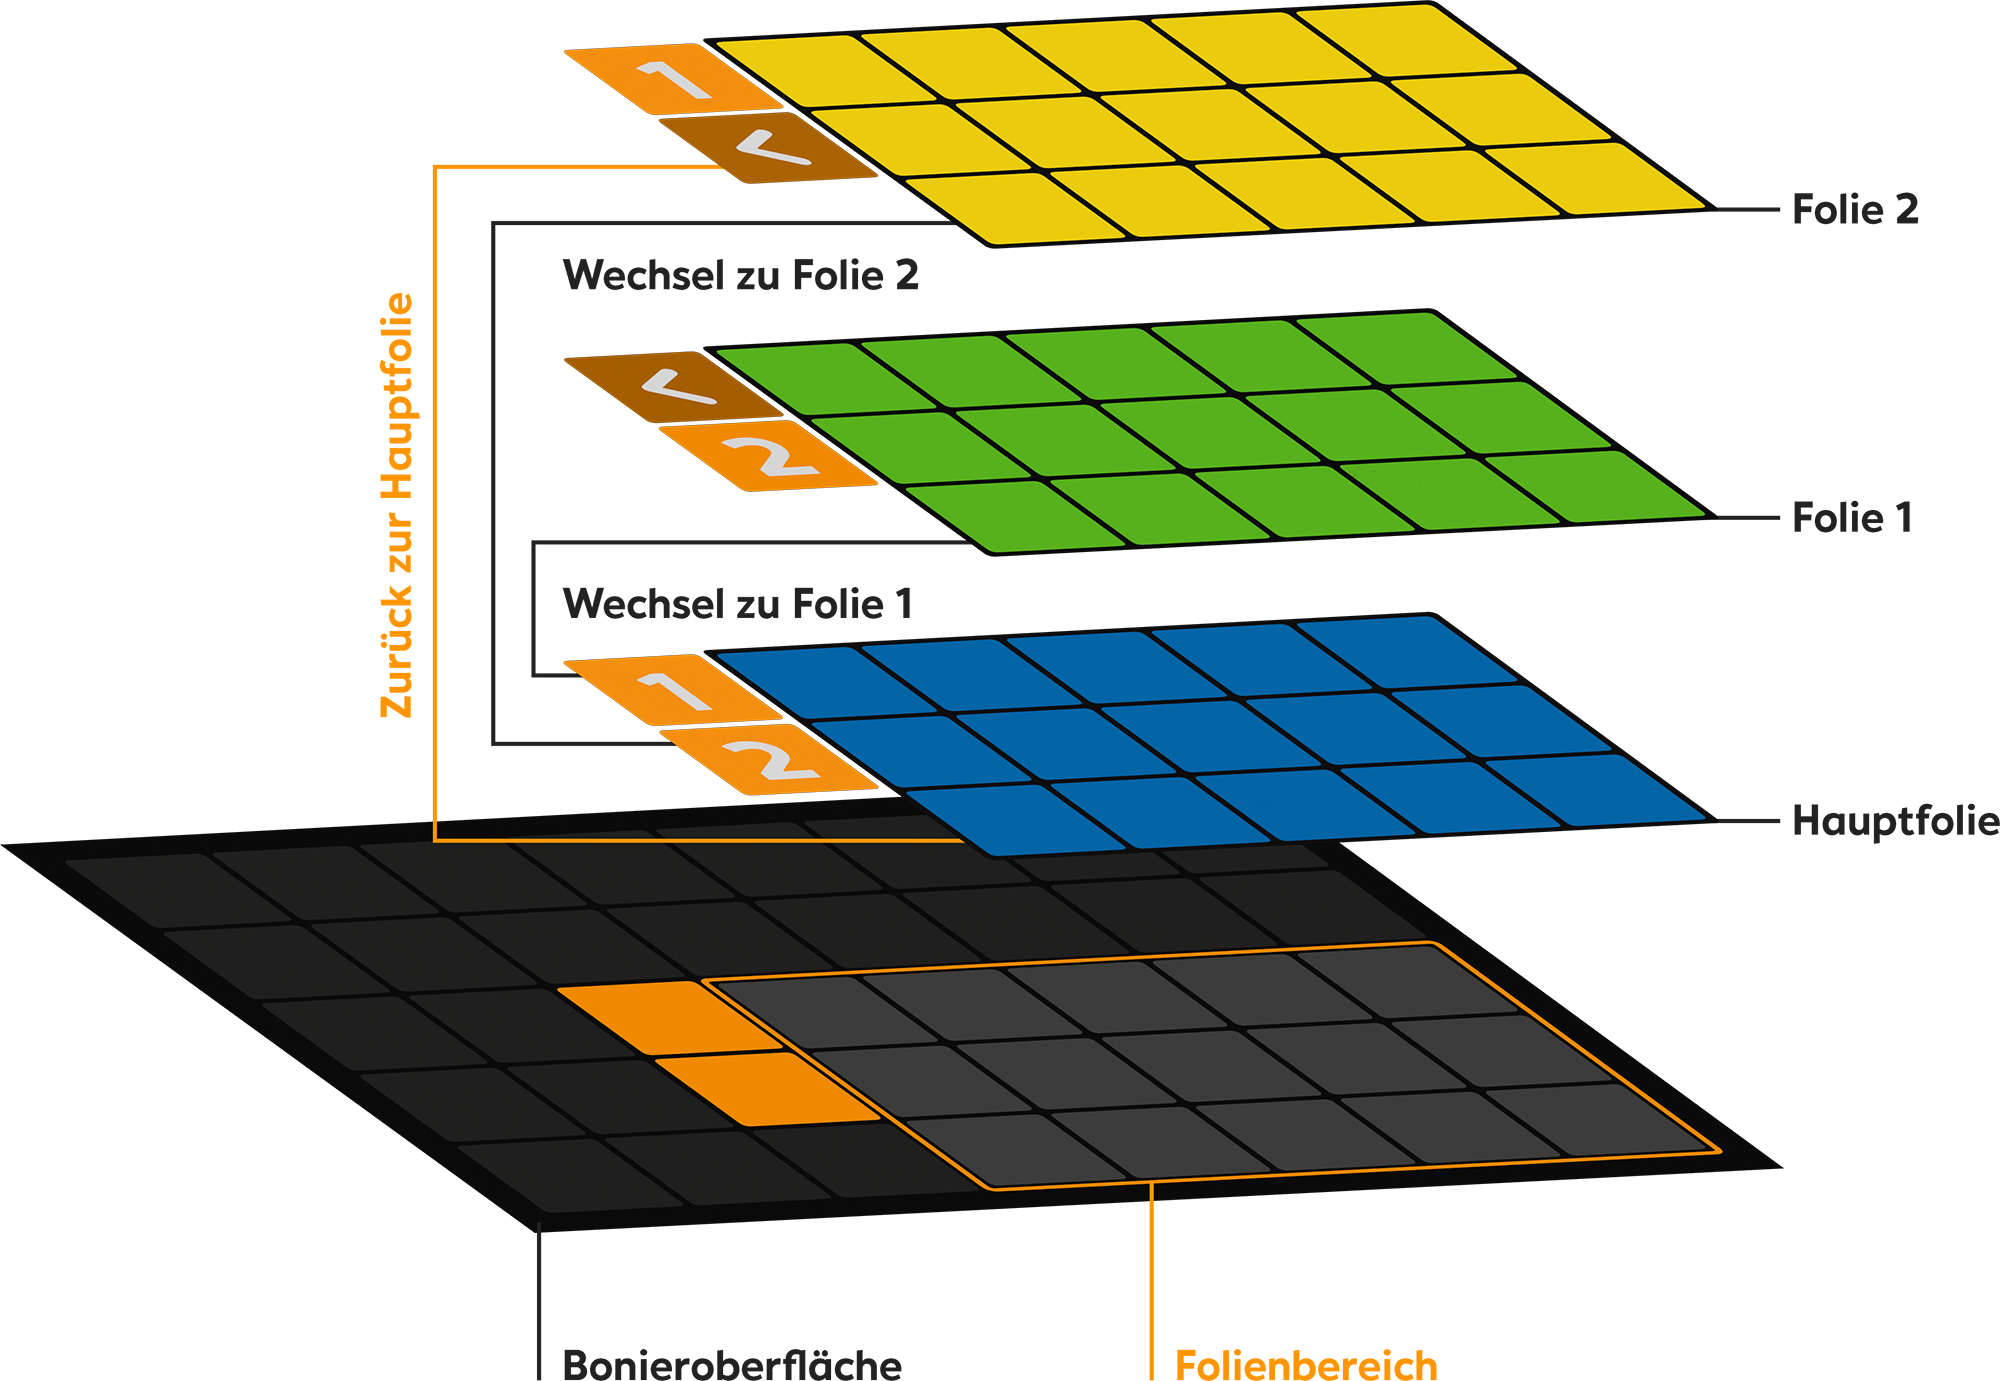
Layers can be described using the example of a building. The floor plan of the building is defined by the layer area. On the ground floor (the main layer) there are rooms (functions or products) that are always accessible when entering the building (opening the register interface).
The lift (‘Change layer’ button) can be used to reach other floors (layers) in the building. Each floor contains new rooms that are laid out in the same way as the ground floor. By adding new floors, an infinite number of rooms can be accommodated in the building.
The purpose of the function
To place more functions on the interface than there is space for on the grid
To place a large number of products on the surface
To group products into individual layers (e.g. by product group)
How it works
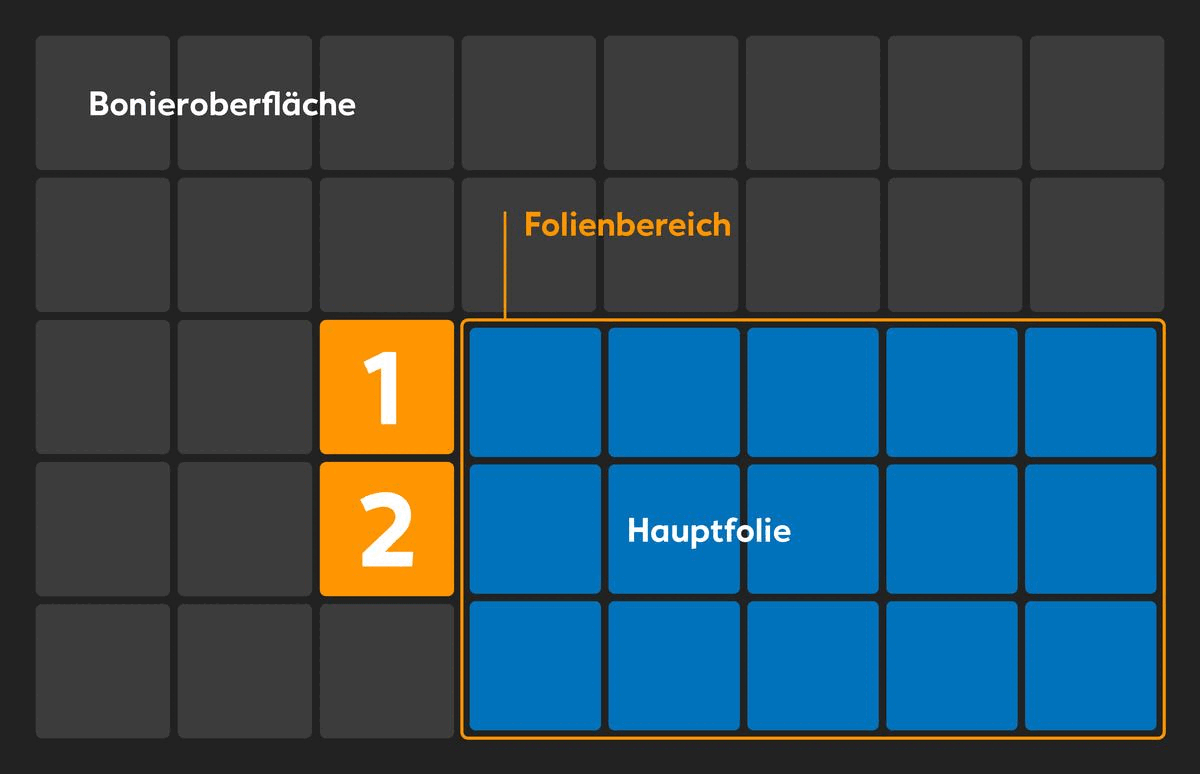
The layer area defines the size of the grid for new layers – it is used to switch between layers.
Each layer area has a main layer. The functions or products placed on it are displayed on the register interface.
Any number of layers can be added to a layer area.
To jump back and forth between layers, you can use the ‘Change layer’ function.
Any number of layer areas can be placed on the surface.
Unavailable functions
A new layer area cannot be placed on a layer in the layer area. Furthermore, no ‘change layer’ button or shopping cart can be placed on it.
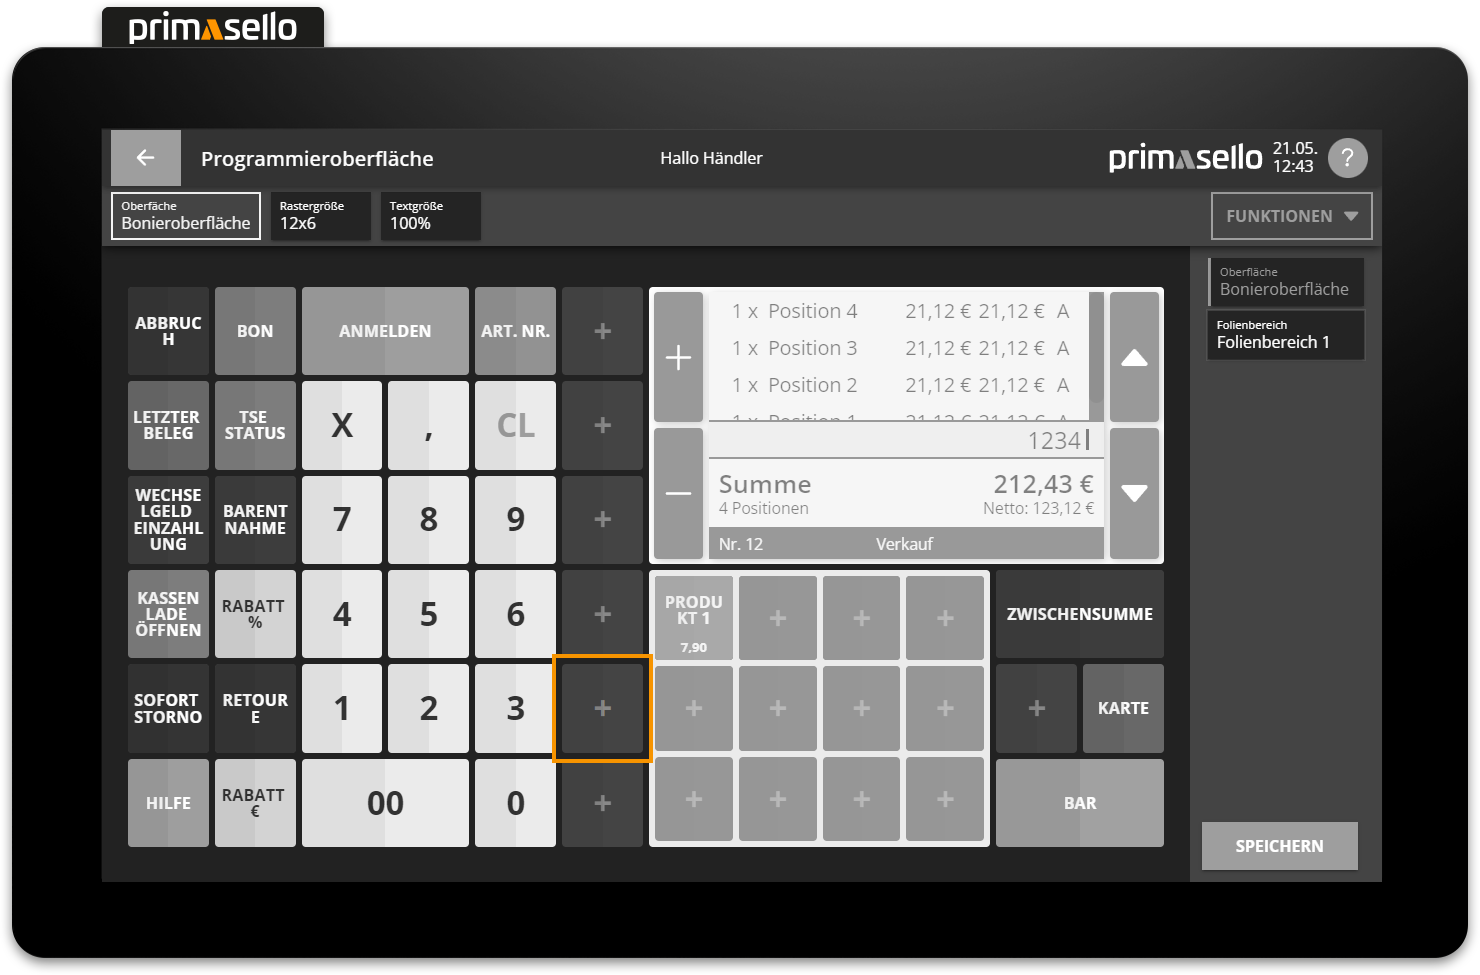
Function: Layer area
The layer area is a defined area on the grid in which the different layers are displayed. Any number of layer areas can be created on the grid. Separate layers can be created for each layer area.
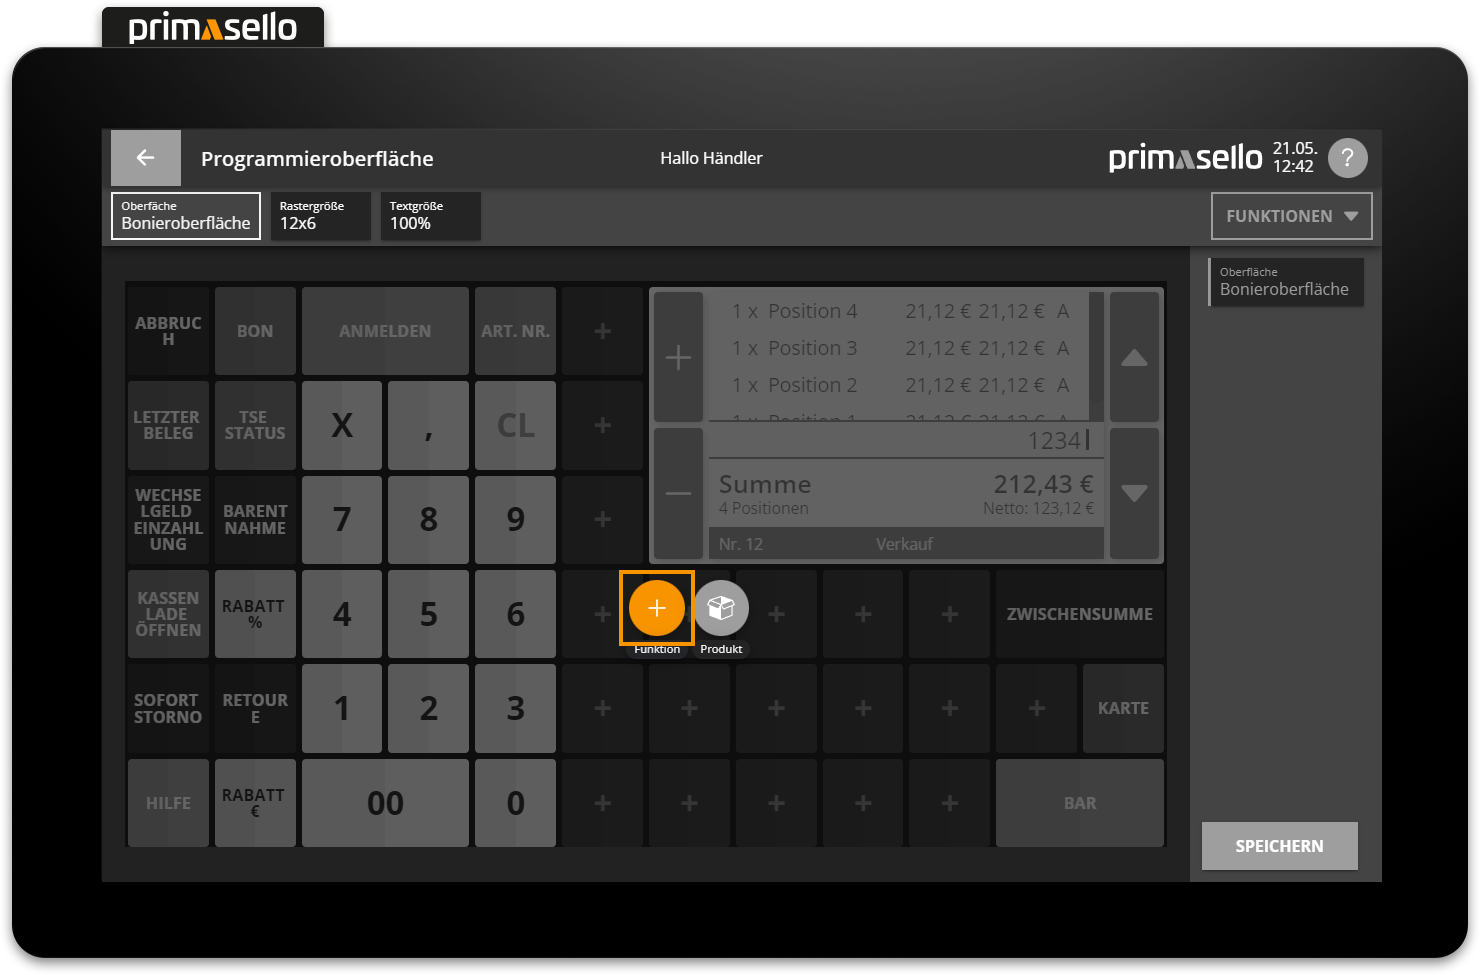
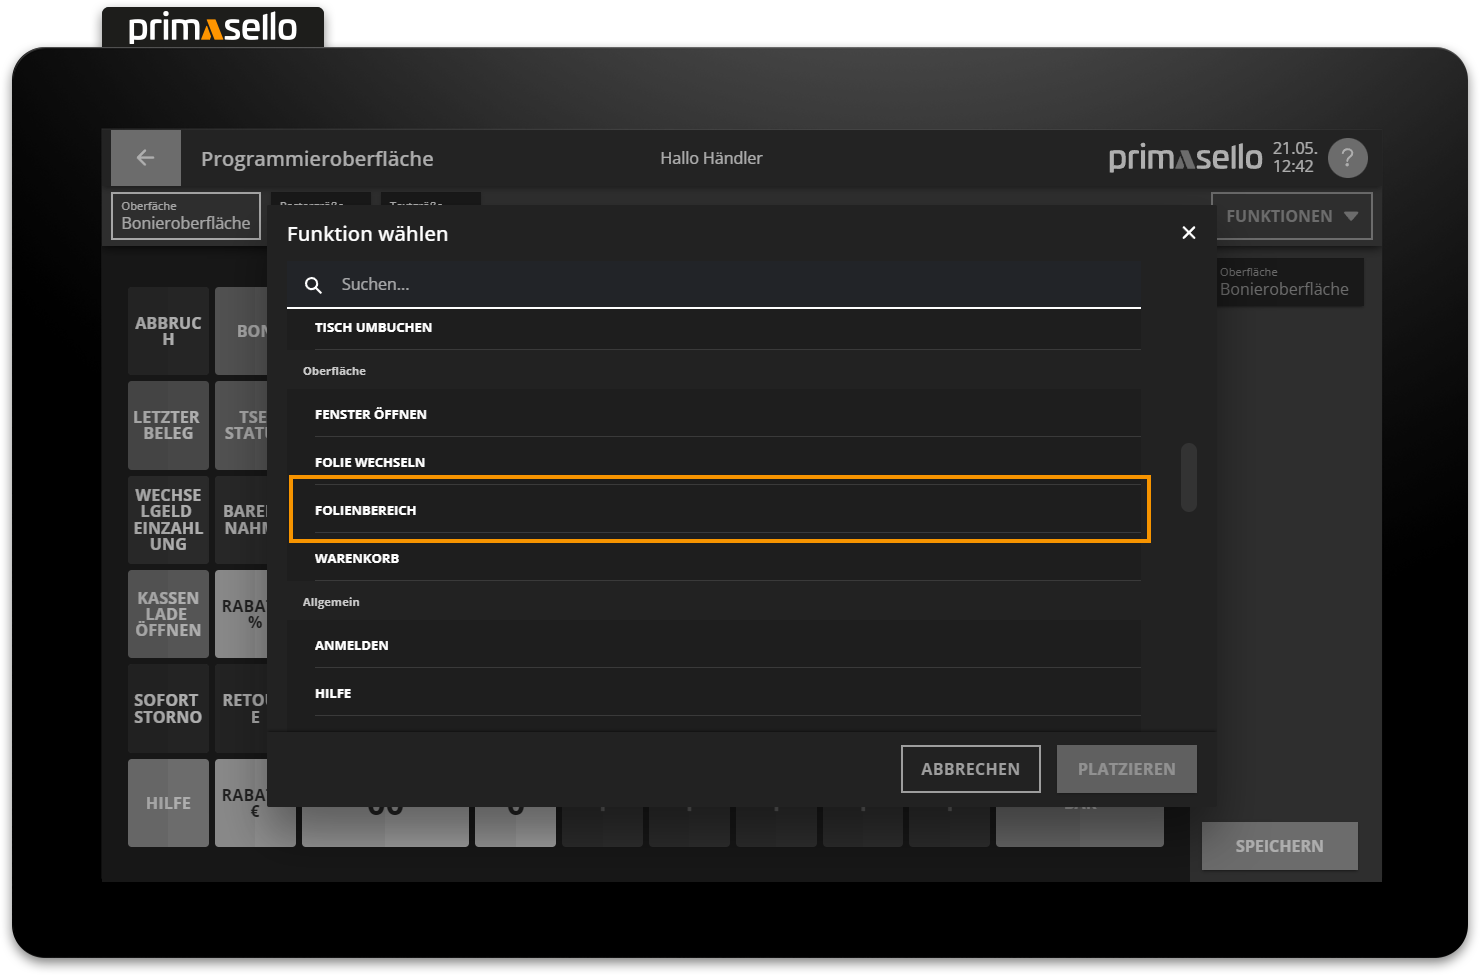
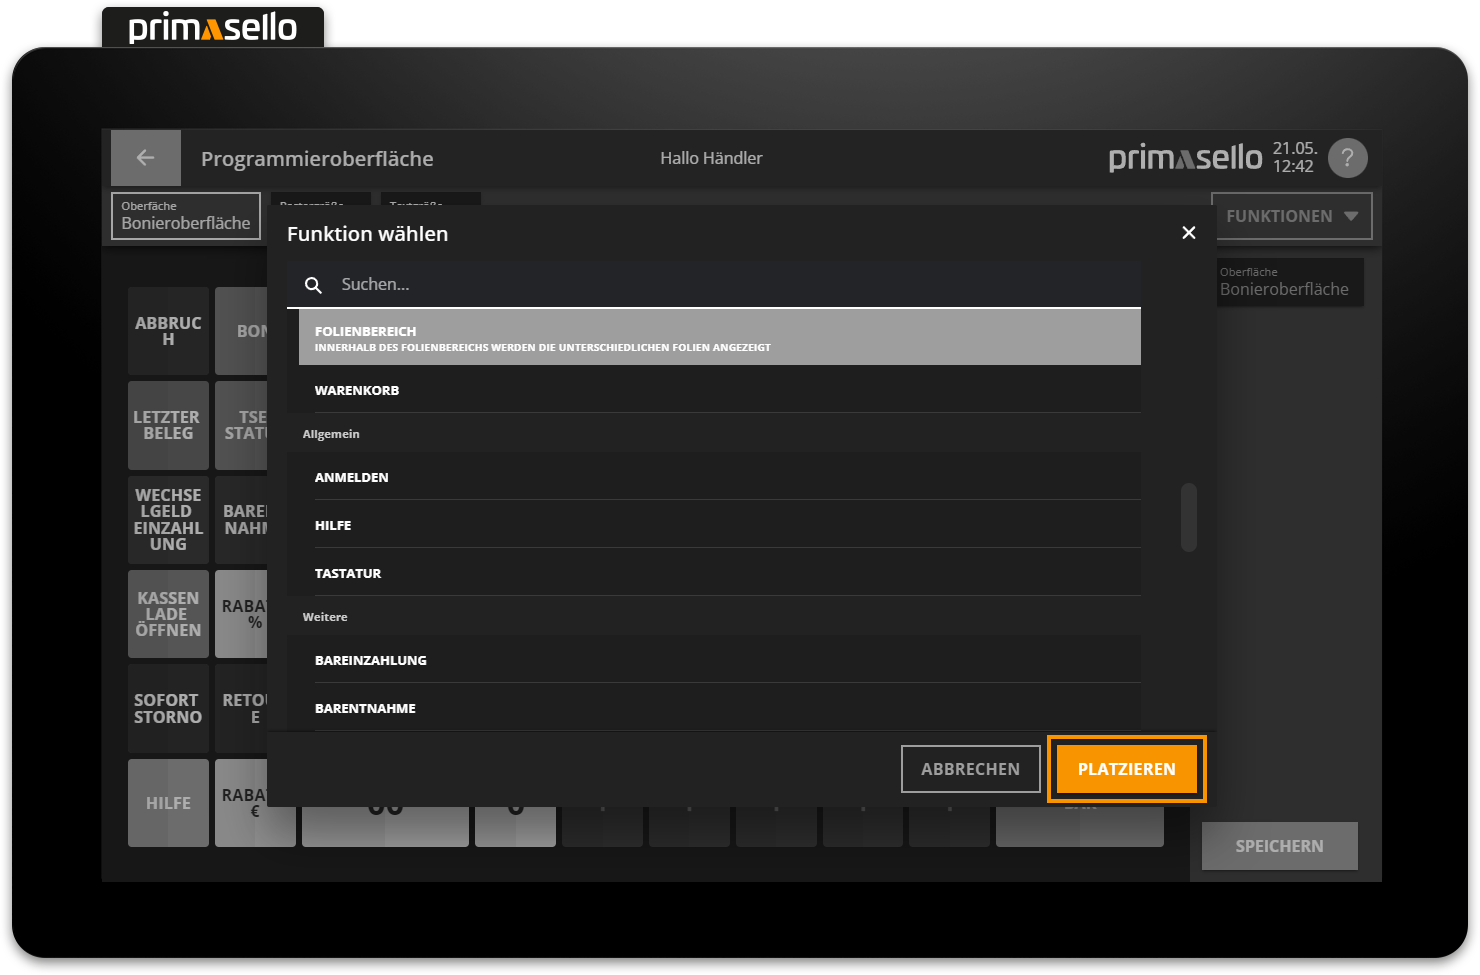
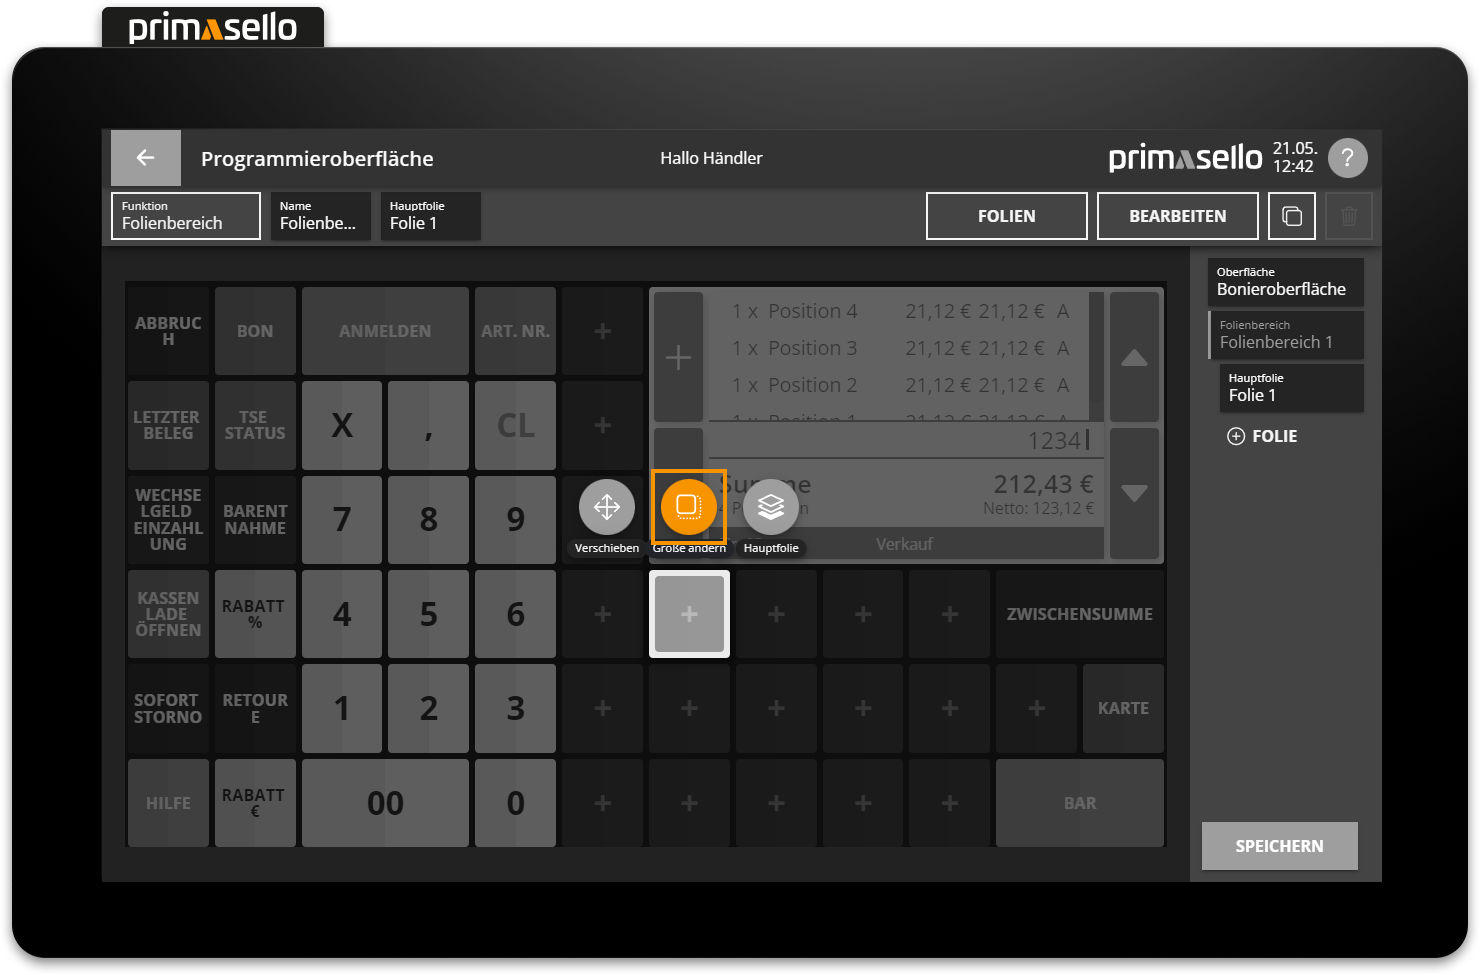
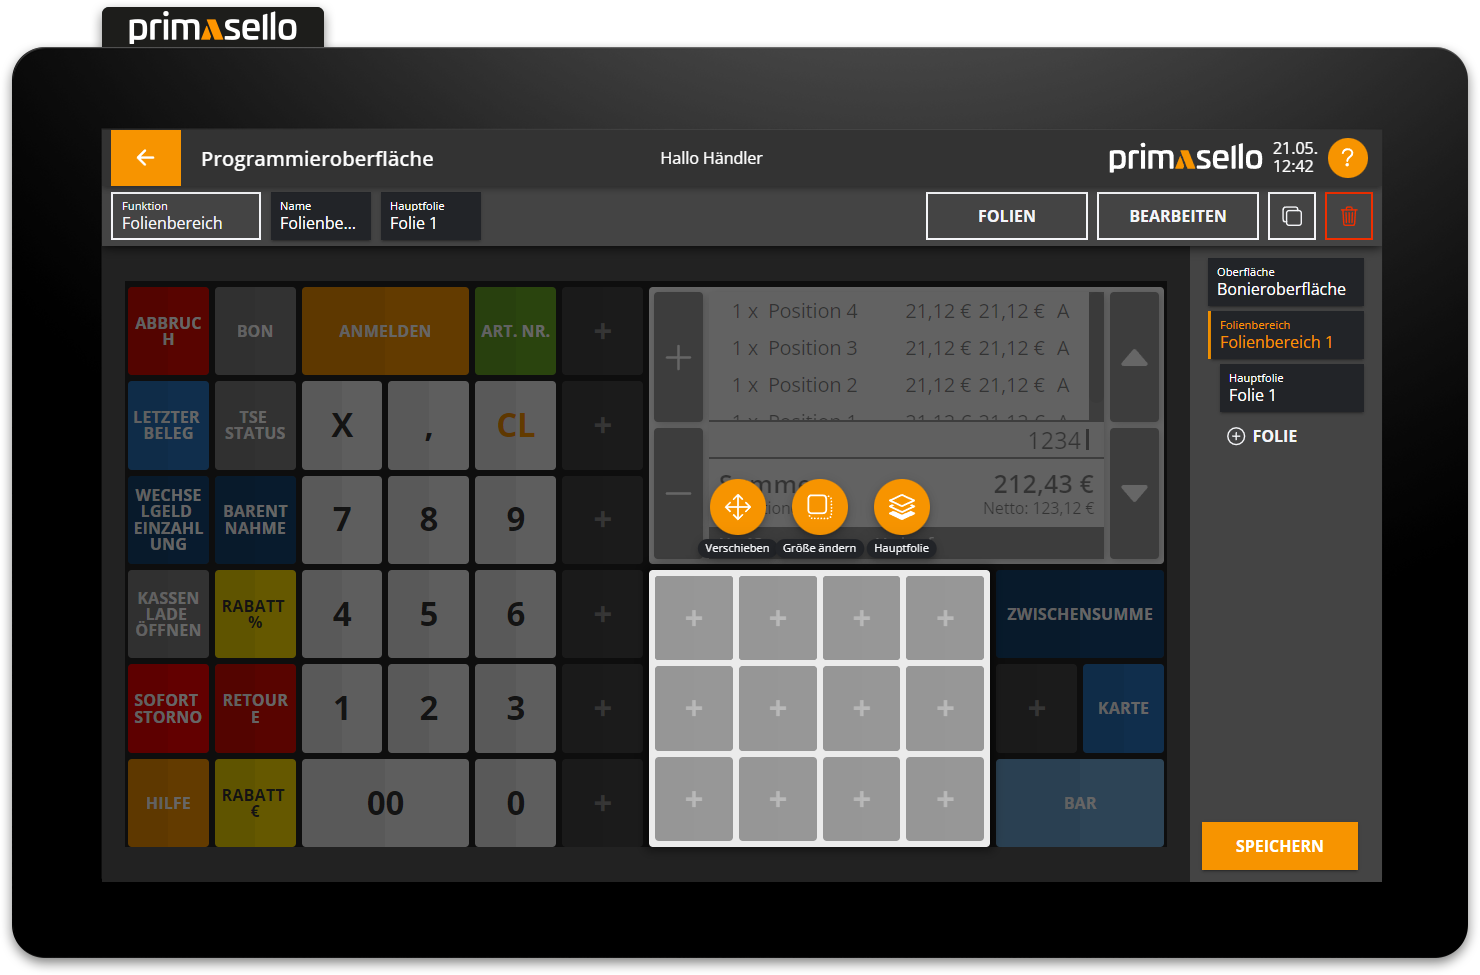
If the ‘layer area’ function is placed on the grid, it can be moved and resized like any other button. The default size of the layer area is 1x1 fields. When selected, the layer area can be deleted and edited like any other function.
Delete layer area
If the layer area is deleted, all layers contained therein and the function buttons will also be deleted!
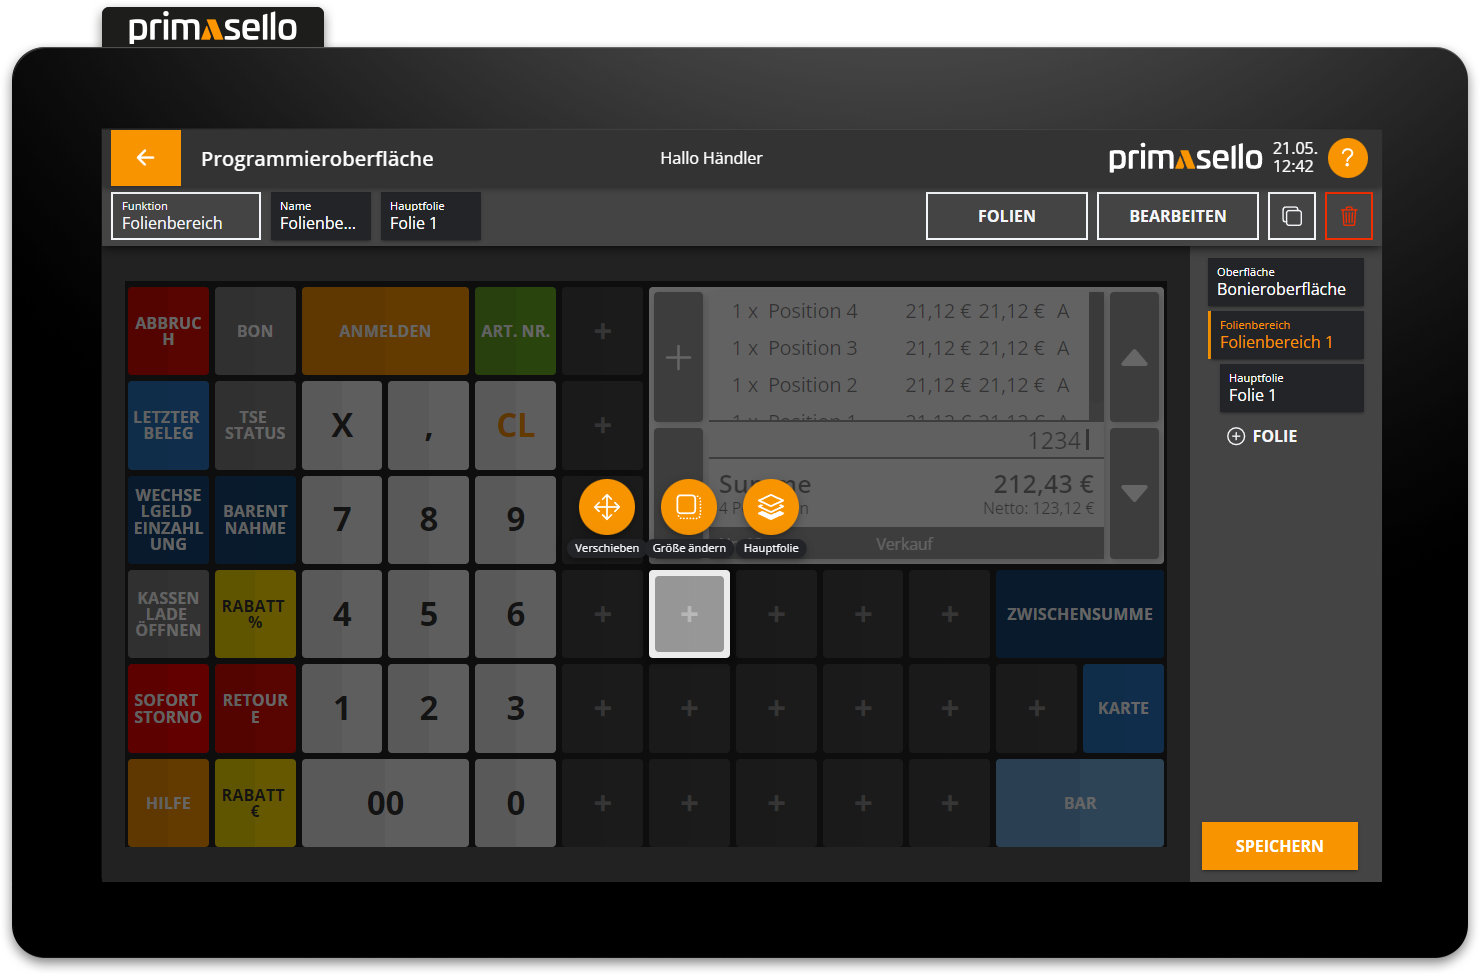
Add new layer
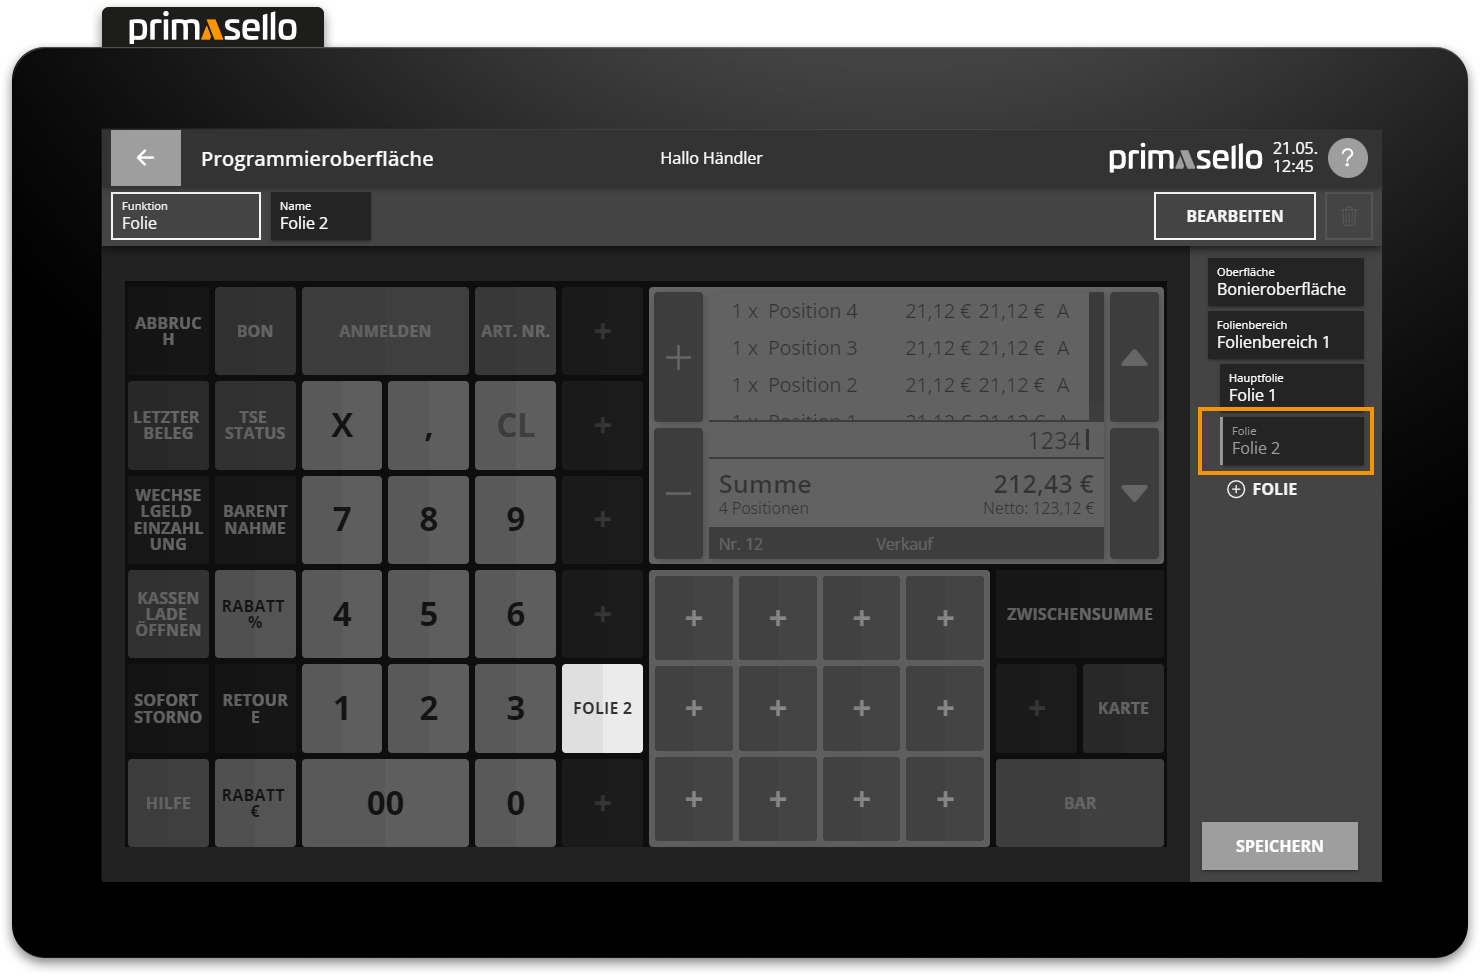
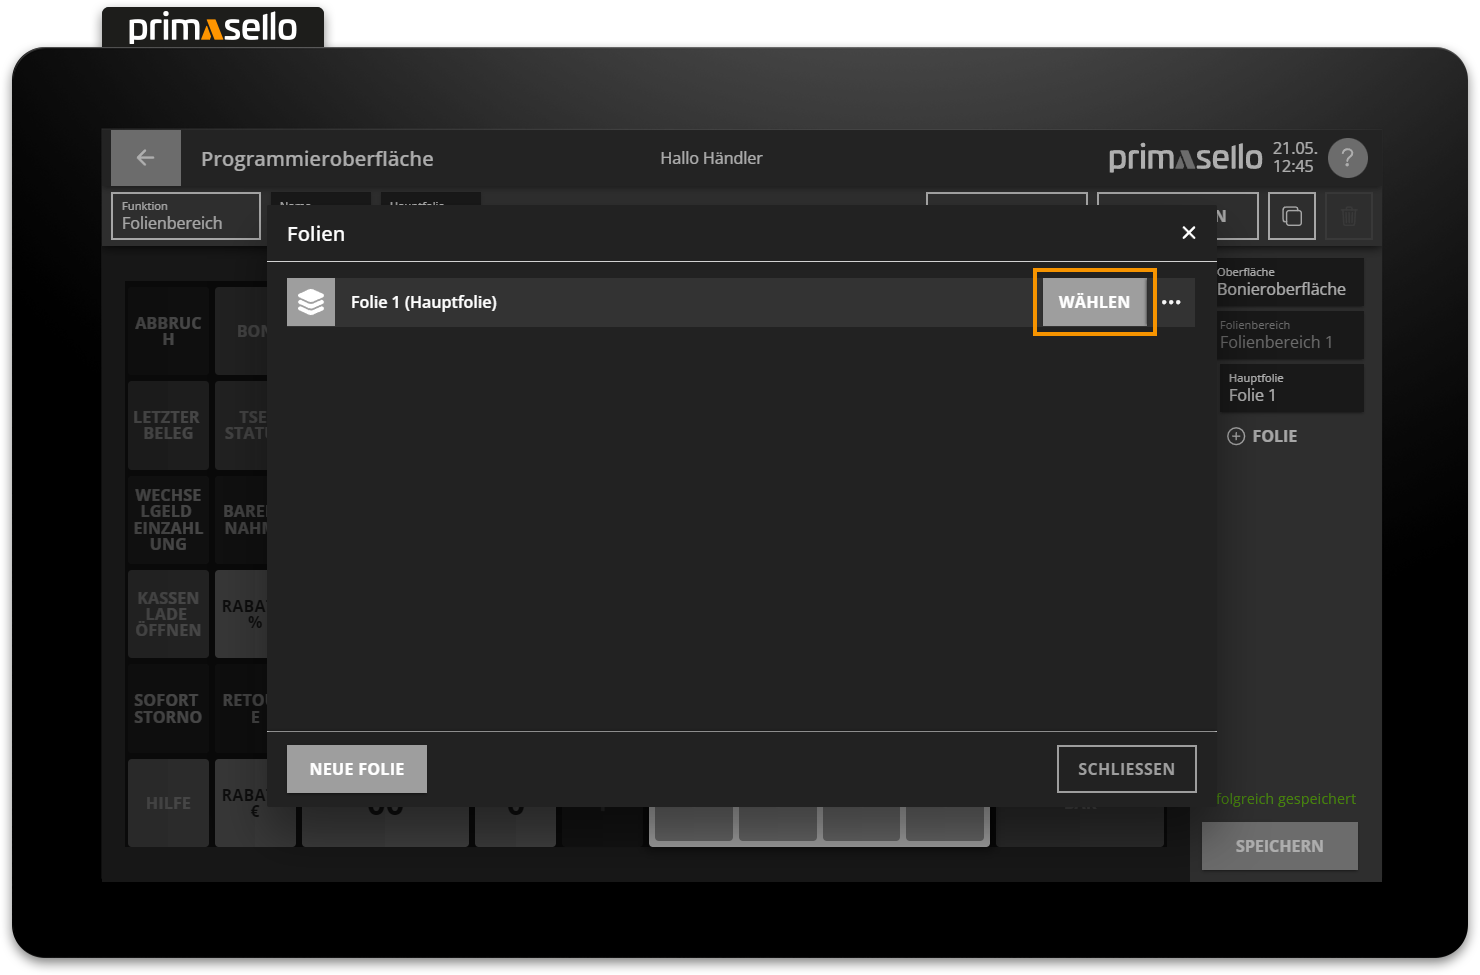
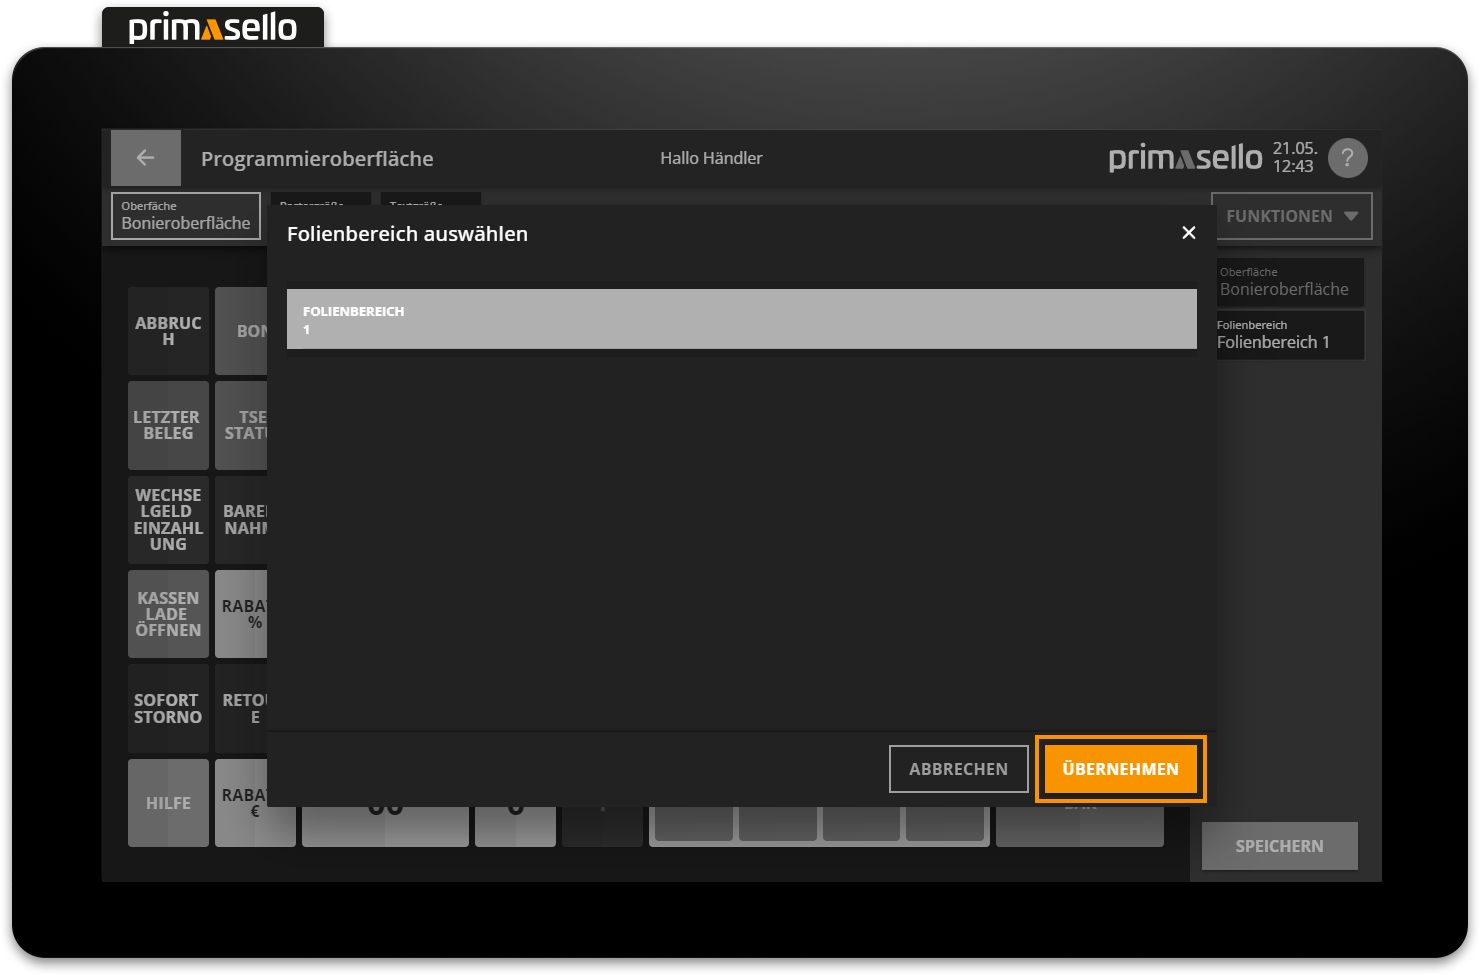
To add a new layer to the layer area, it has to be selected first. The layer area is highlighted in orange in the navigation bar on the right-hand side of the screen. All layers and the main layer of the respective layer area are displayed below.
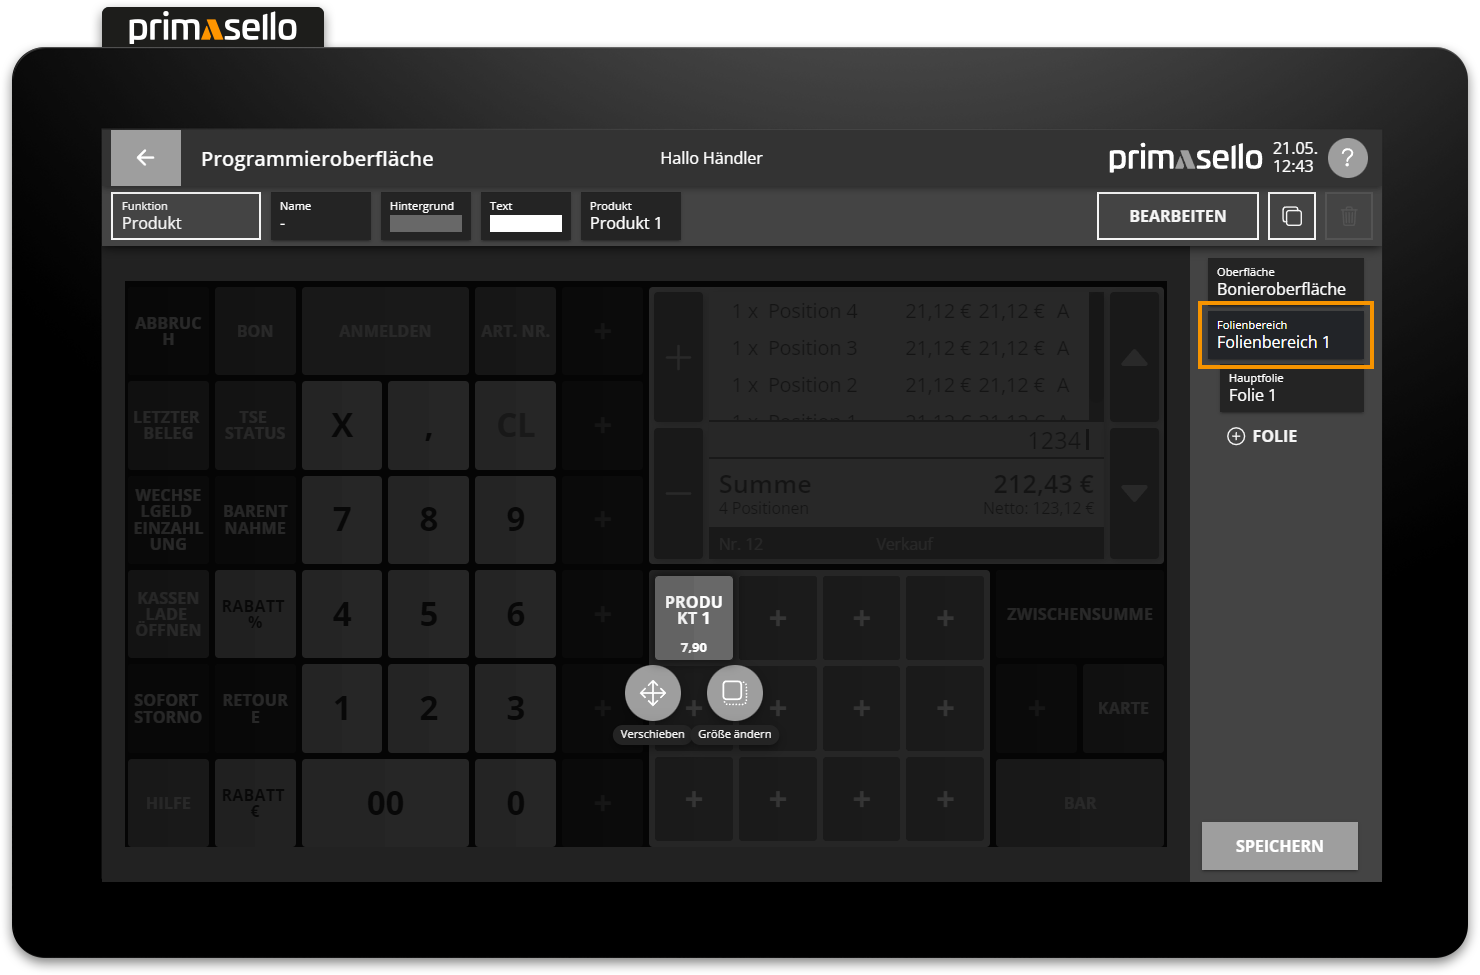
At the end of the list is the ‘Plus’ symbol with the title ‘layer’, which can be used to add new layers to the layer area.
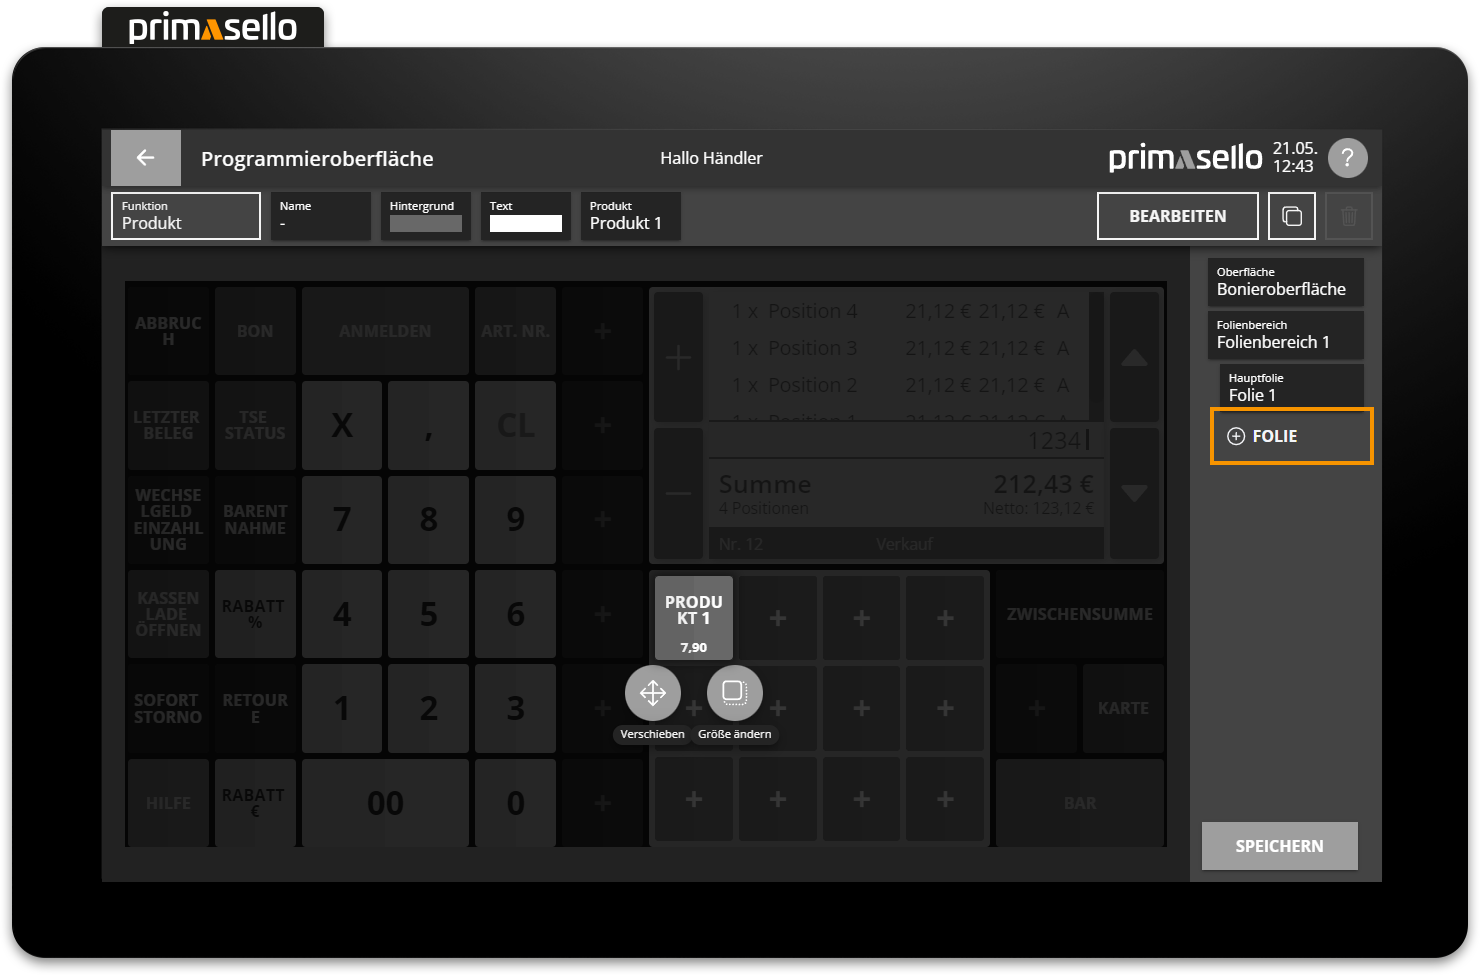
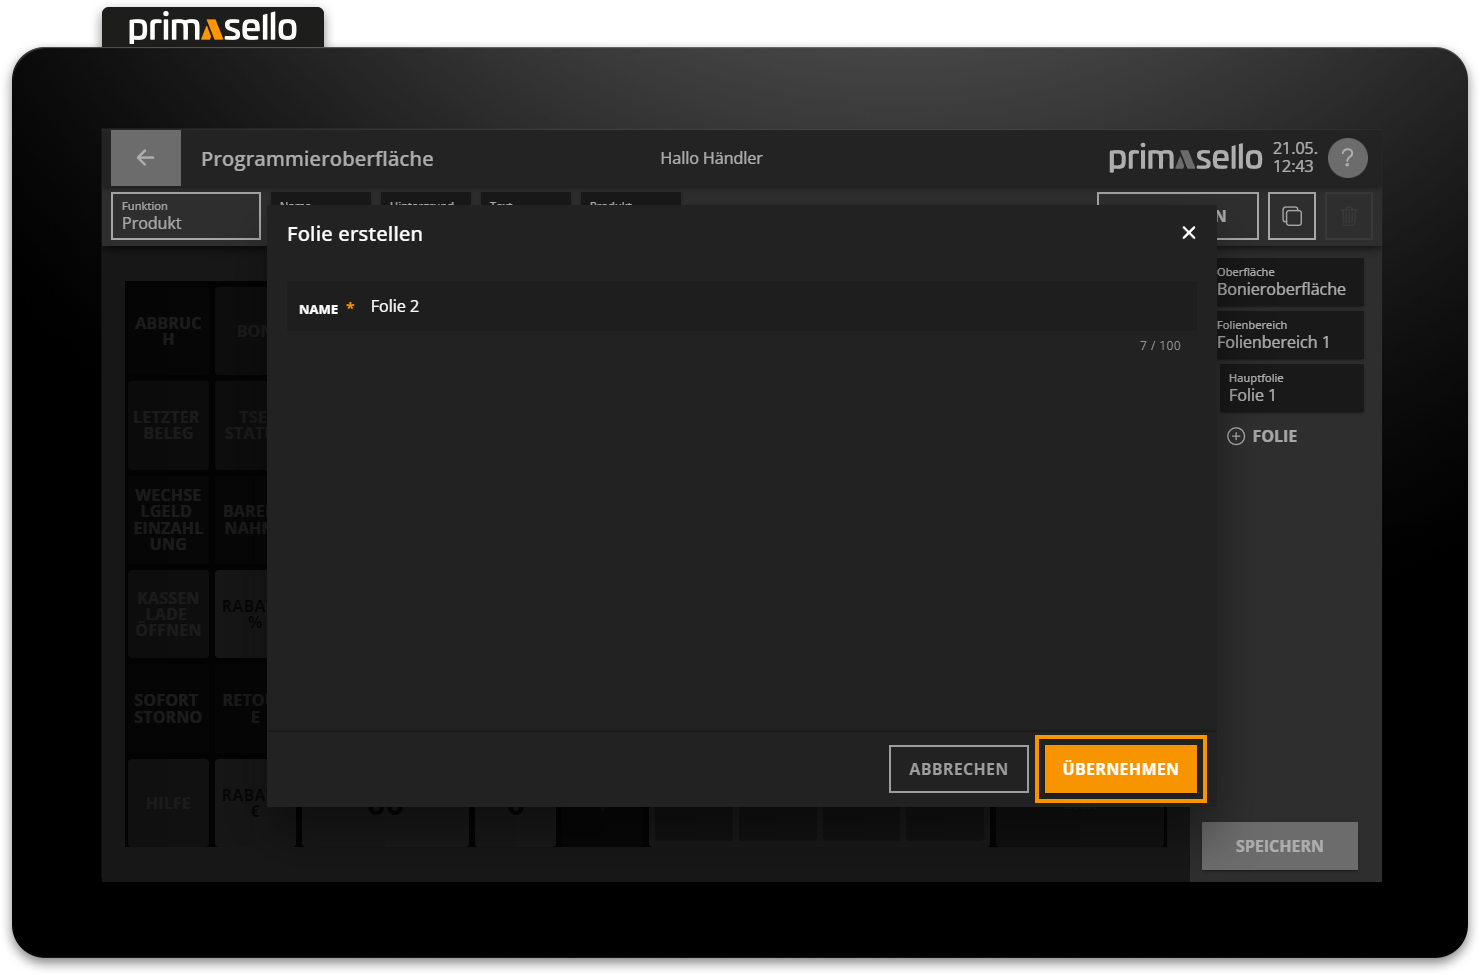
Clicking on it opens a new window where you can enter a name for the new layer.
The new layer is saved by pressing the orange ‘Apply’ button in the lower right corner of the window and is displayed in the layer area.
A new layer is placed over the main layer of a layer area using the same grid and is congruent with it. function buttons can now be placed on the free spaces in the grid as usual.
Switch between layers
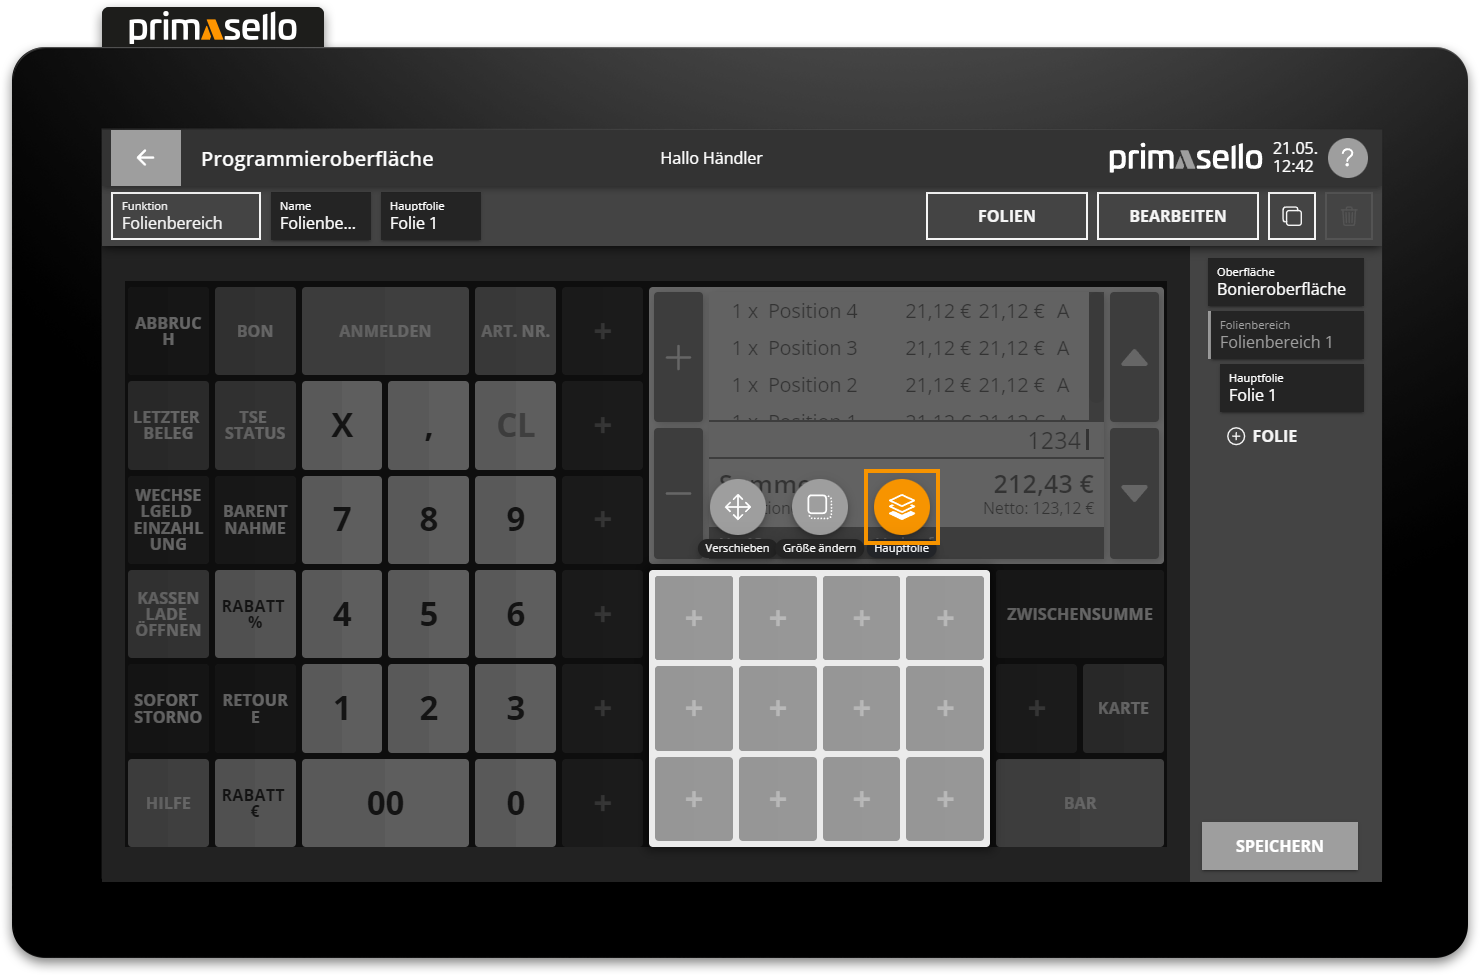
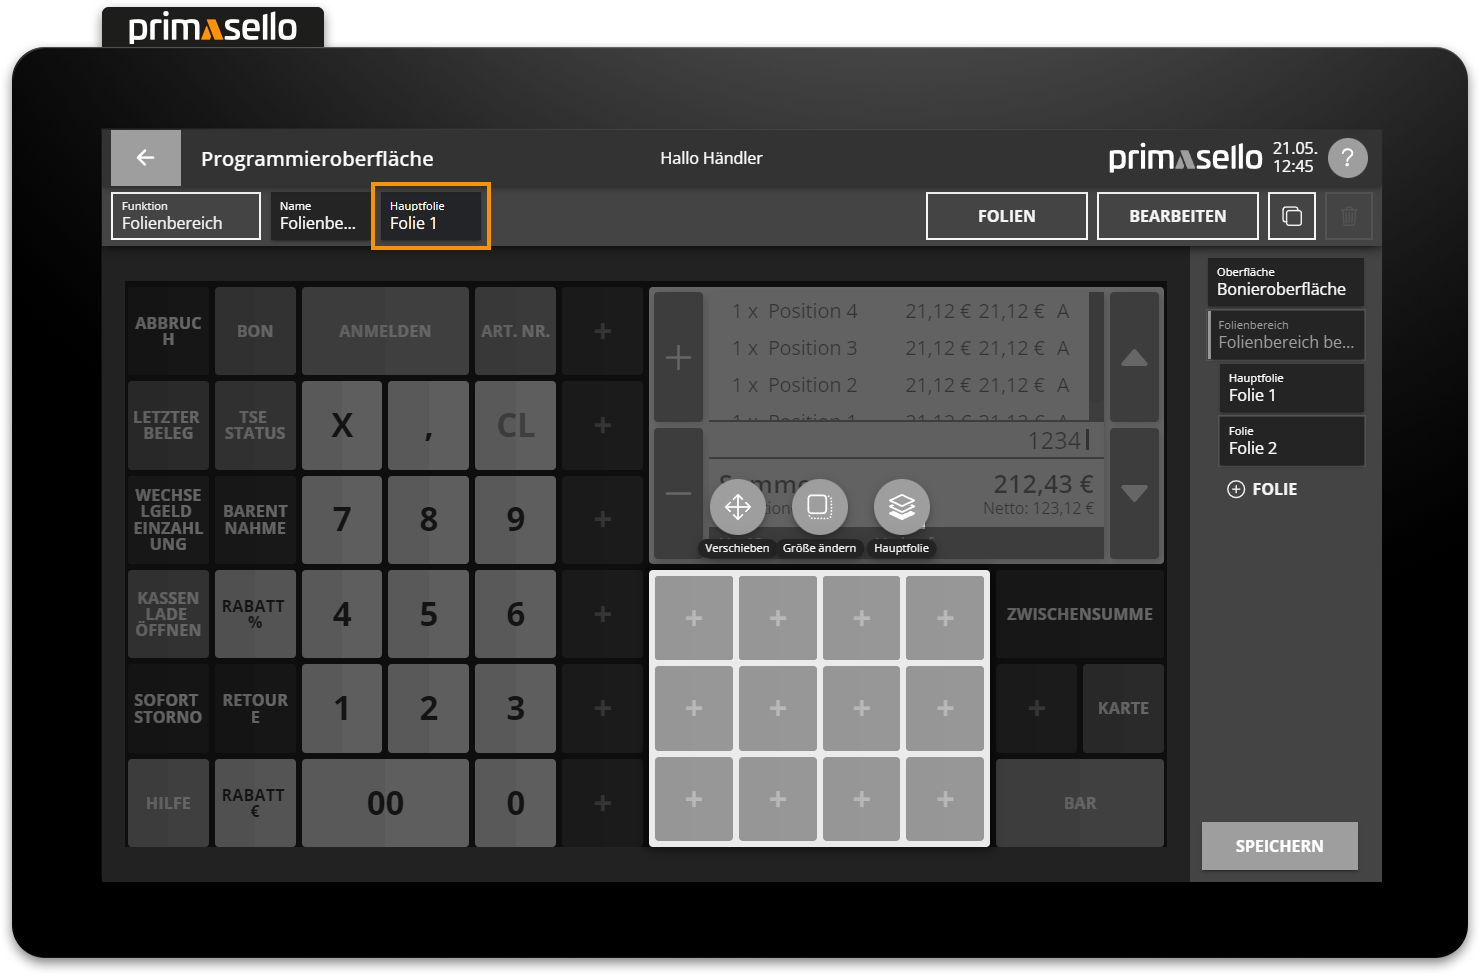
If a layer area is selected on the programming interface, you will find yourself in the editing menu for that layer area.
The ‘Main layer’ button is located in the button menu of the layer area. Clicking on this button takes you to the editing menu for the main layer, where you can edit the functions on it.
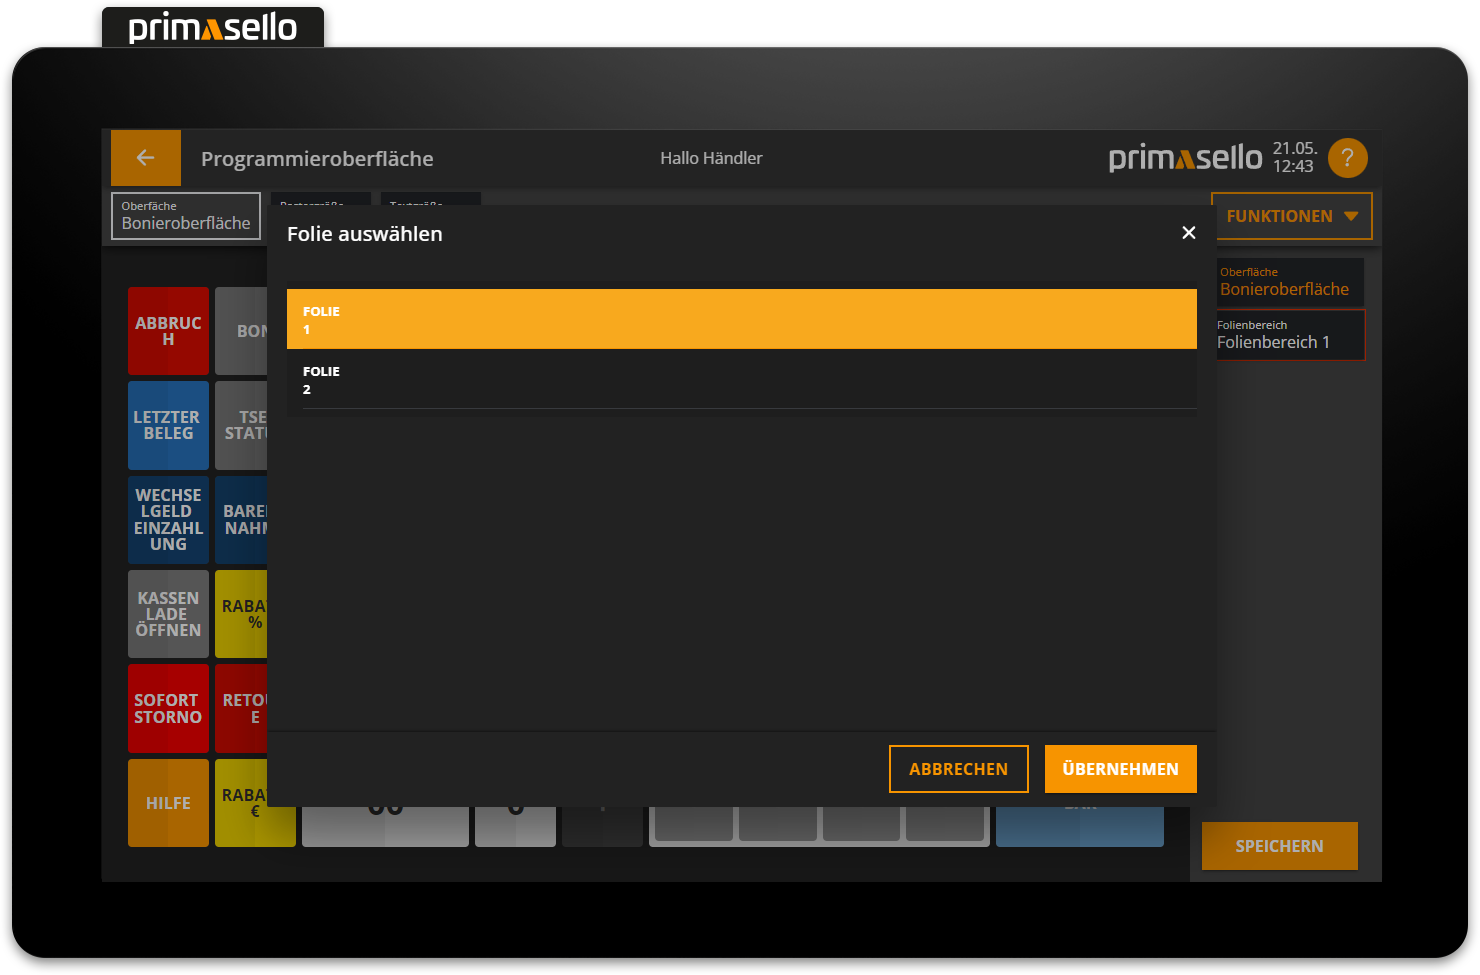
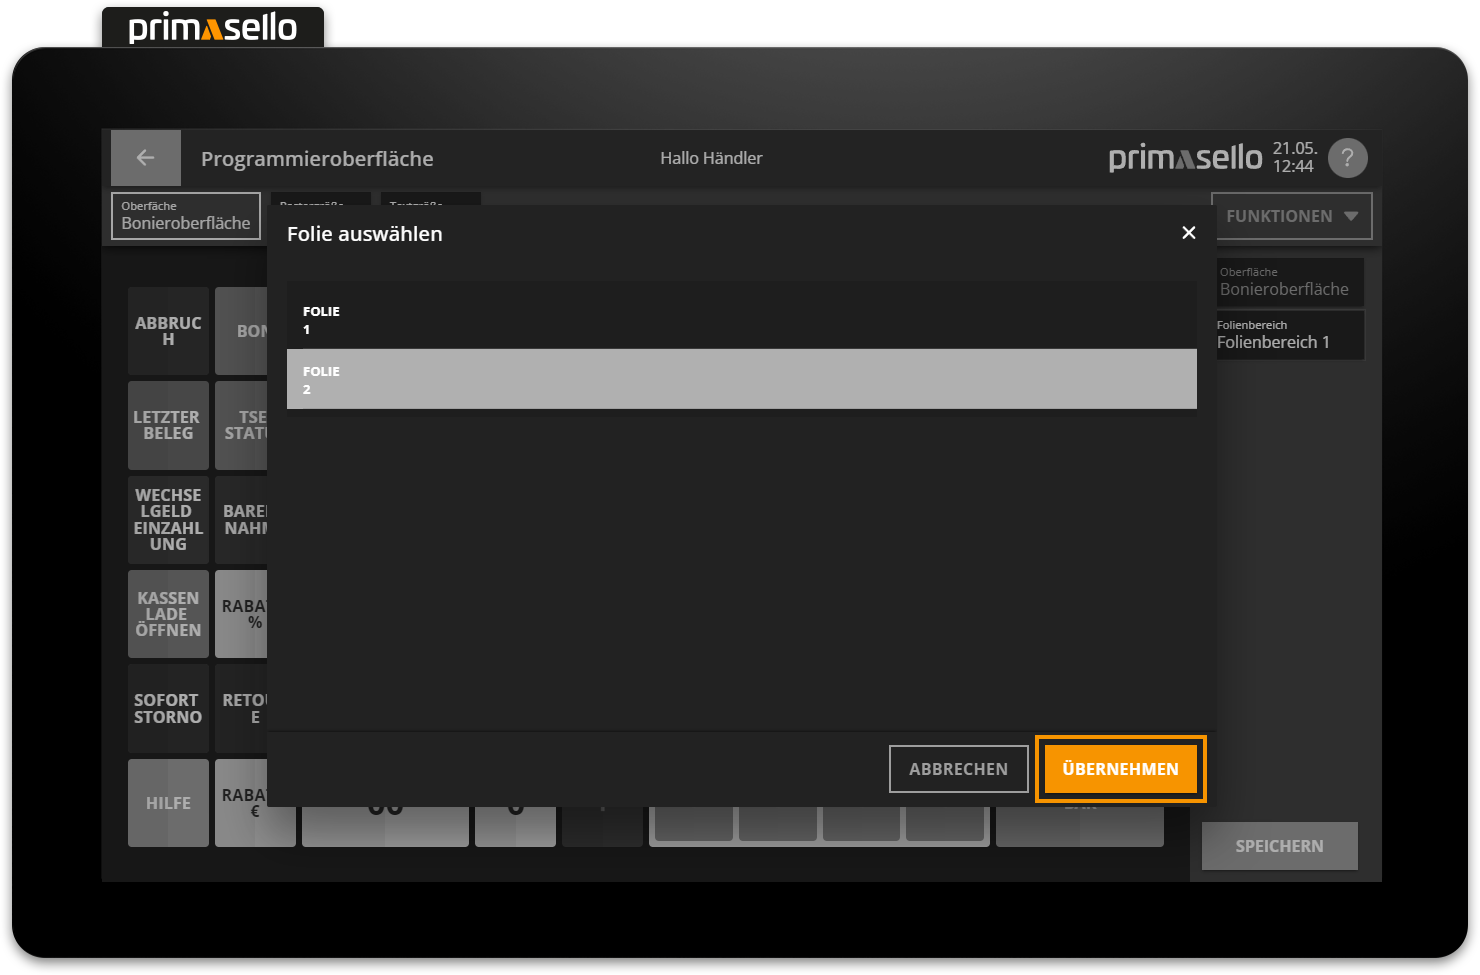
If you want to switch to another layer in order to edit it, you can click on the box with the desired layer in the navigation bar on the right-hand side of the screen.
When one of the layers in the list is pressed, the layer area changes to that layer and the function buttons on it can be edited.
Main layer
When placing a layer area, a new layer is automatically created, which is used as the main layer of the layer area. The main layer is the layer that is always displayed in the layer area.
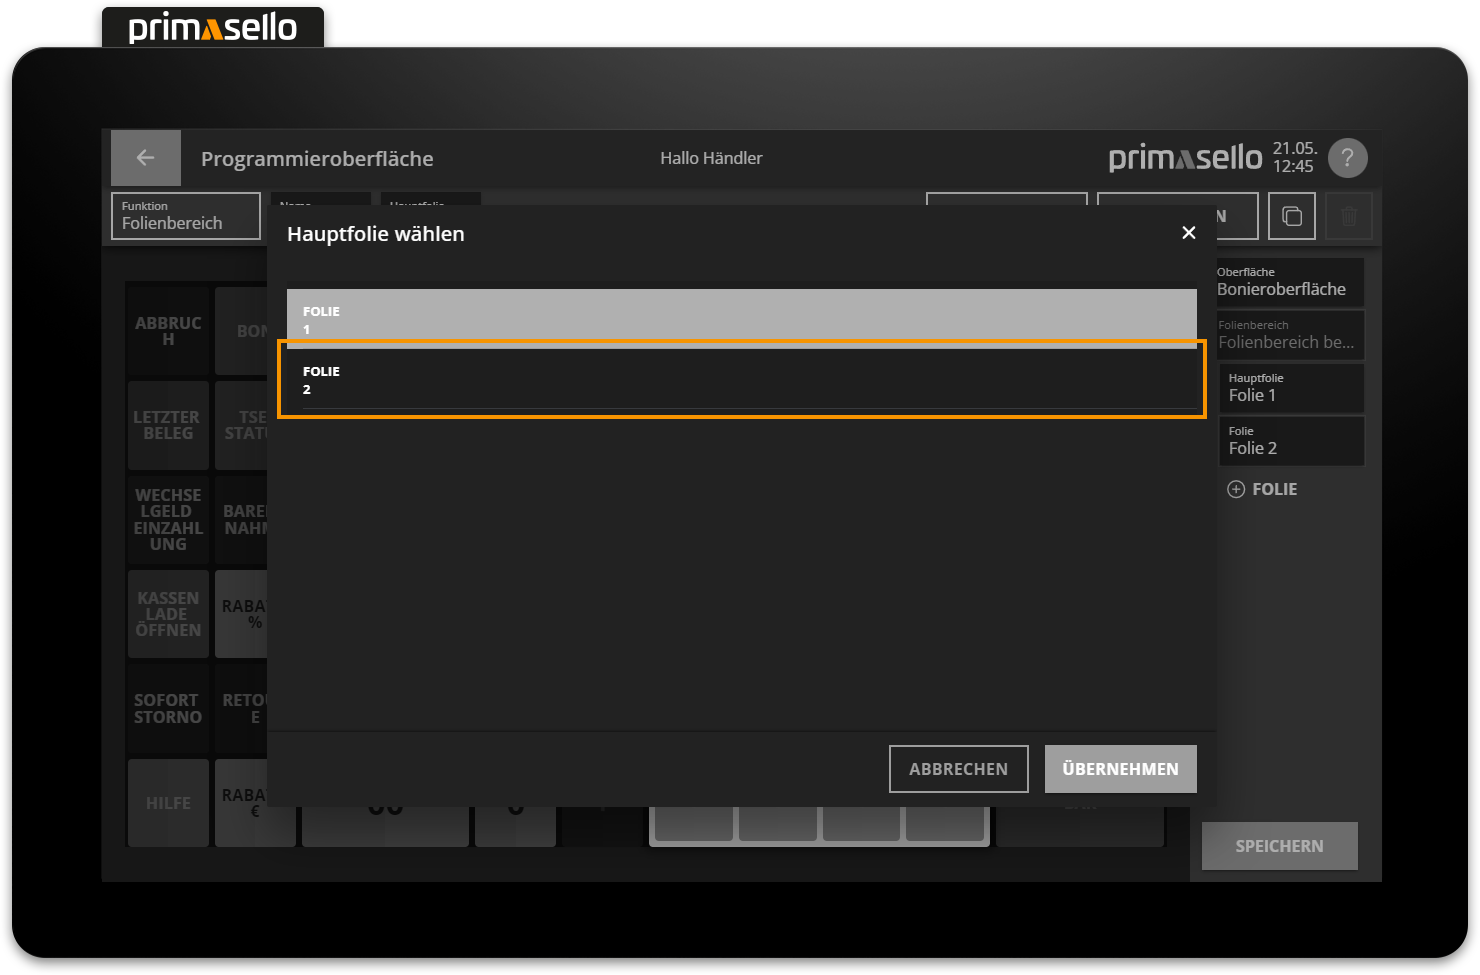
To define a different layer as the main layer, the desired layer area has to be selected.
In the editing bar at the top of the screen, next to the setting for the name of the layer area, there is a field titled ‘Main layer’.
Pressing this field opens a new window in which all layers in the layer area are displayed in a list.
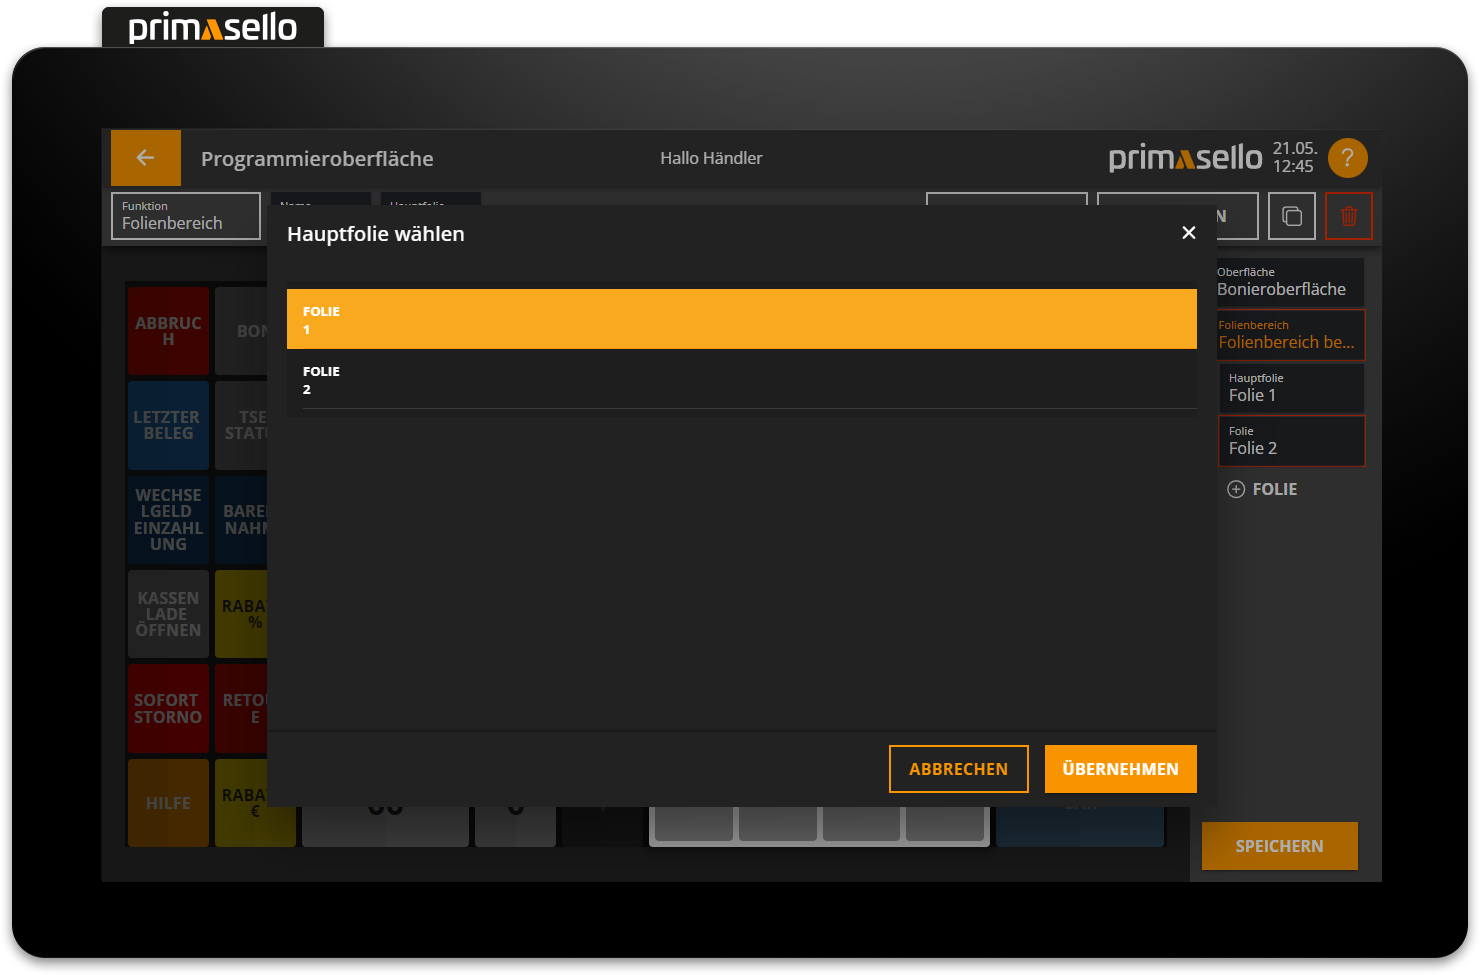
The layer that is to be defined as the new main layer can be selected by clicking on it and saved by clicking the orange ‘Apply’ button in the lower right corner.
View on the register interface
The register interface always displays the main layer set for a particular area.
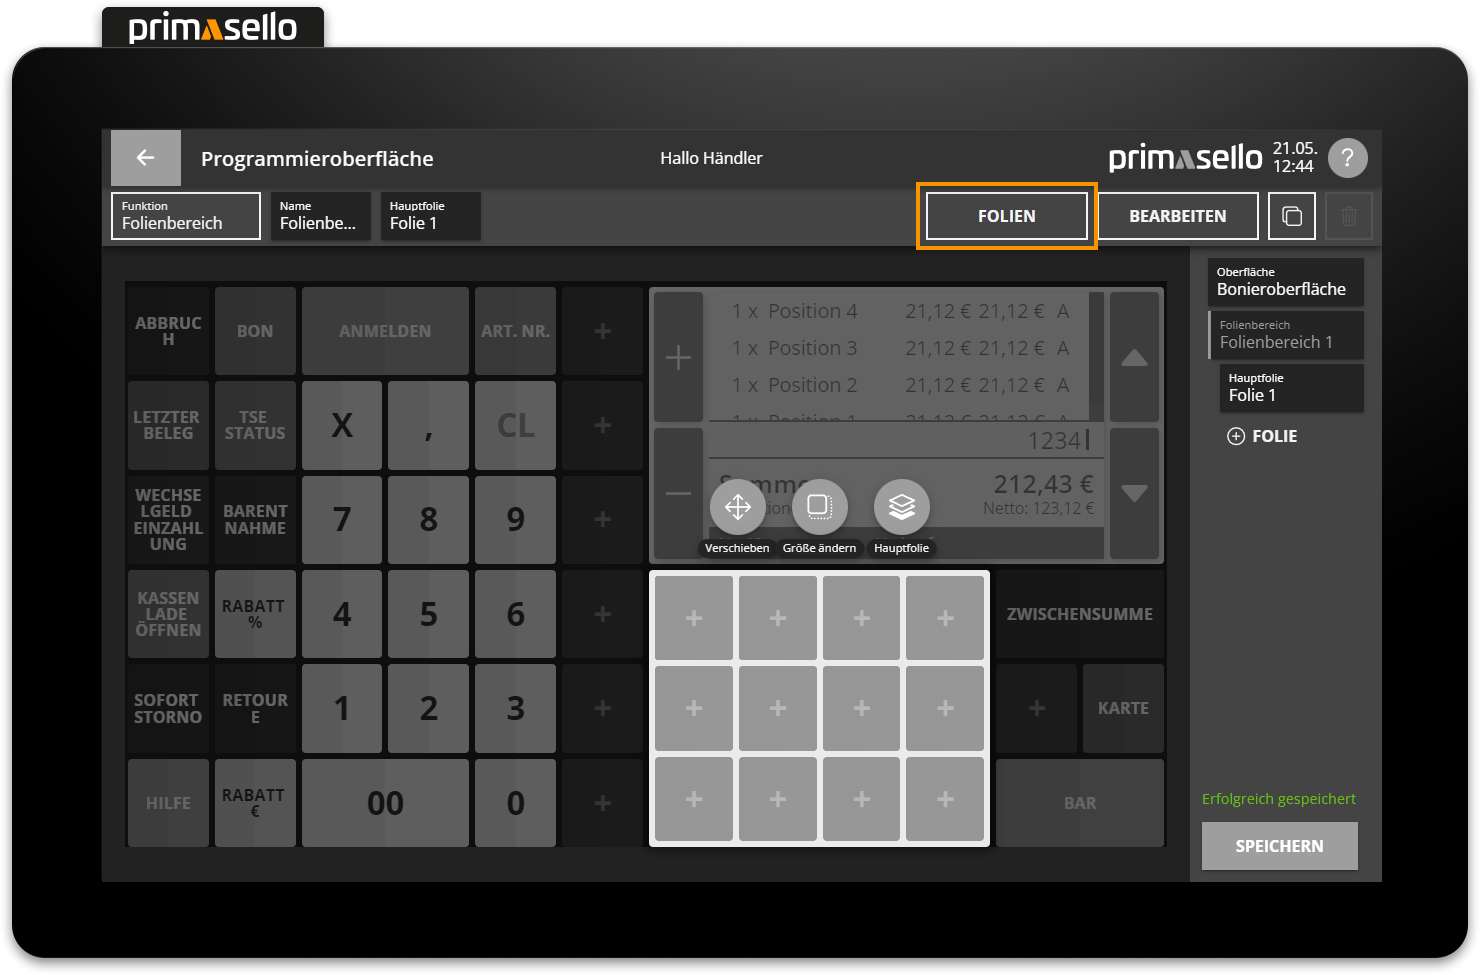
Edit / delete layers
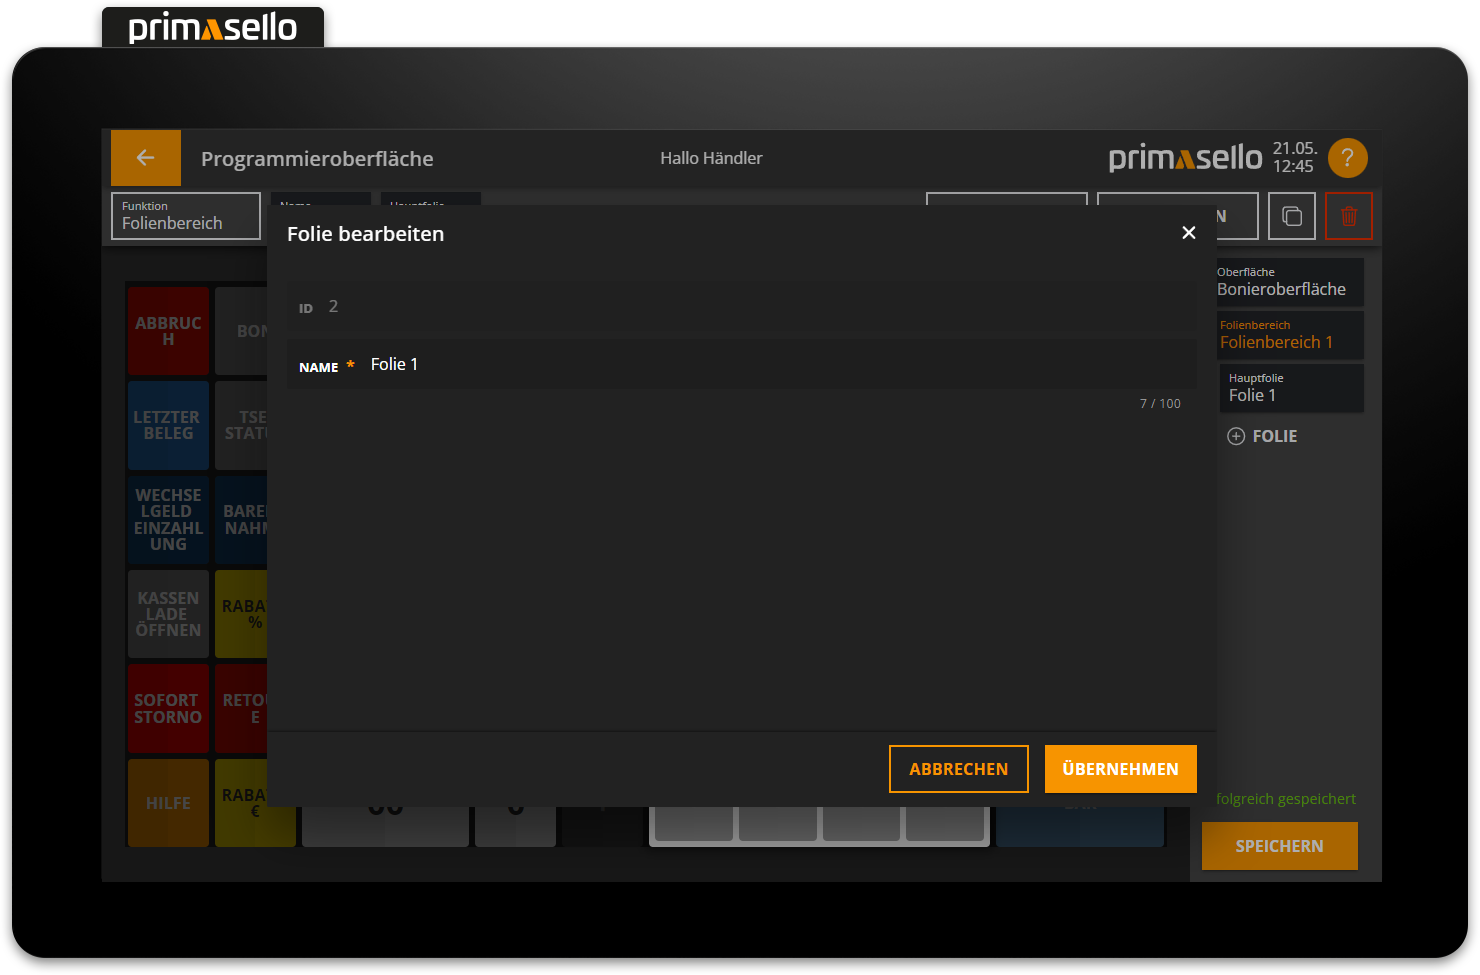
All layers in a layer area can be edited at any time by selecting the relevant layer area and pressing the ‘Layer’ button at the top of the editing bar.
A new window opens, displaying the layers contained in the layer area as a list.
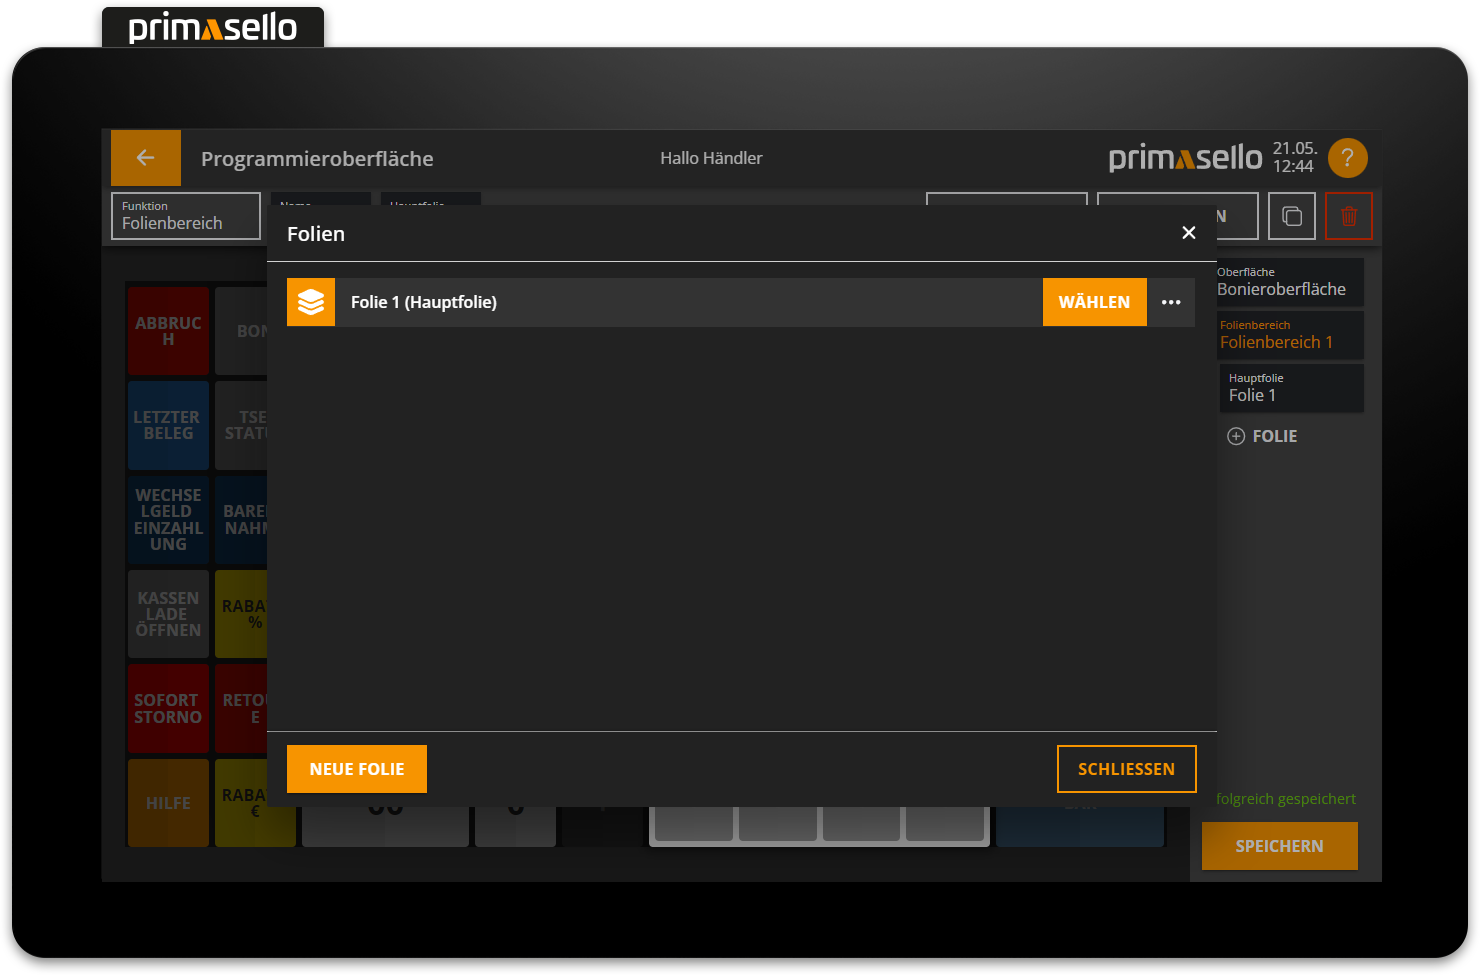
In the lower left corner is the orange ‘New Layer’ button, which can be used to create new layers.

If you press the orange ‘Select’ button at the end of a line in the list, the respective layer is selected for editing and the window is closed.
To edit a layer, press the icon with the three dots at the end of a line. A new window will open where you can change the name of the layer and save it by pressing the orange ‘Apply’ button in the lower right corner.

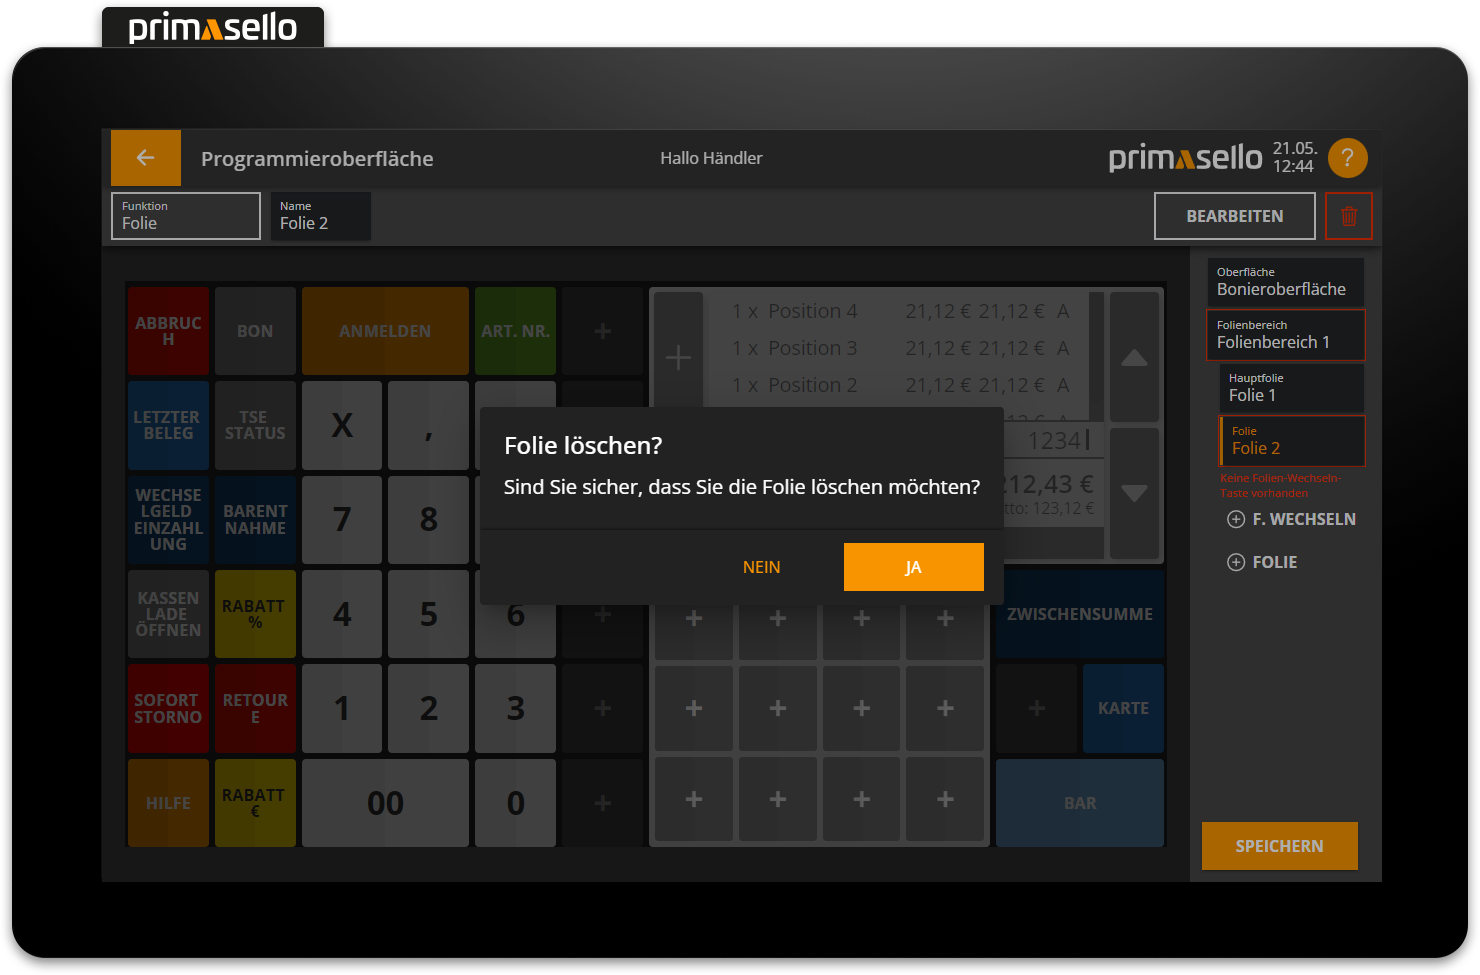
To delete the layer, you can press the red 'bin' button on the far right of the editing bar at any time.
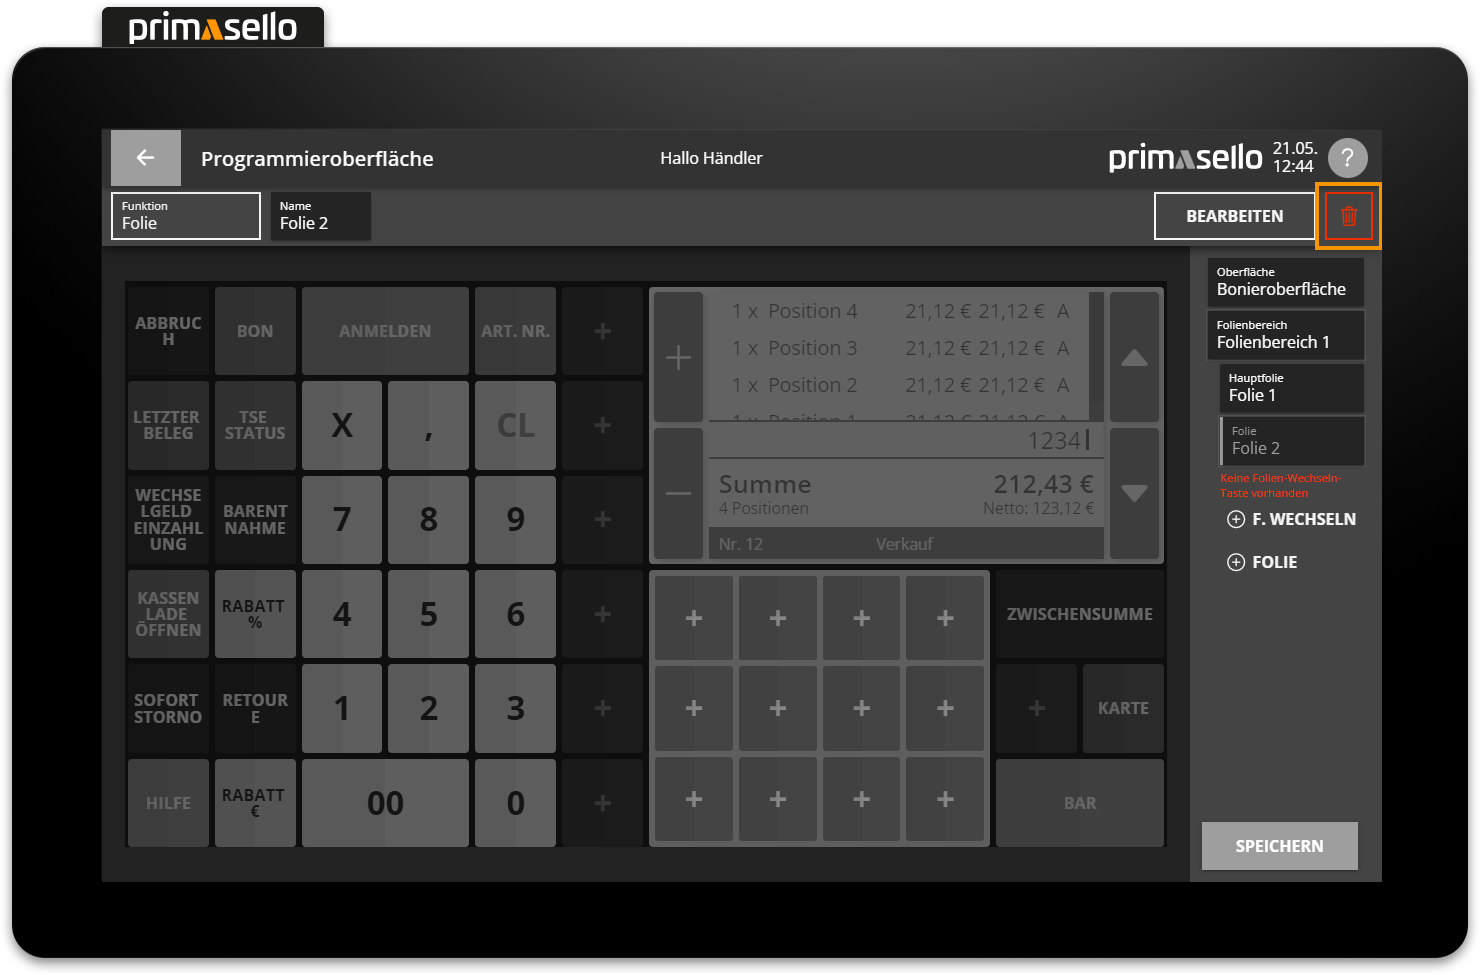
A security prompt appears, which can be confirmed with the ‘Yes’ button or cancelled with the ‘No’ button to prevent the layer from being deleted. The main layer of a layer area cannot be deleted. To delete the main layer, another layer has to be defined as the main layer.
Delete layer
If a layer is deleted, all function buttons contained therein will also be deleted!
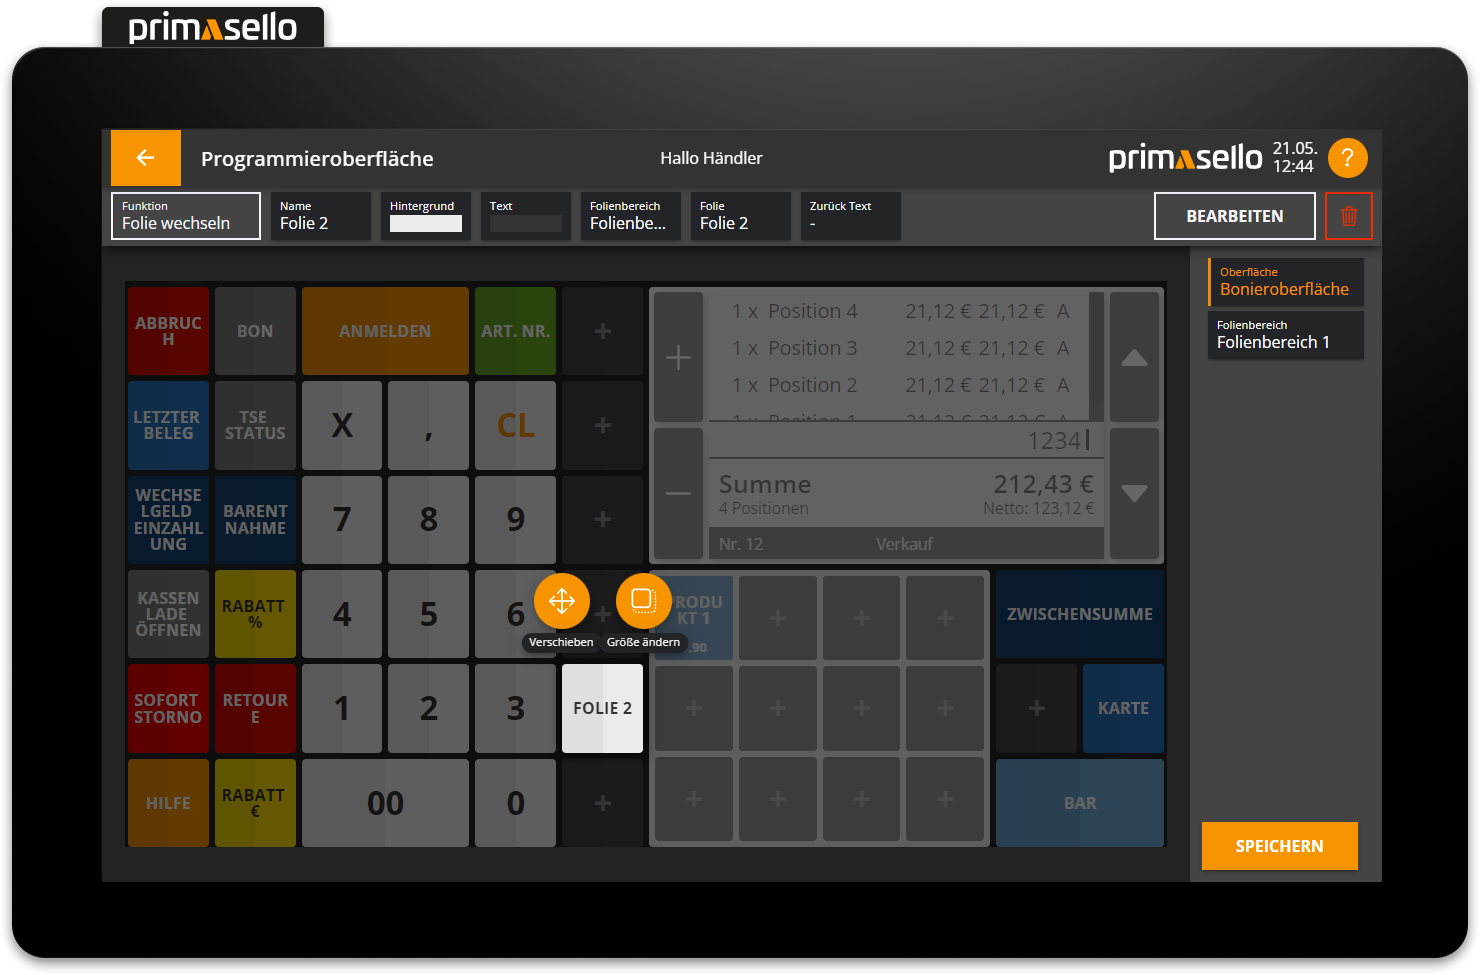
Function: Change layer
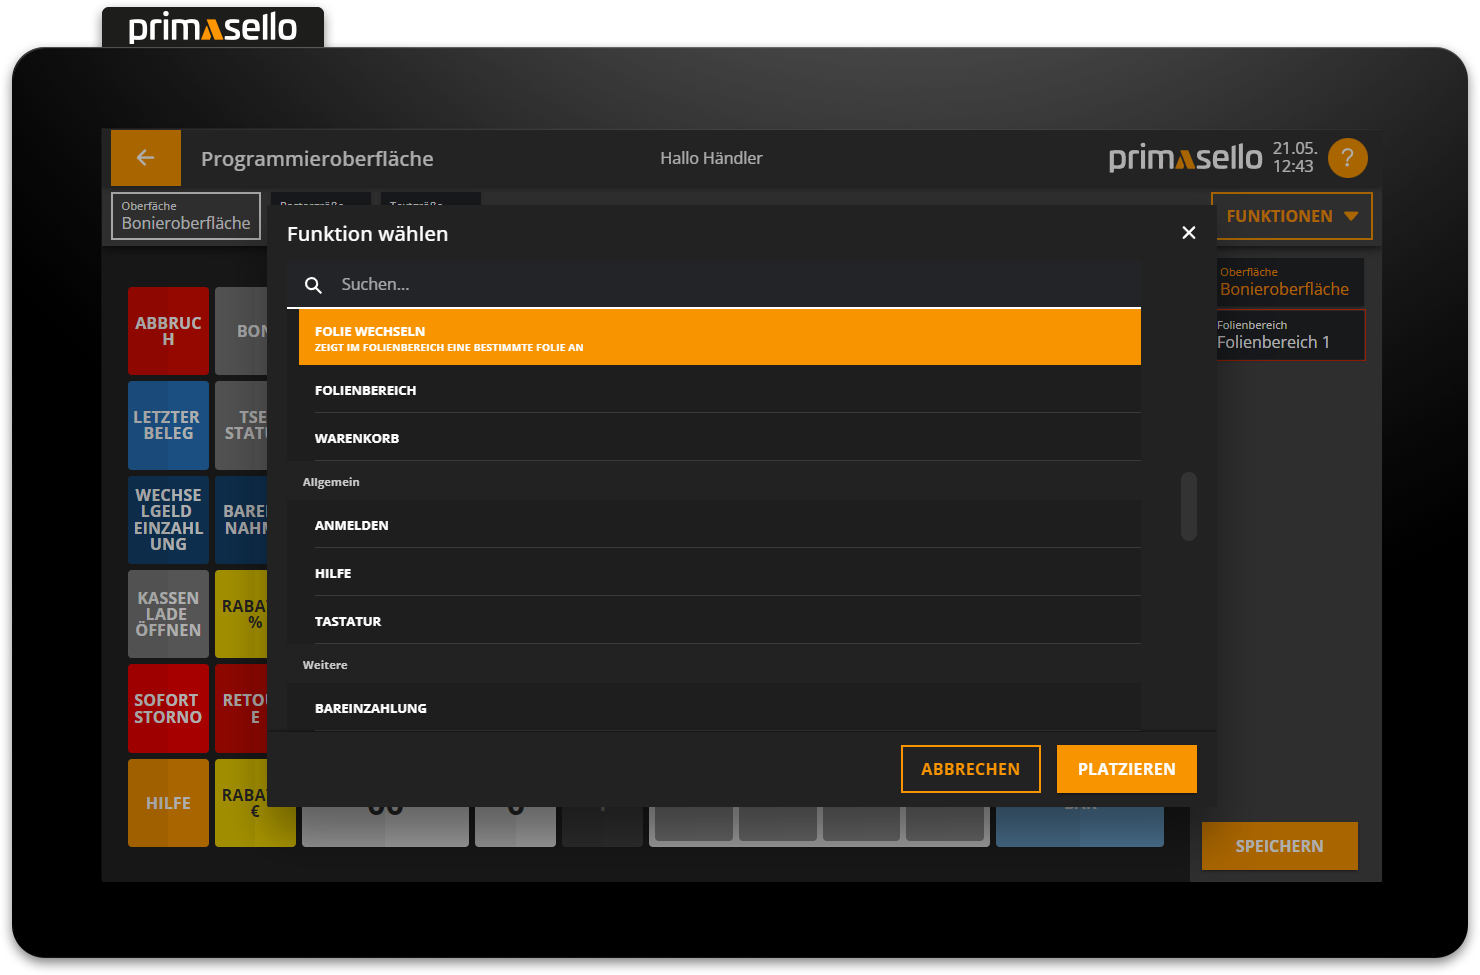
Once all layer areas have been created and the layers they contain have been filled with function buttons, a function has to be added to the programming interface that makes it possible to show and hide layers. To do this, the ‘Change layer’ function from the function list can be placed on the grid as a button.
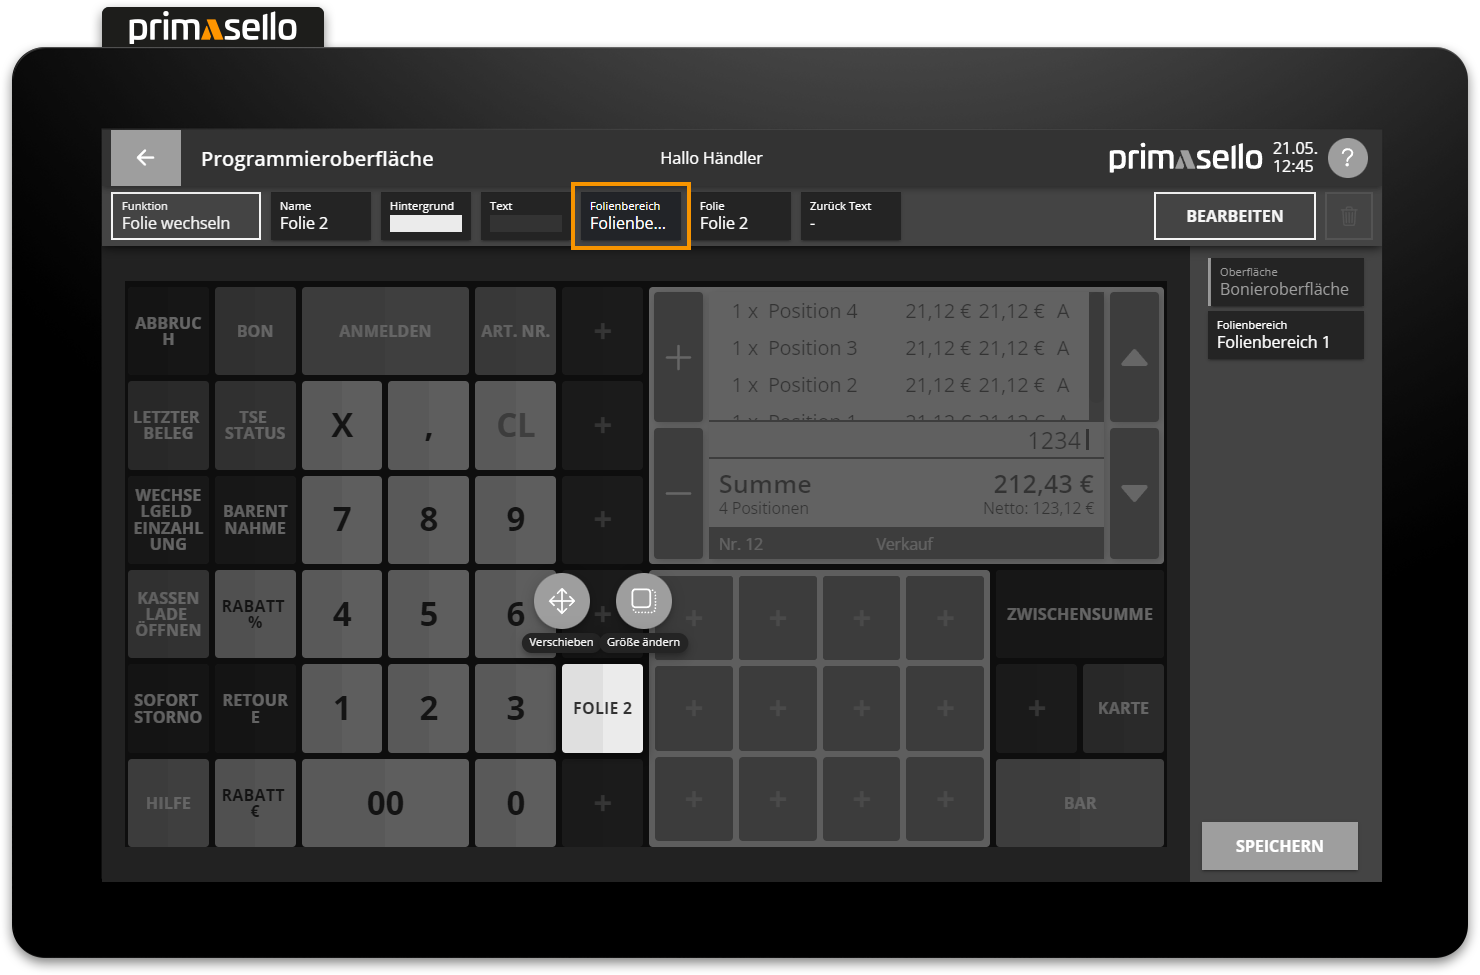
Once the 'Change layer' function has been placed, the button can be edited, moved, enlarged, deleted, and adjusted as usual.
In addition, there are two additional properties to set in the editing bar at the top: layer area and layer. Clicking on the ‘layer area’ field opens a new window in which you can select the layer area that the ‘Change layer’ button should affect.
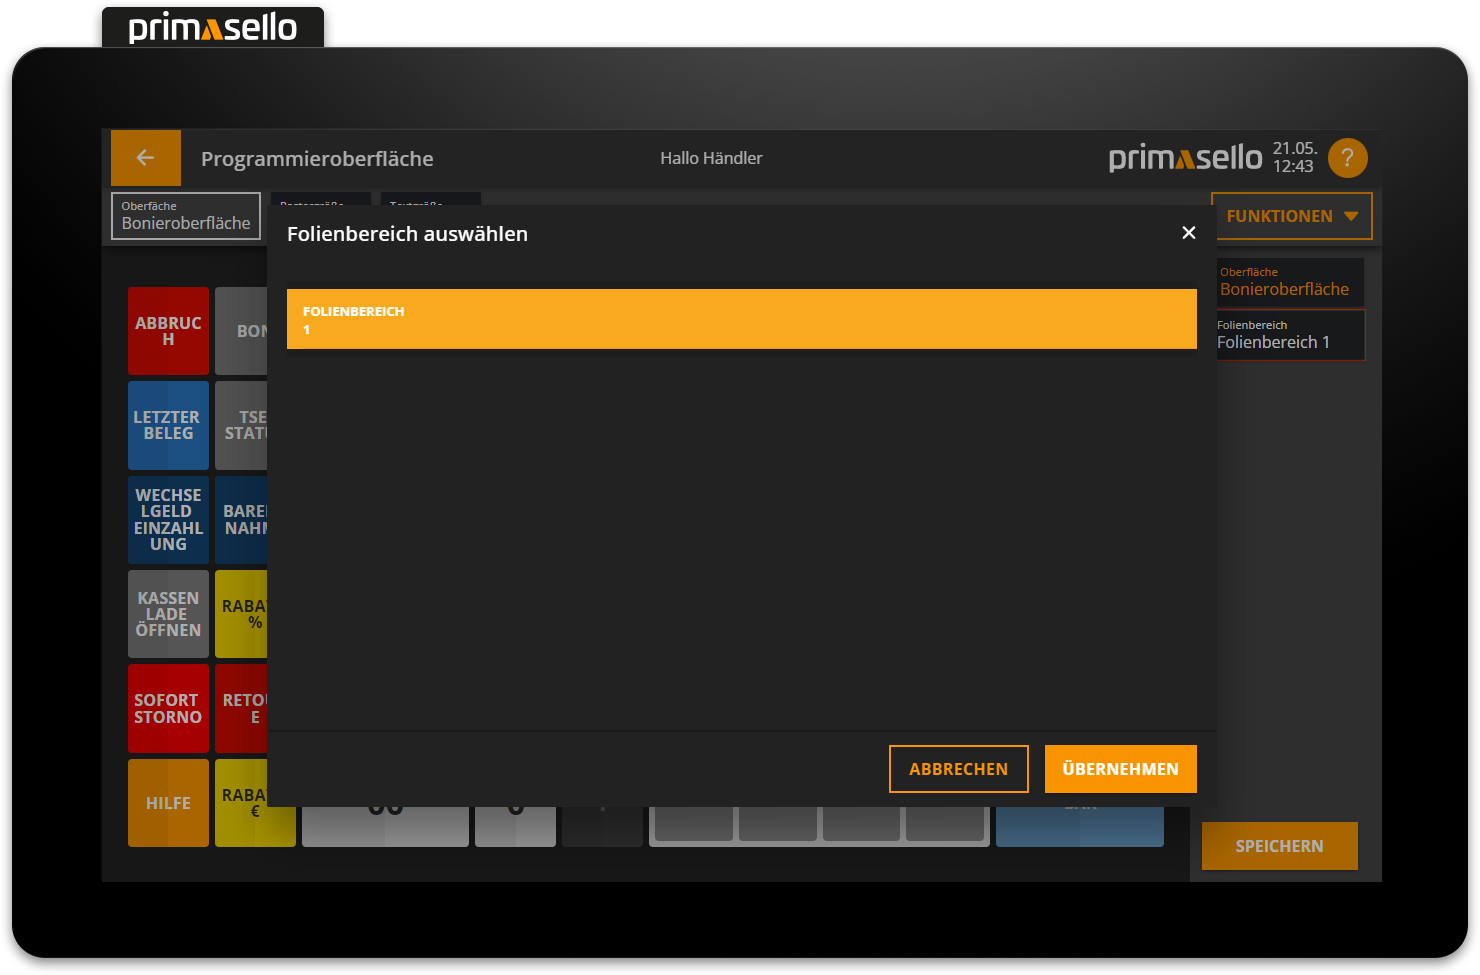
To save your selection, press the orange ‘Apply’ button in the bottom right corner.
Then you can press the 'layer' field.

A window opens with a list of all layers available in the selected layer area.
To select which layer within the layer area the ‘Change layer’ button should switch to, press the corresponding entry in the list and save it by pressing the orange ‘Apply’ button.
This closes the window and automatically changes the name of the 'Change layer' button to the name of the selected layer.
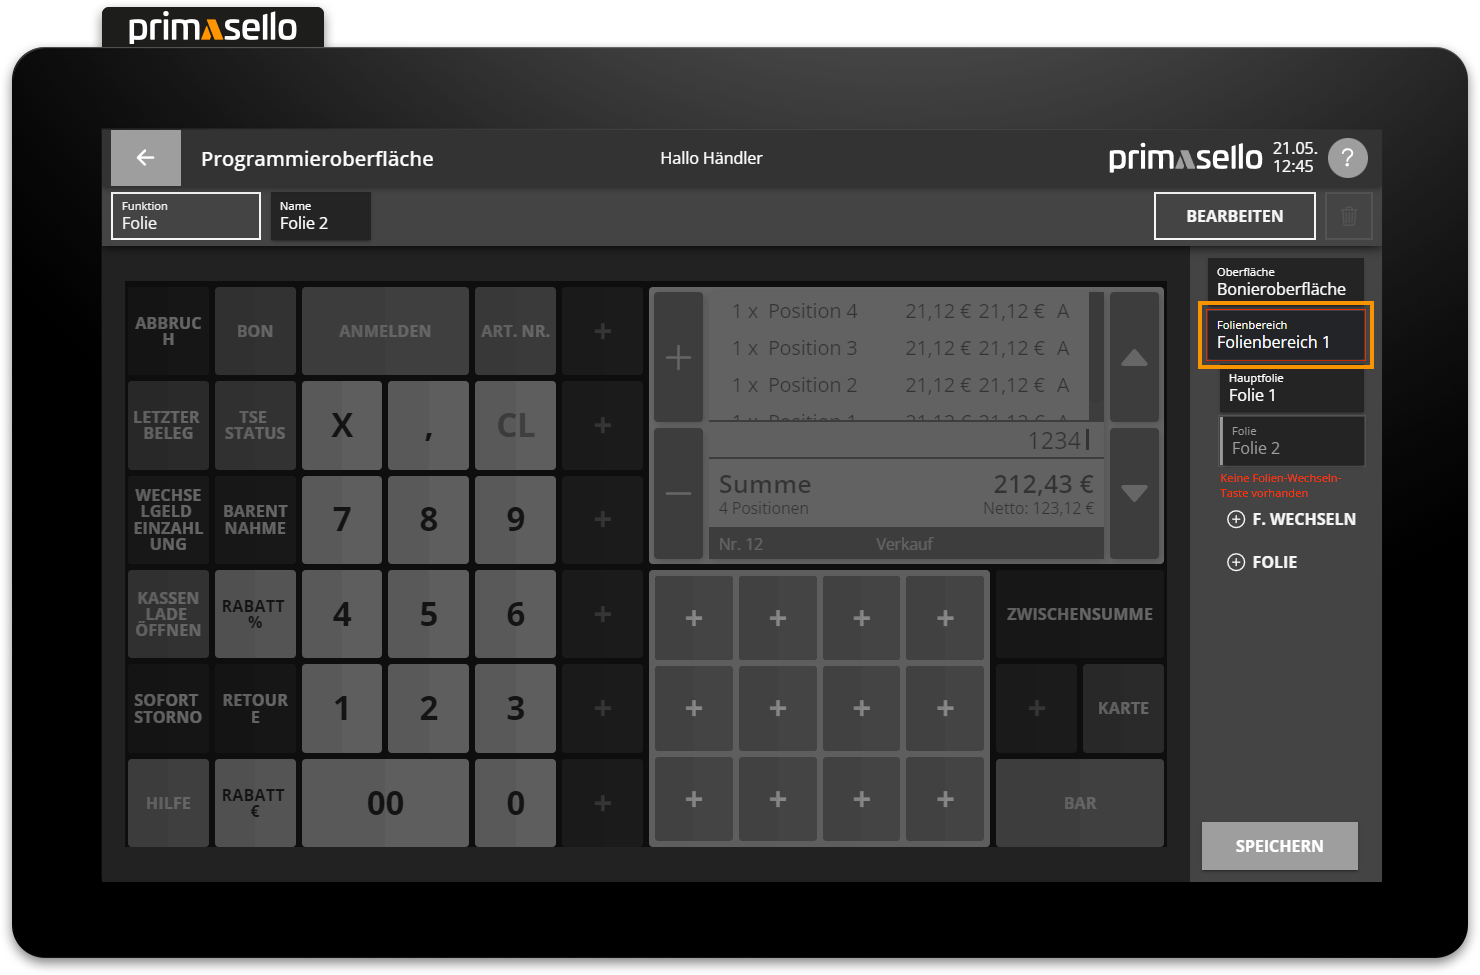
Automatically create ‘Change layer’ button
If a new layer is added in the navigation bar on the right-hand side of the screen, it is immediately outlined in red and an error message appears below it indicating that the ‘Change layers’ button is missing for this layer.
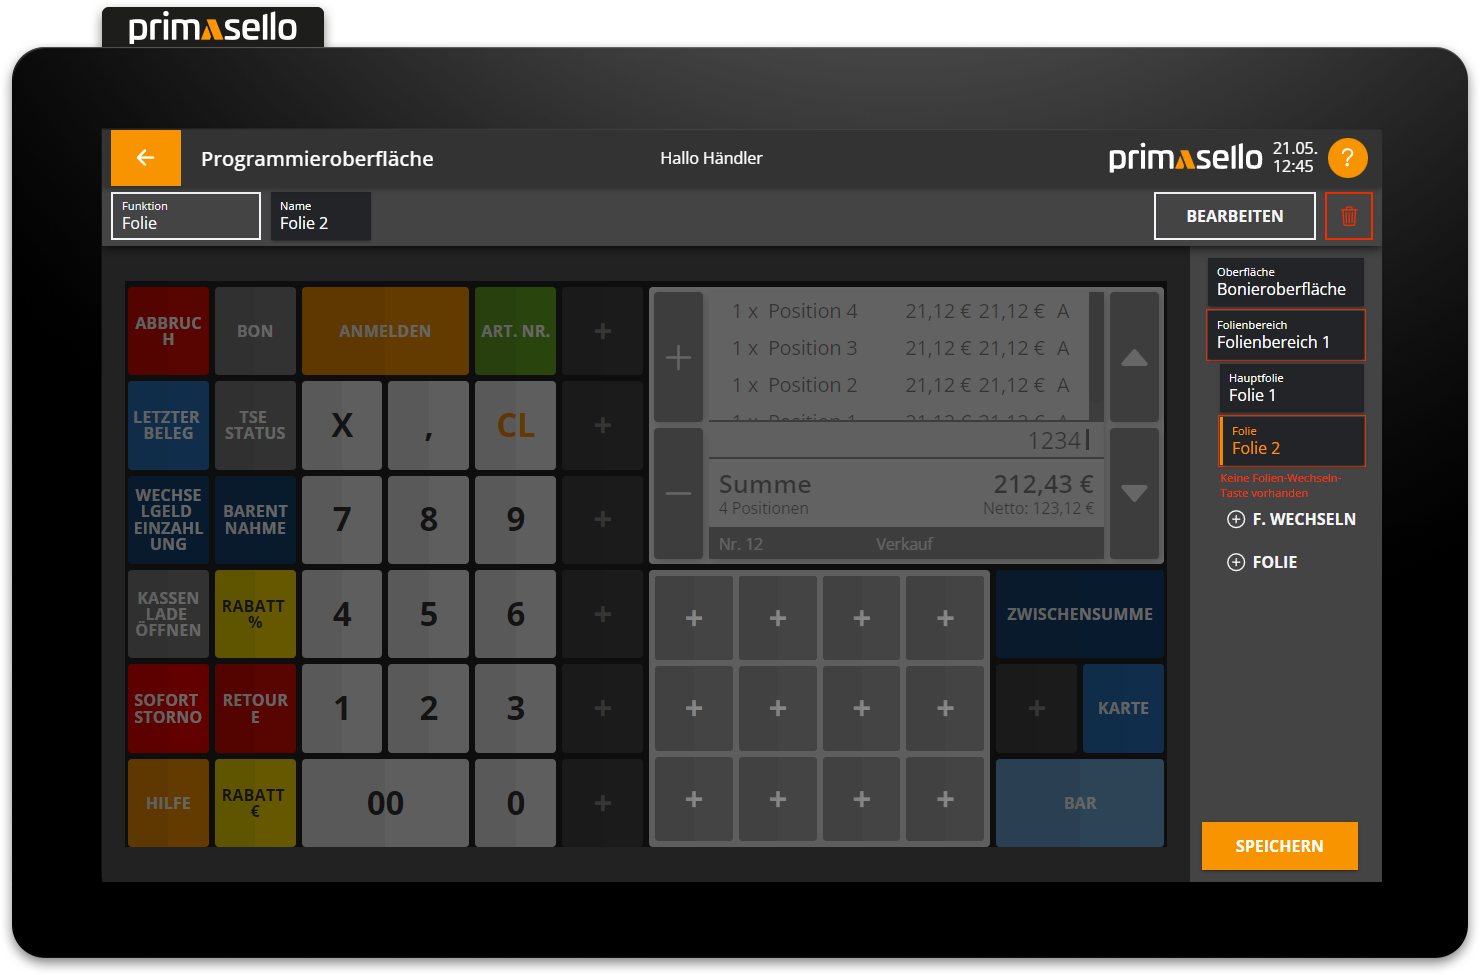
Below this is a ‘plus’ symbol labelled ‘Change L.’. Pressing this places a new ‘Change layer’ button on the programming interface. The layer area and layer are already preselected.
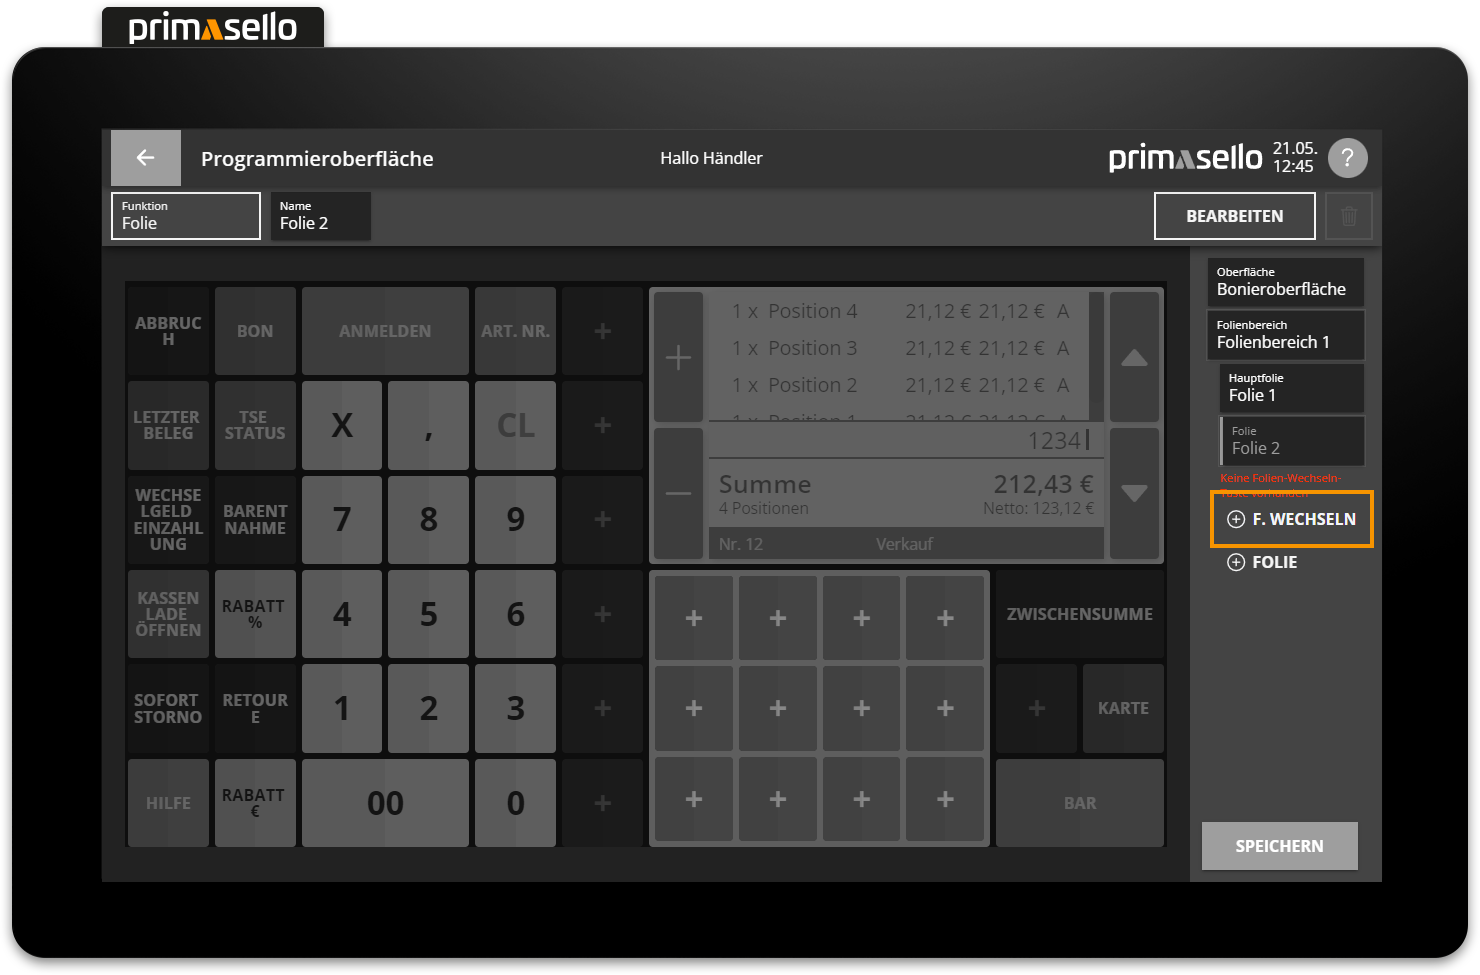
This allows you to quickly add the “Change layer” button for new layers and ensure not to forget it.
Behaviour on the register interface
When a user presses the ‘Change Layer’ button on the register interface, the set layer area changes to the selected layer and the main layer is hidden. In addition, the ‘Change layer’ button automatically changes its appearance and displays an arrow pointing to the left and the text “Back”. If the ‘Change layer’ button (or now ‘Back’ button) is pressed again, the layer area returns to the main layer.