X380 PRO
Before you start using your primasello cash register, please read the quick start guide provided carefully. Alternatively, you can also find all the important information in the Getting Started chapter.
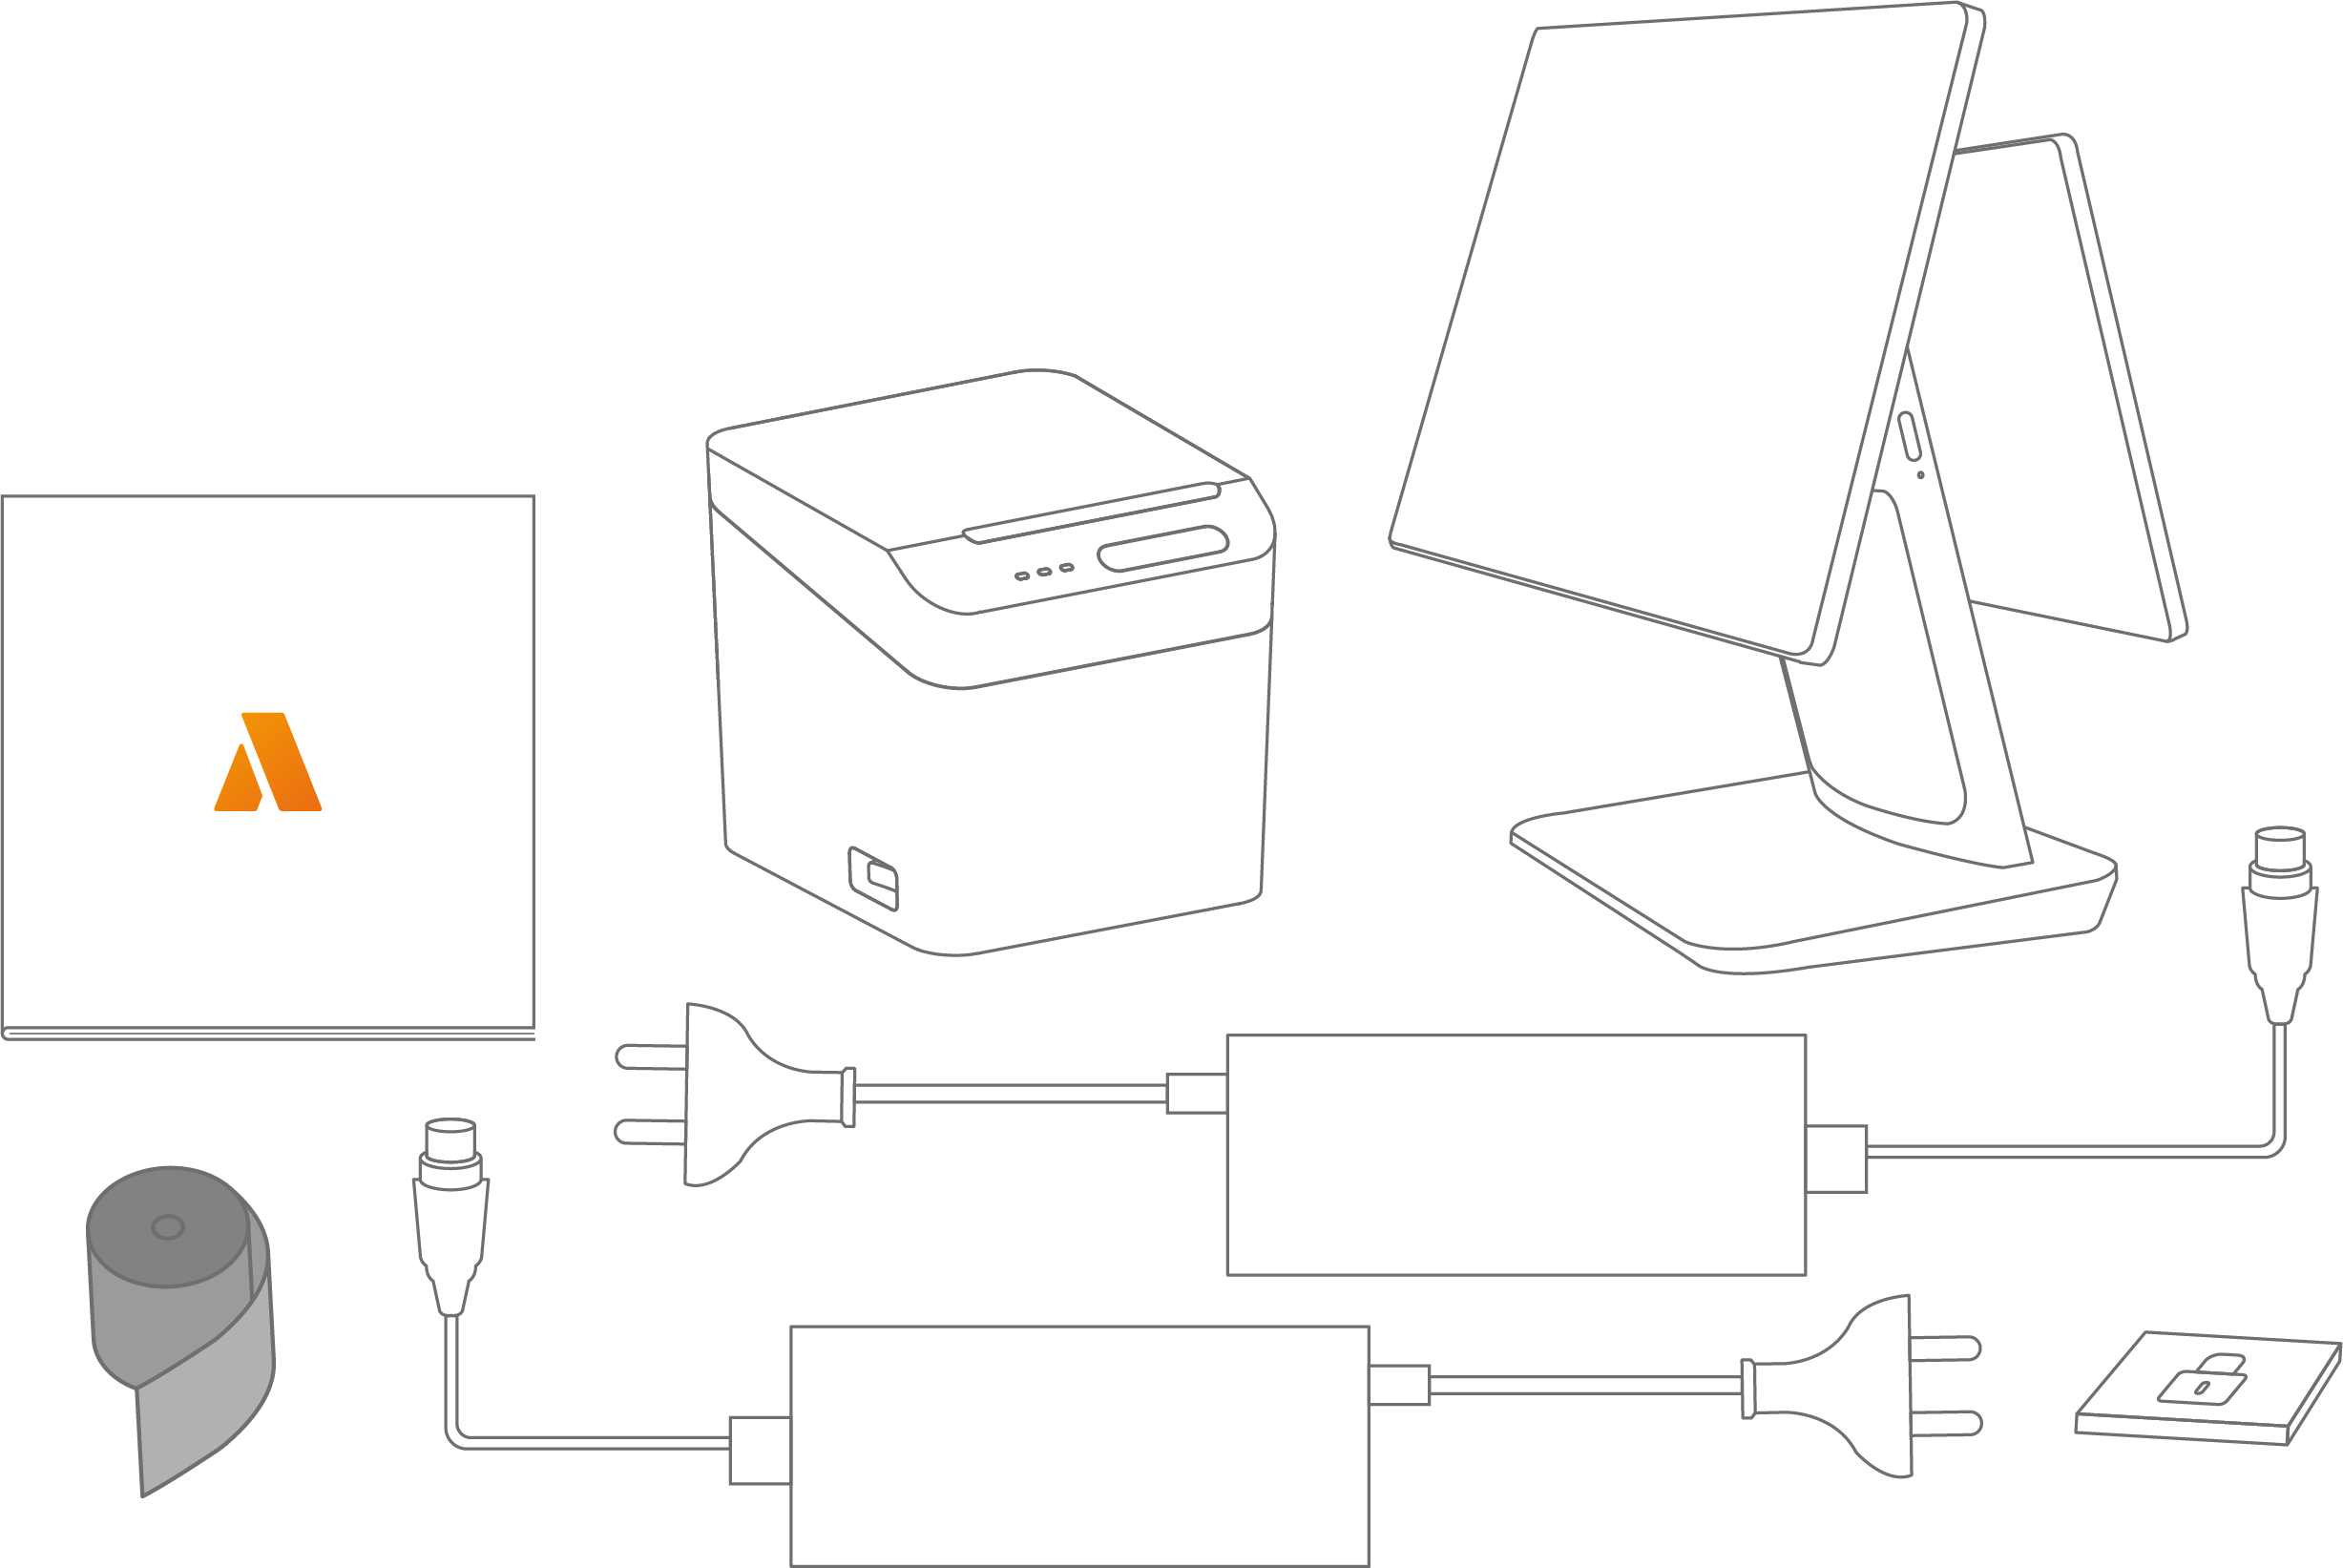
Scope of delivery
The package includes:
1x primasello X380 PRO cash register
1x quick start guide
1x power supply unit with power cable
1x customer screenX80
1x 80mm printer
1x 80mm thermal paper for printer
1x printer cable
1x security module
Screen components
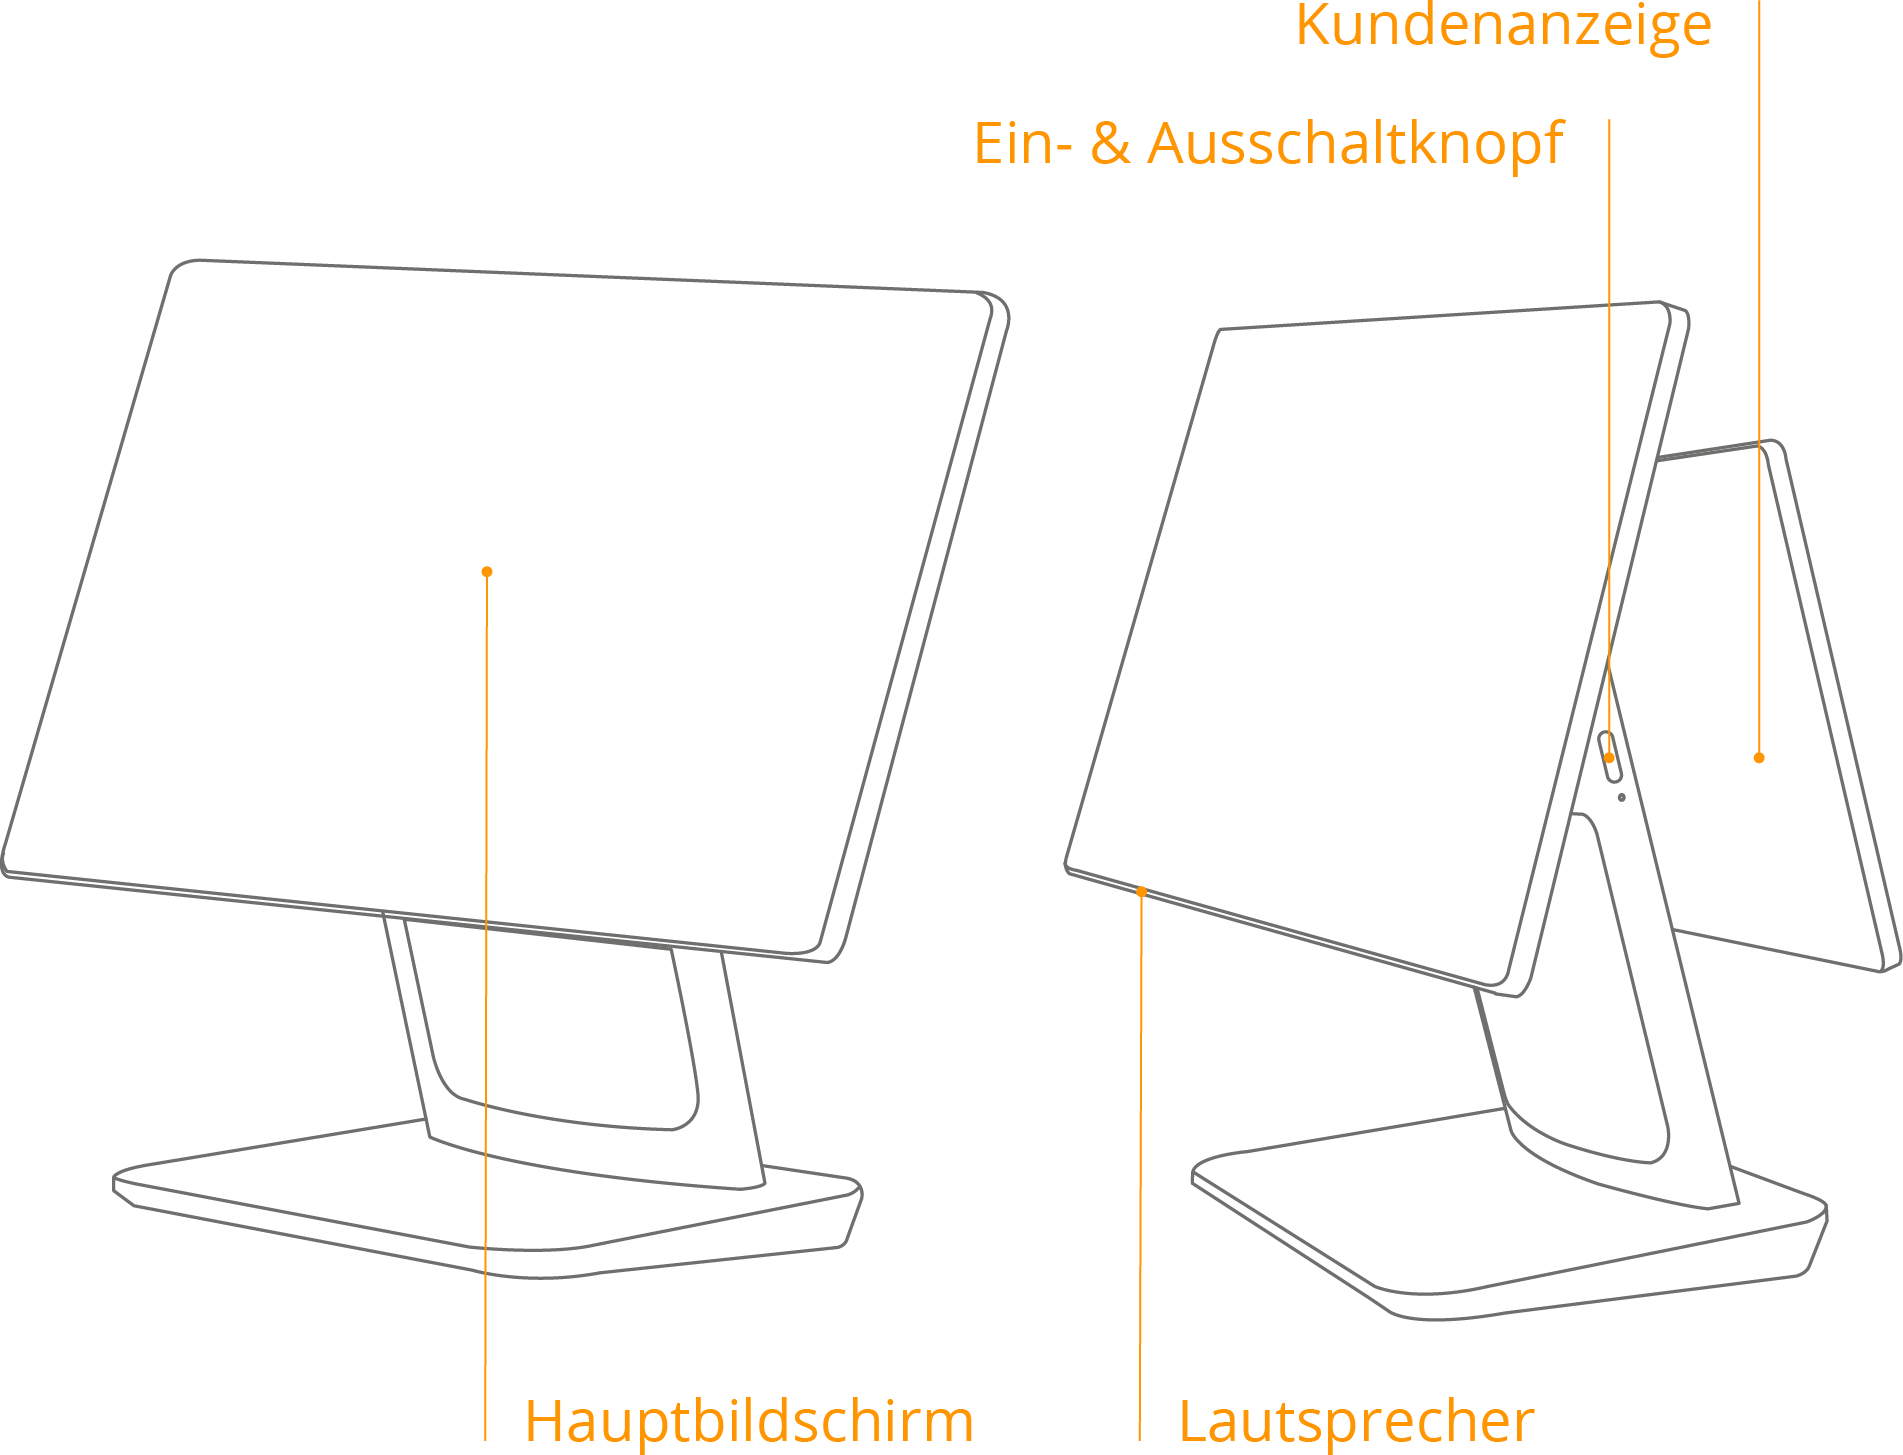
Main screen
Touch screen for operation.
On/off button
If the device is switched off, press briefly to start it up. Press and hold the power button for 2-3 seconds to choose between ‘Shut down’ or ‘Restart’. To force the device to switch off, press and hold the power button for 11 seconds. The system will shut down.
Costumer screen
Screen for customers with information about the open receipt.
Speaker
The speaker for outputting signal tones.
Screen Connectors
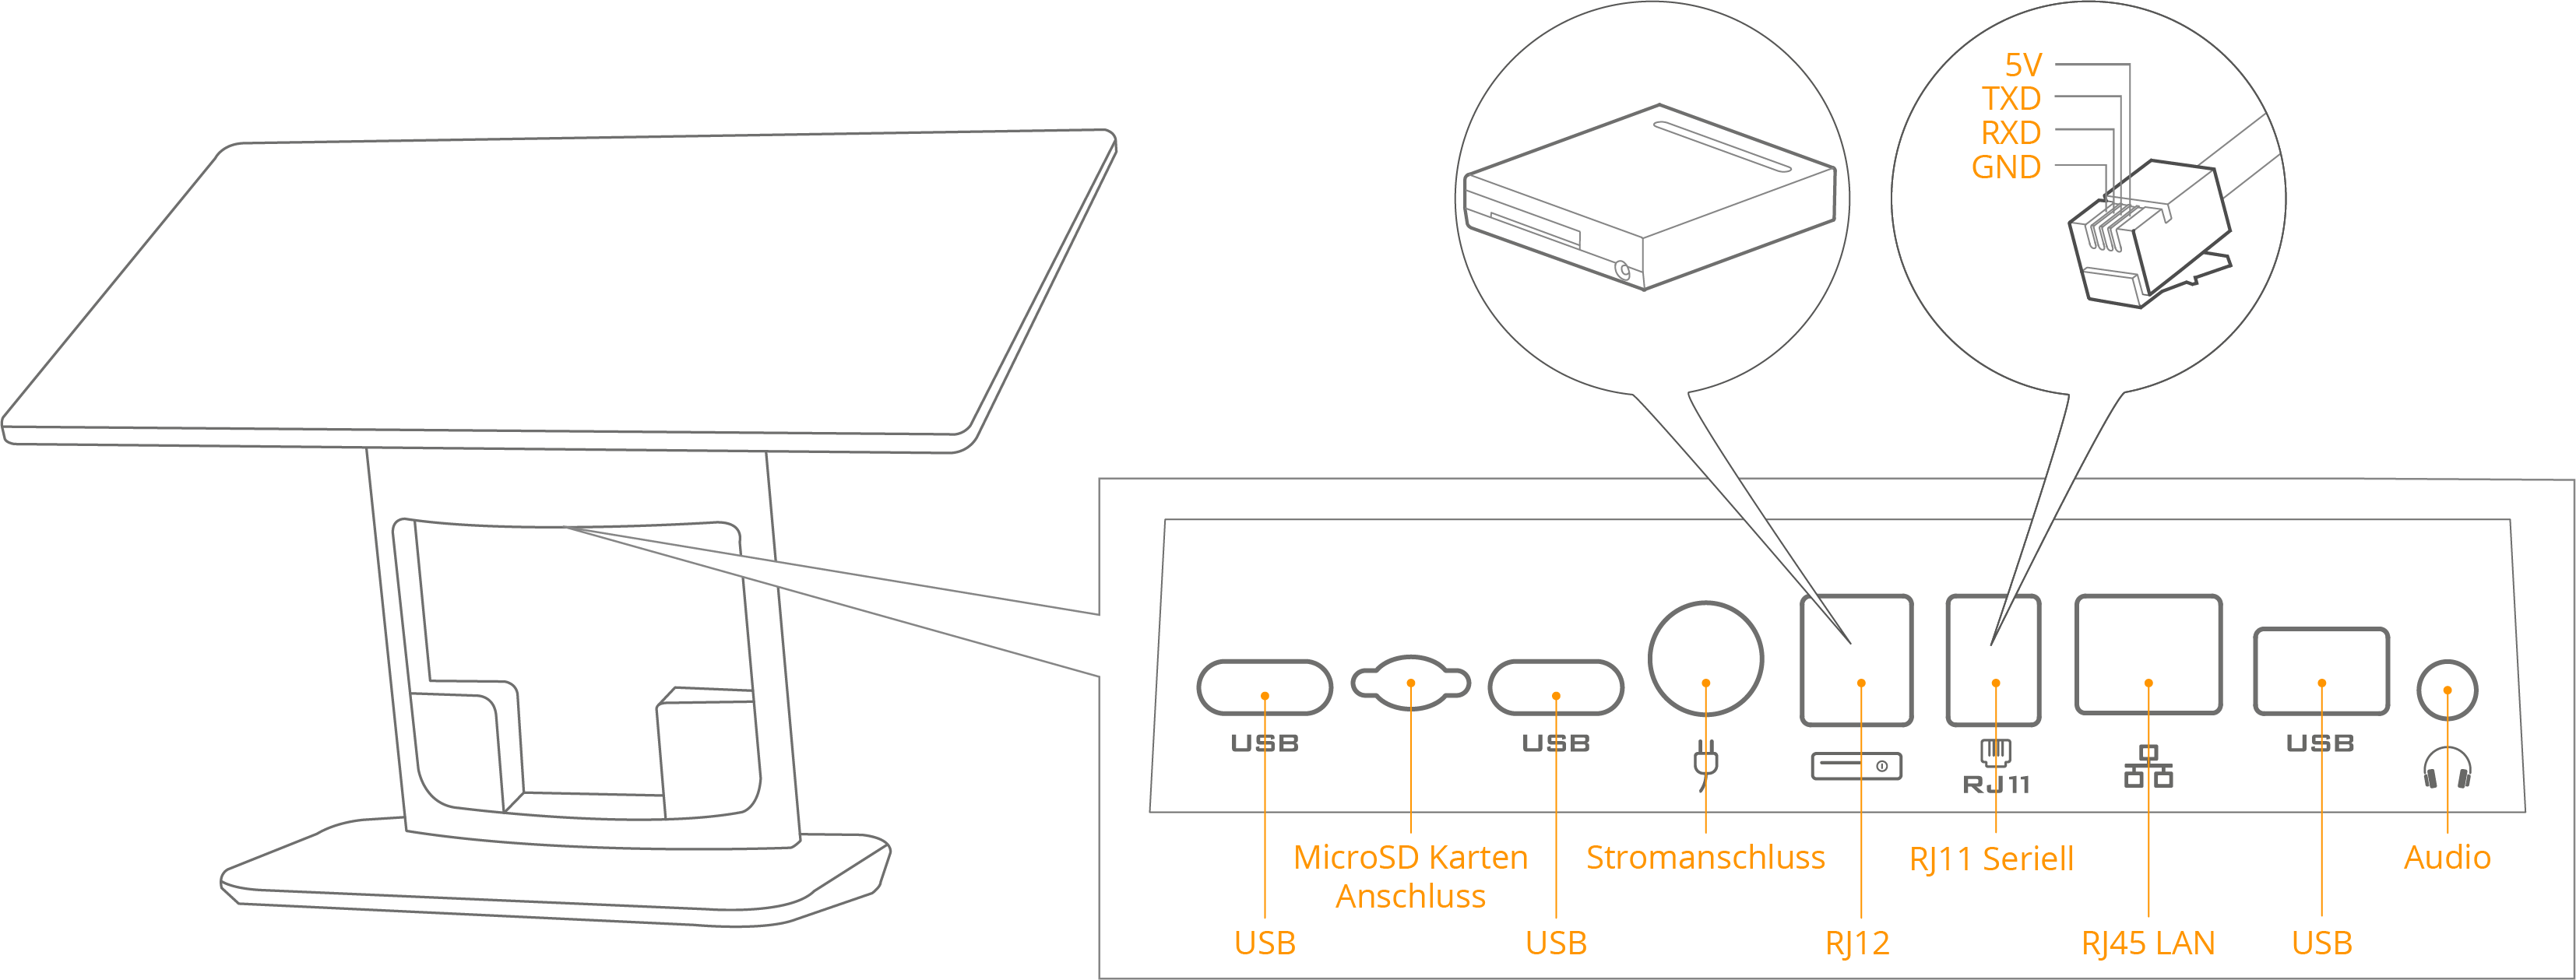
MicroSD card connector
For expanding the internal data storage using a MicroSD card (max. 64GB).
Audio jack
An audio jack for connecting external speakers or headphones.
USB port
USB 2.0 / USB 3.0 port for connecting peripheral devices.
Serial connector (RJ11)
Connection of peripheral devices via a serial port.
Ethernet / LAN (RJ45)
Ethernet connection for an internet connection in the local network.
Cash drawer connection (RJ12)
For connecting an external cash drawer. The connection is not permanently energised, but sends current pulses with a frequency of 100ms. Different types of 9-24V cash drawers are supported.
Power connection
Connection of the power supply unit for the power supply.
Printer components
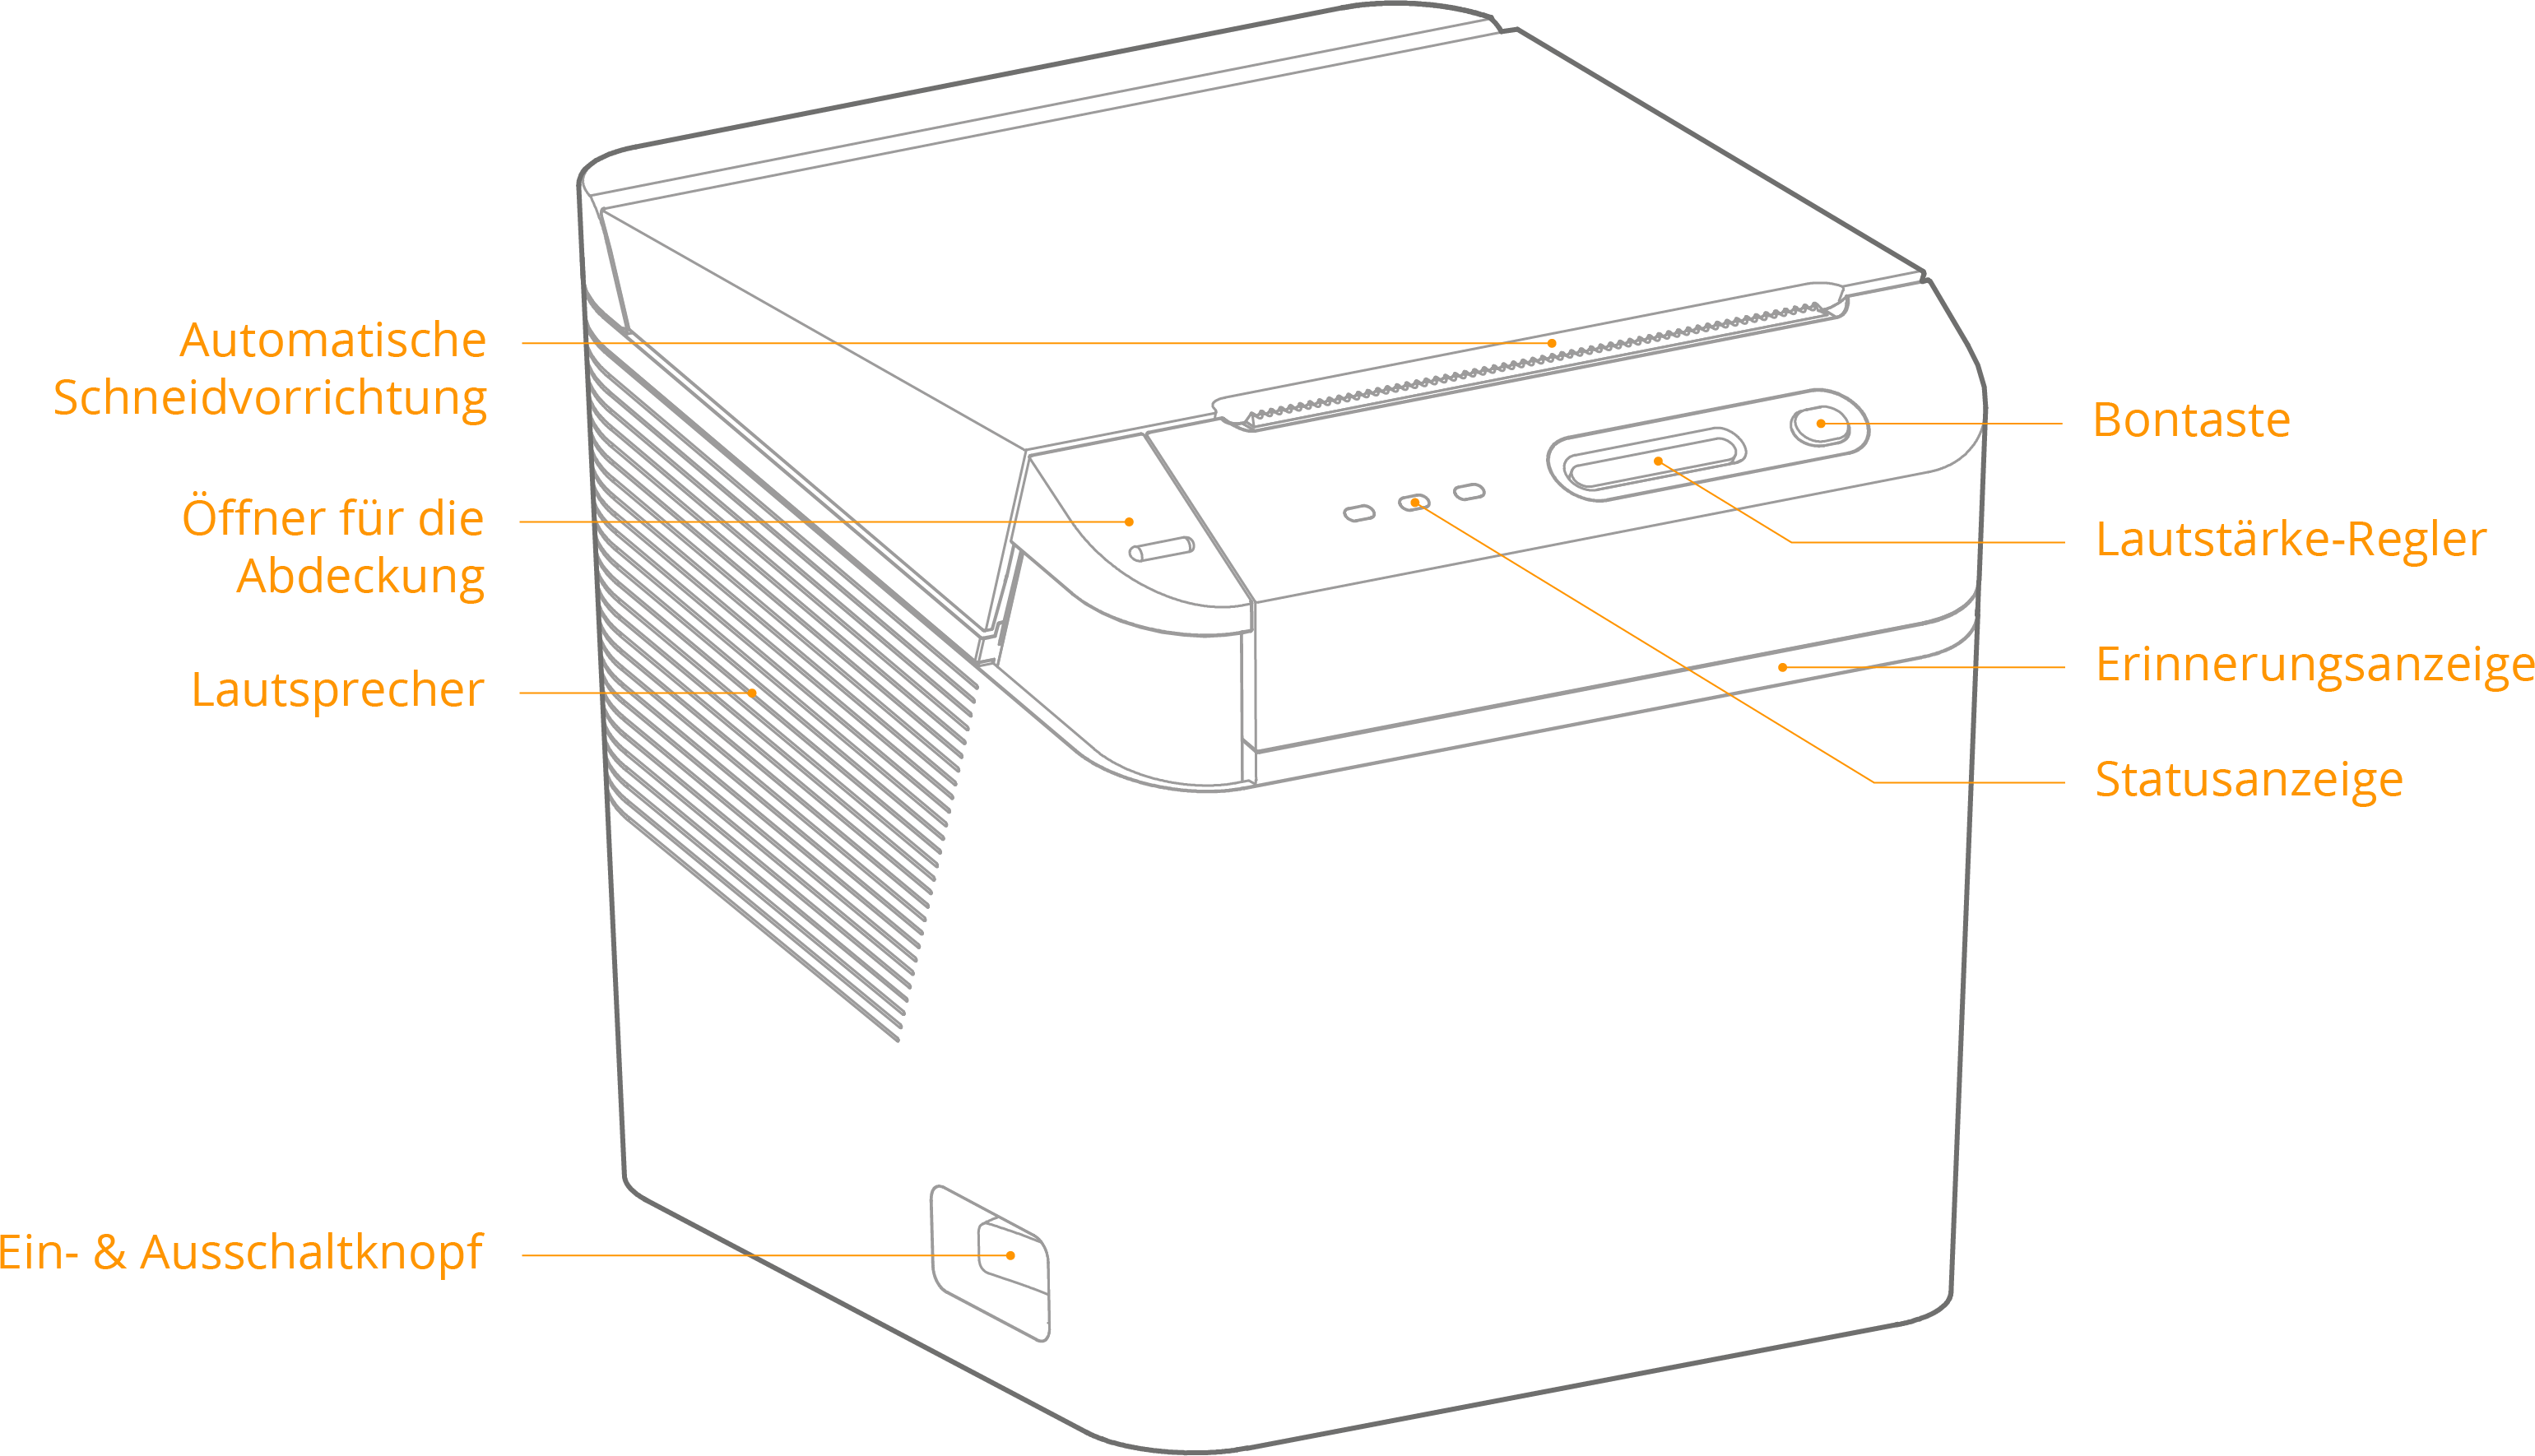
Feed button
The ‘Receipt’ button feeds a piece of unprinted receipt paper from the printer. Should be pressed after inserting a new roll of receipts.
Status indicator
If the printer is connected correctly, the ‘Network’ light will glow blue. If there is an error (e.g. out of paper), the 'Error' light will glow red. If the green ‘Power’ light is on, the printer is switched on.
Reminder display
If a printout that is to be removed is still in the printer, the indicator flashes white. If the lamp is lit continuously, this indicates that the paper roll will be empty soon.
Opener for the lid
Press the switch down to open the printer lid.
On & off button
To switch on the printer, press the toggle switch to the right. To switch off the printer, press the toggle switch to the left. Caution: Do not switch off the printer during a print job.
Speaker control
The volume can be adjusted by pressing the ‘louder’ or ‘quieter’ side of the switch.
Connectors printer
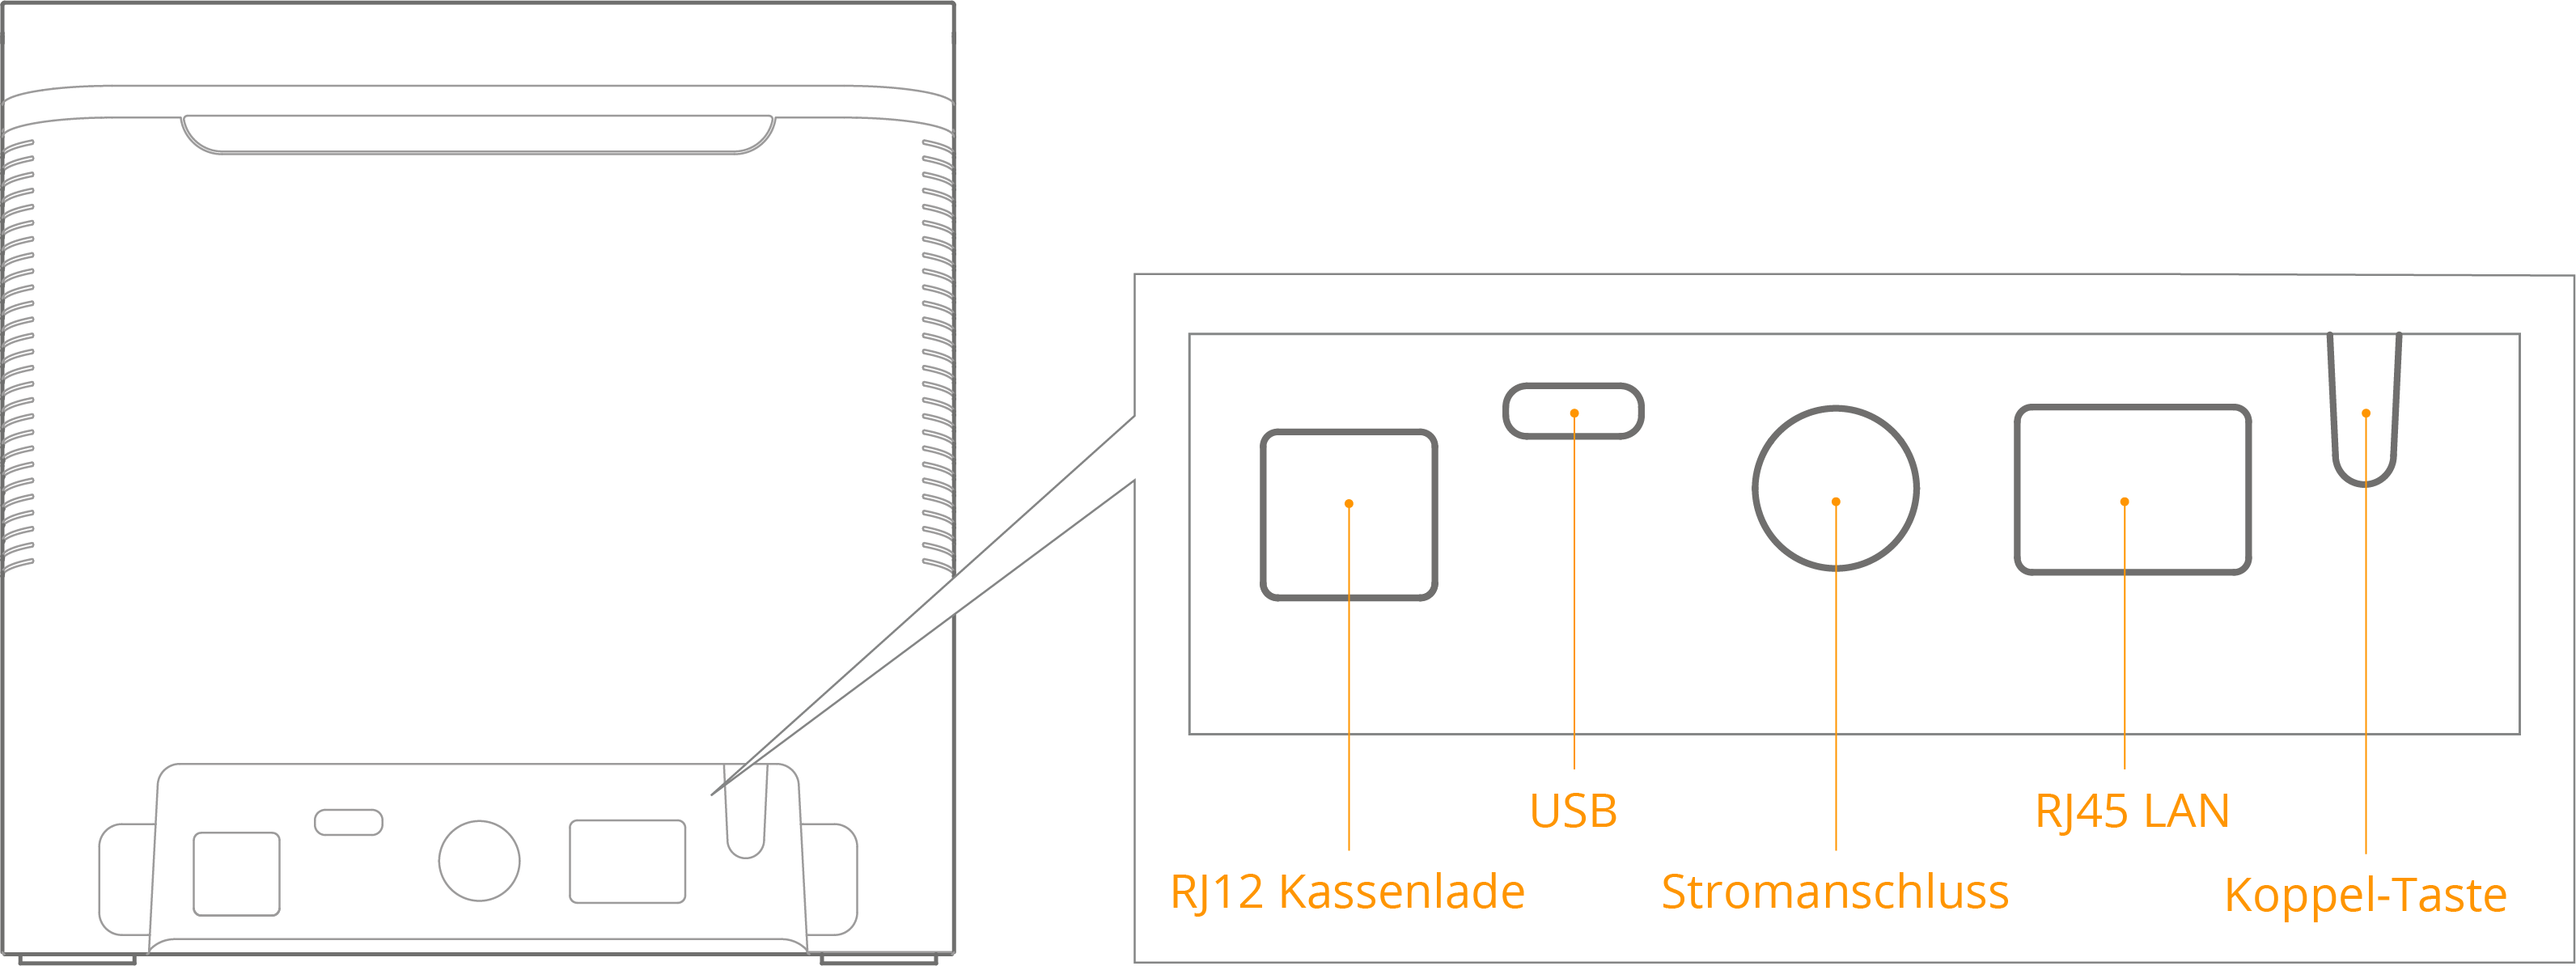
Power connection
Connection of the power supply unit for the power supply.
USB
The printer communicates with the cash register via the USB cable. Connect the supplied printer cable here.
Cash drawer connection (RJ12)
For connecting an external cash drawer. Only 24V/1A cash drawers are supported. Each cash drawer should be connected to the printer to ensure functionality.
LAN Connector
For connecting the printer to the Internet via a LAN connection.
Pairing button
Press and hold the button to switch to network pairing mode. Double-click to perform network self-diagnosis and print the report.
Insert receipt roll
To insert the receipt roll, first open the printer lid in the direction of the arrow, then insert the 80x80mm thermal paper roll and finally close the printer lid.
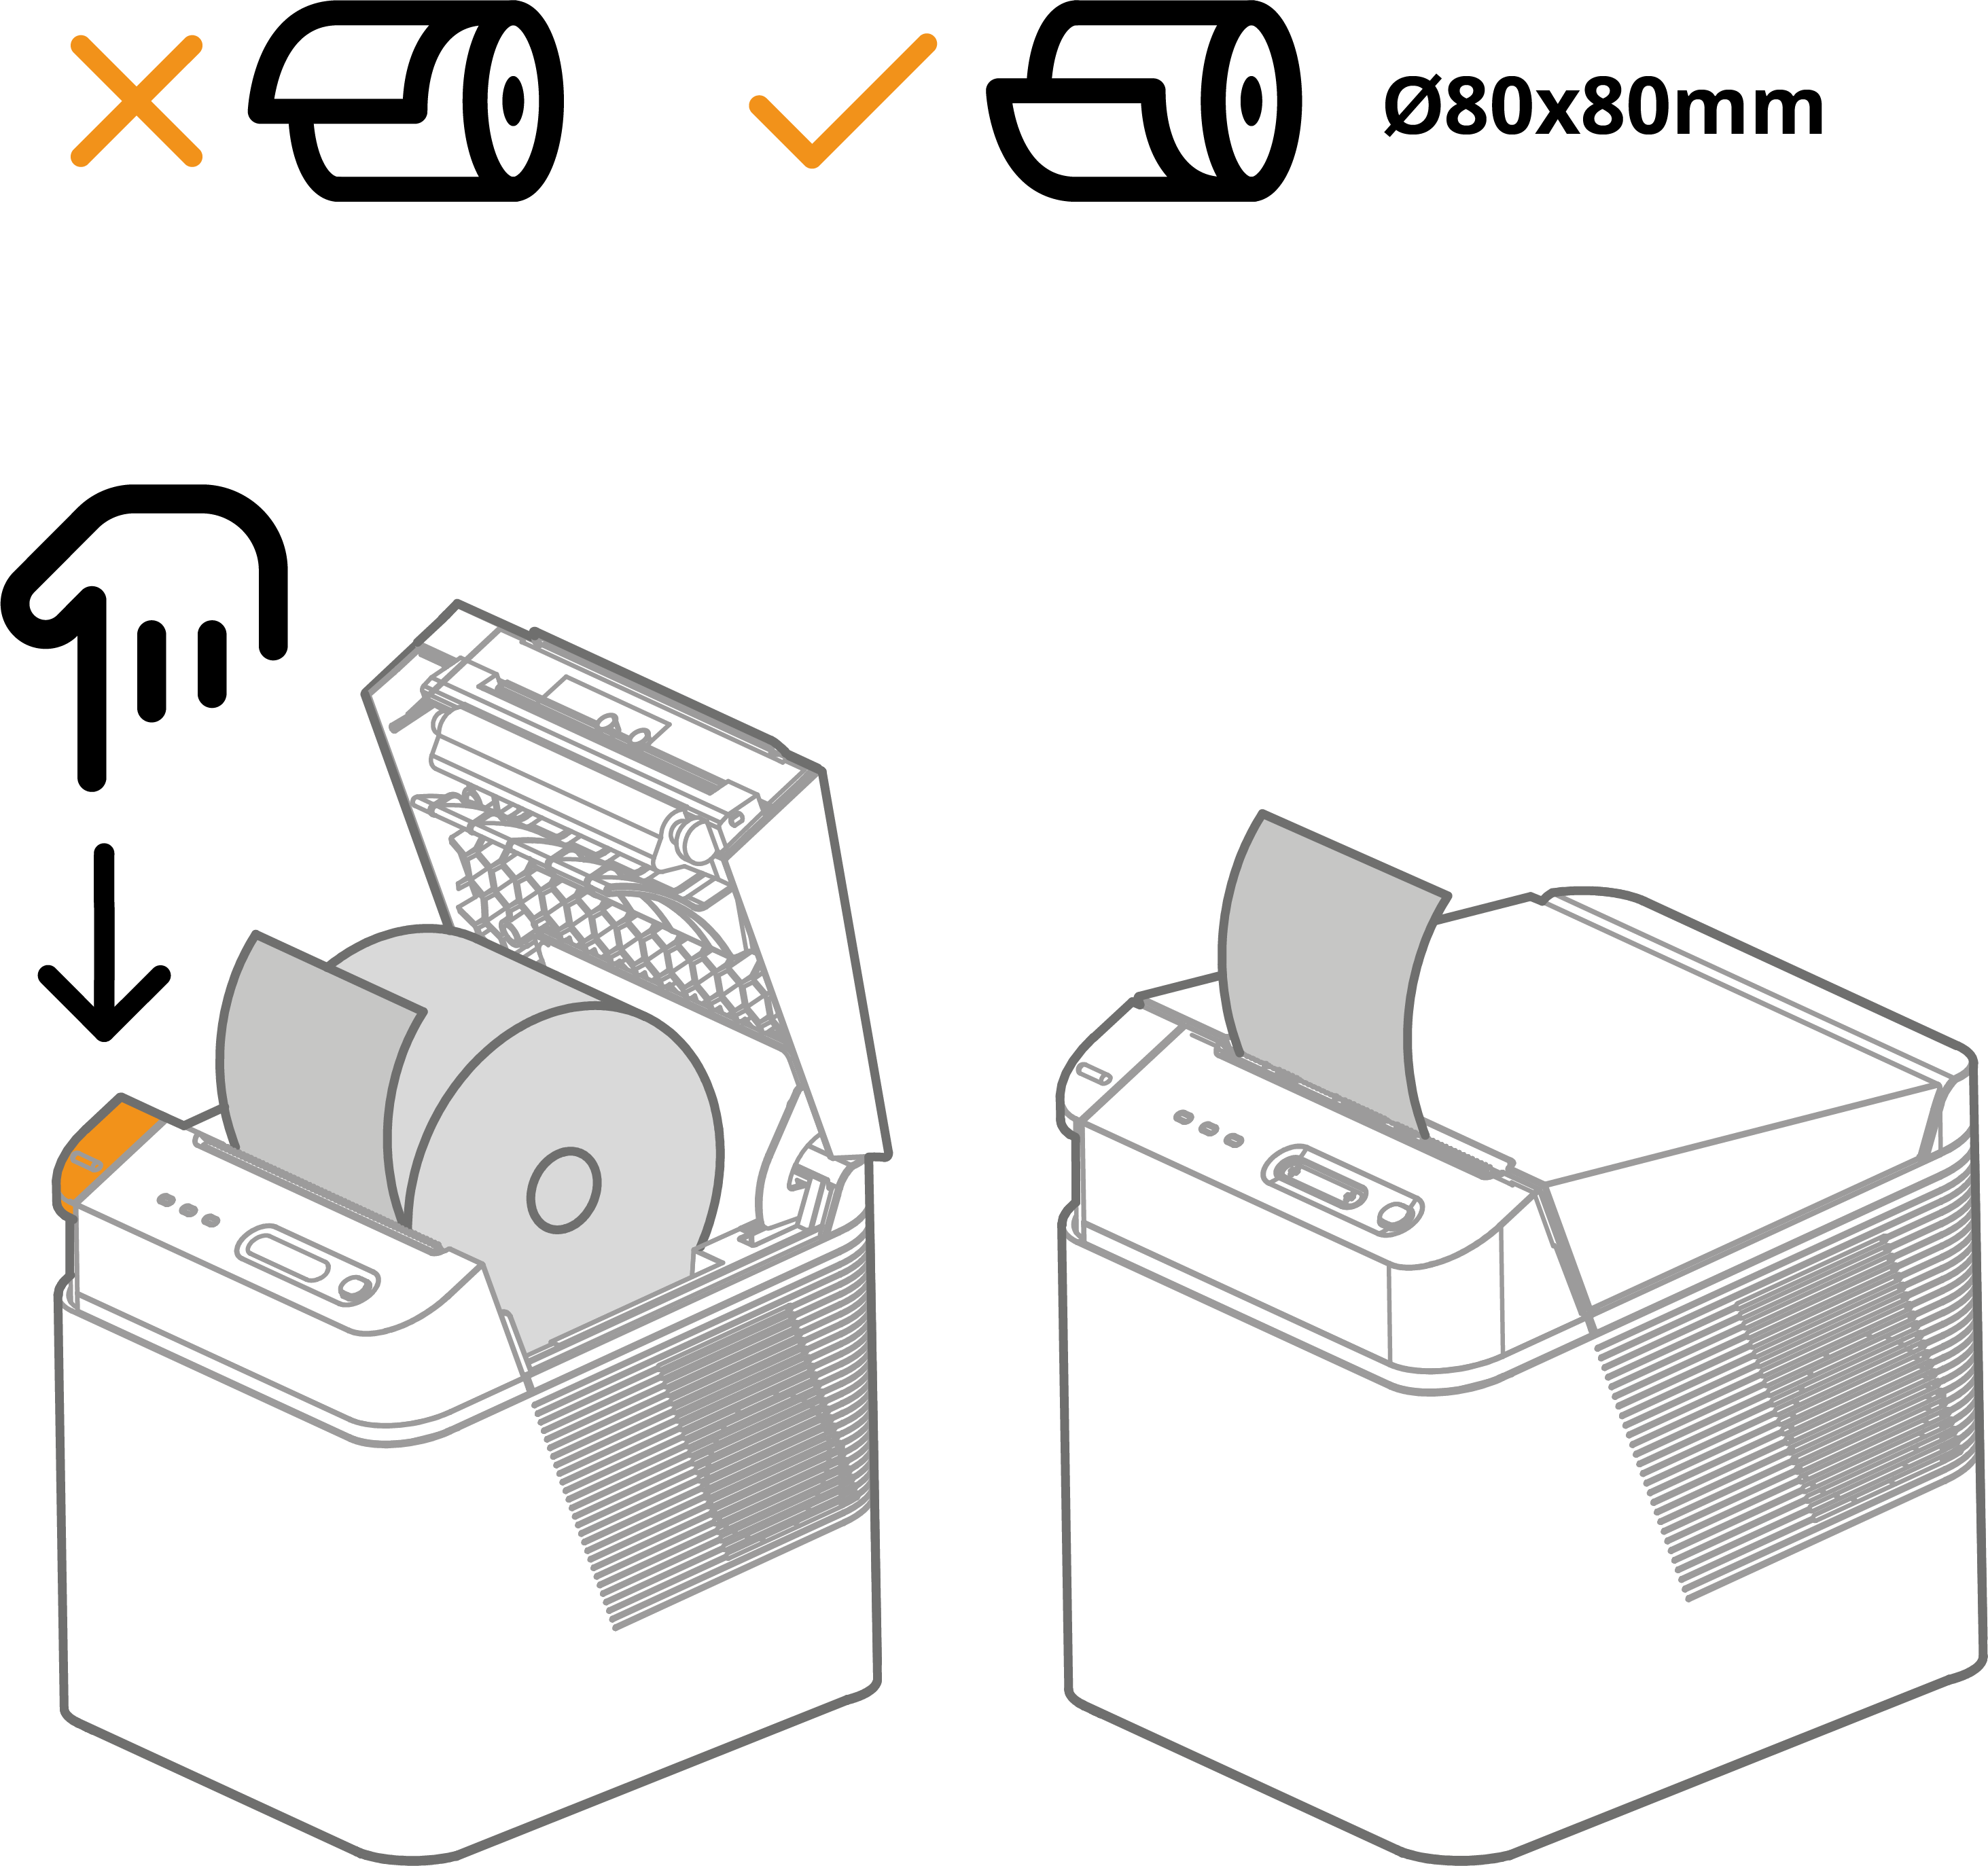
Note
When changing the receipt roll, please ensure that the core of the last roll has been removed before inserting the new roll.
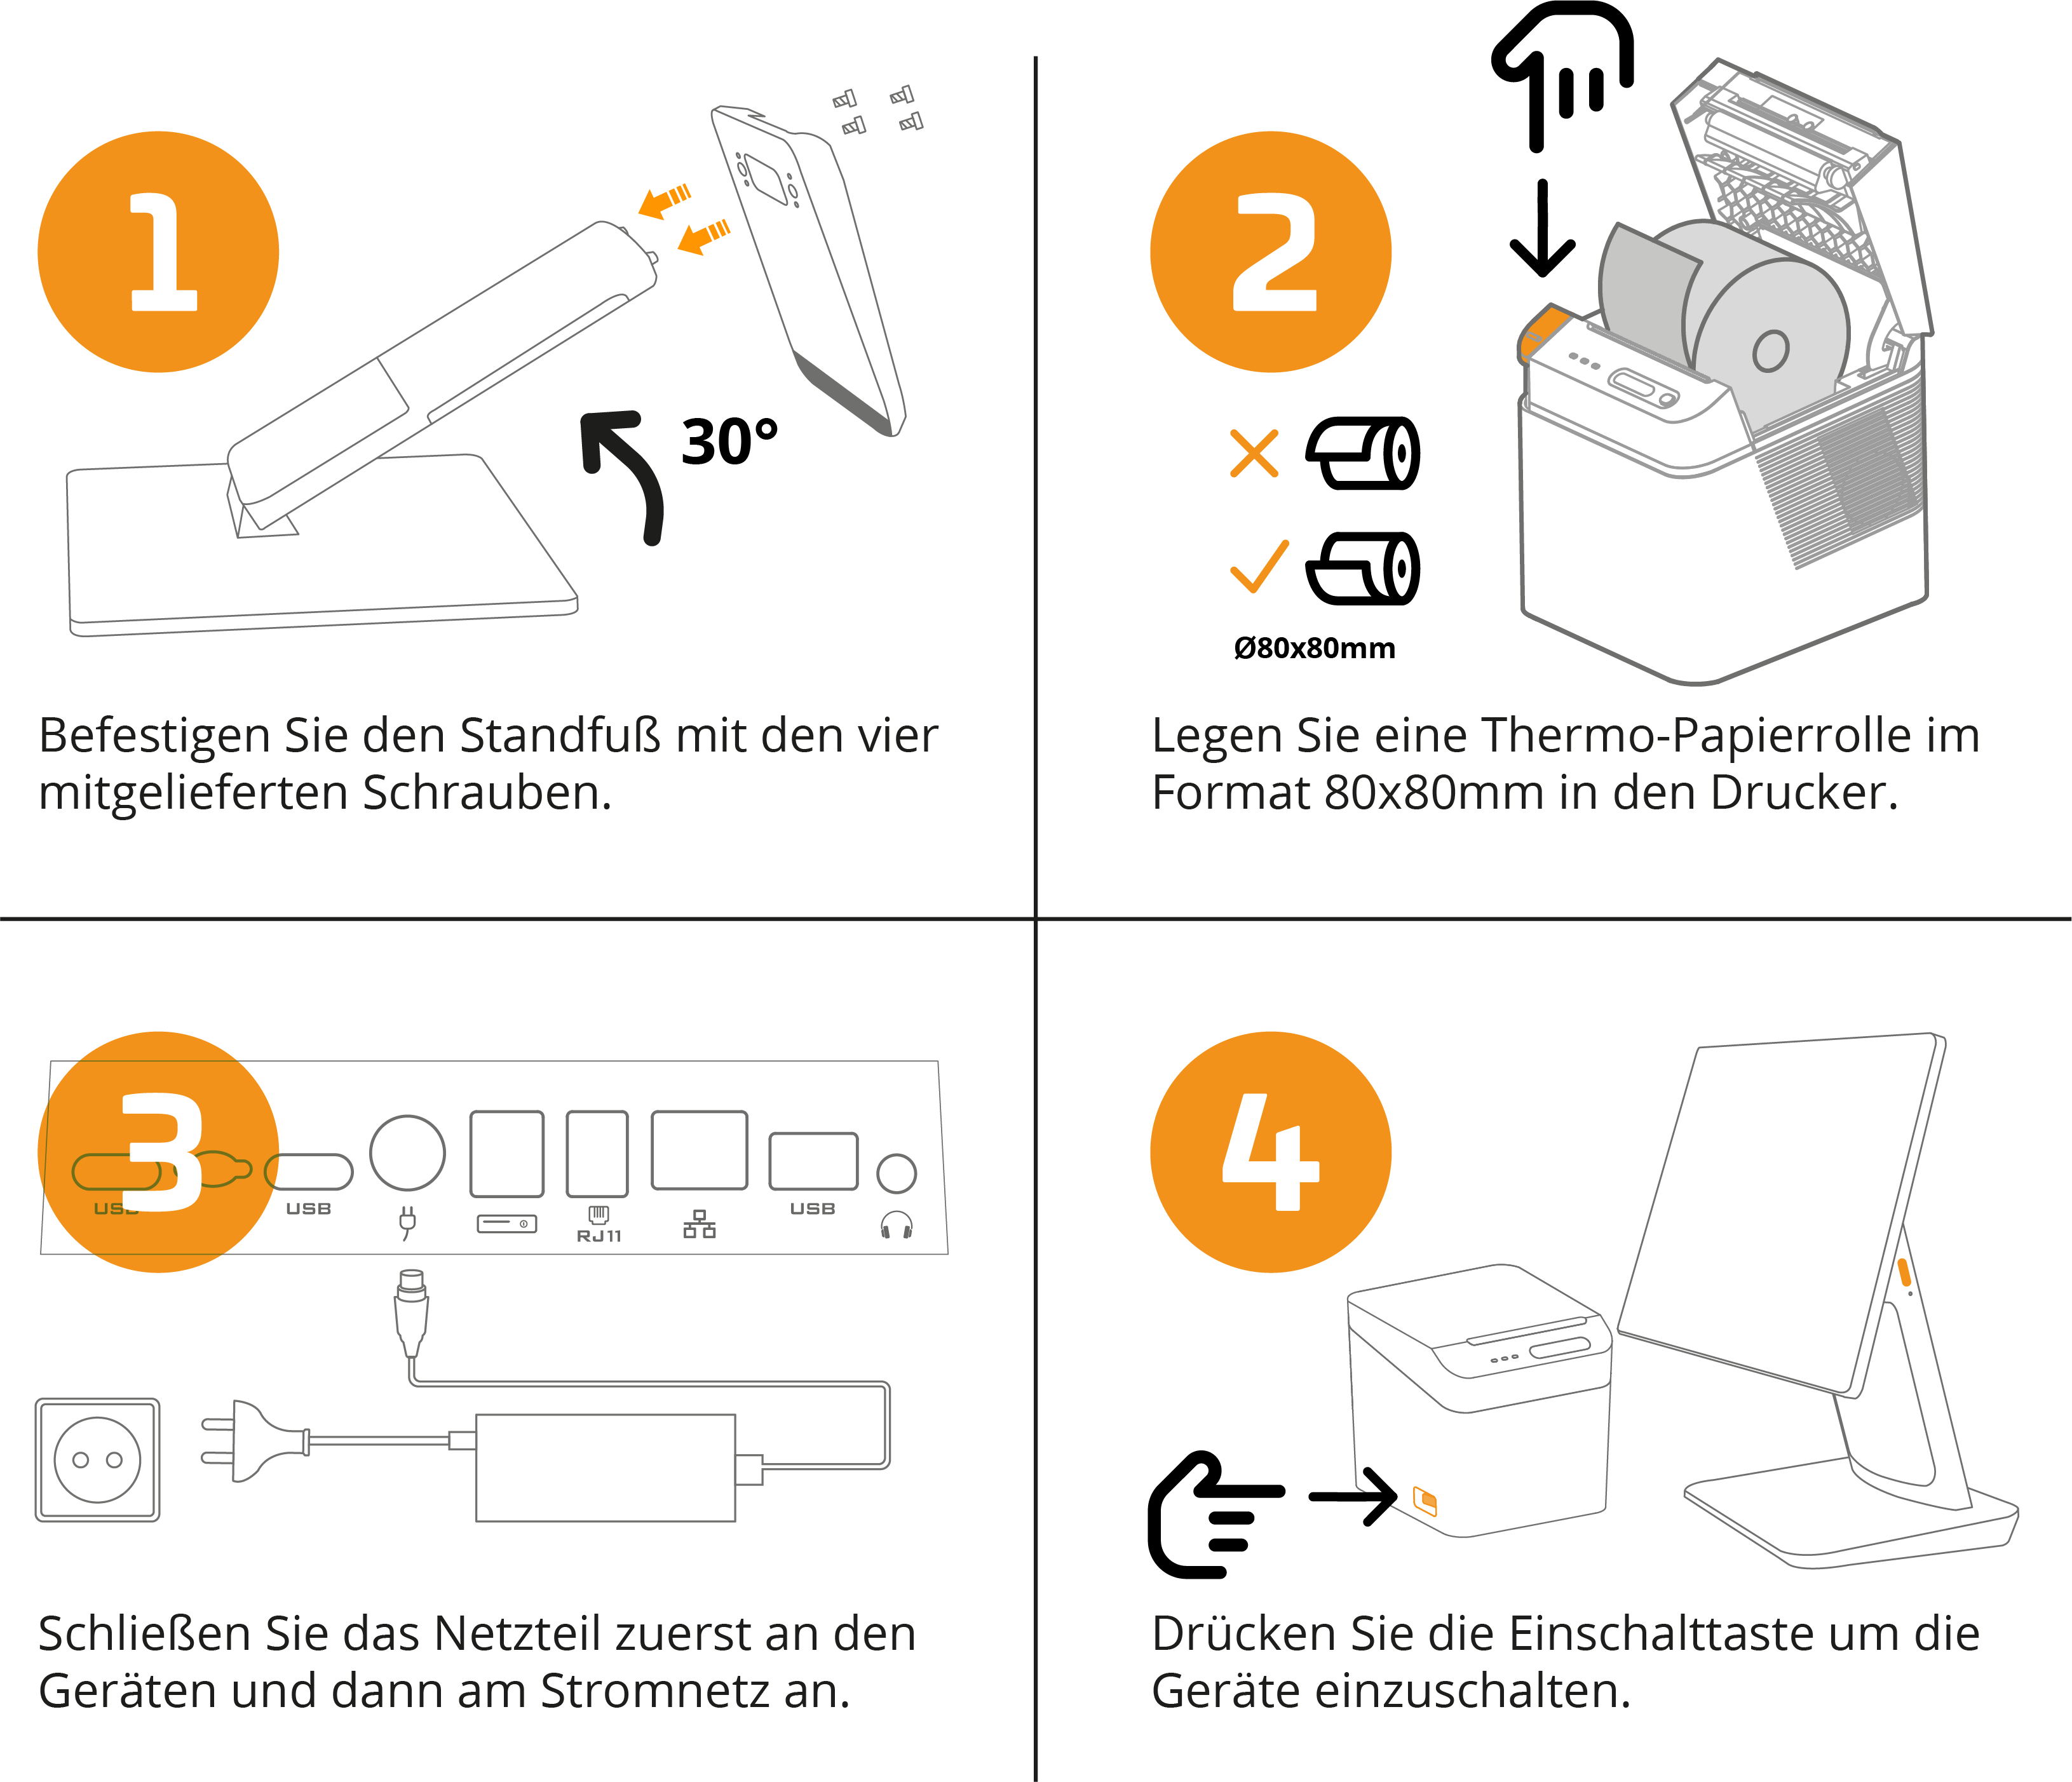
Quick Start
Secure the stand with the four screws provided and place both devices on a stable surface.
Place the thermal paper roll in the printer..
First connect the power supply to the devices and then to the mains.
Press the power button to turn on the device..
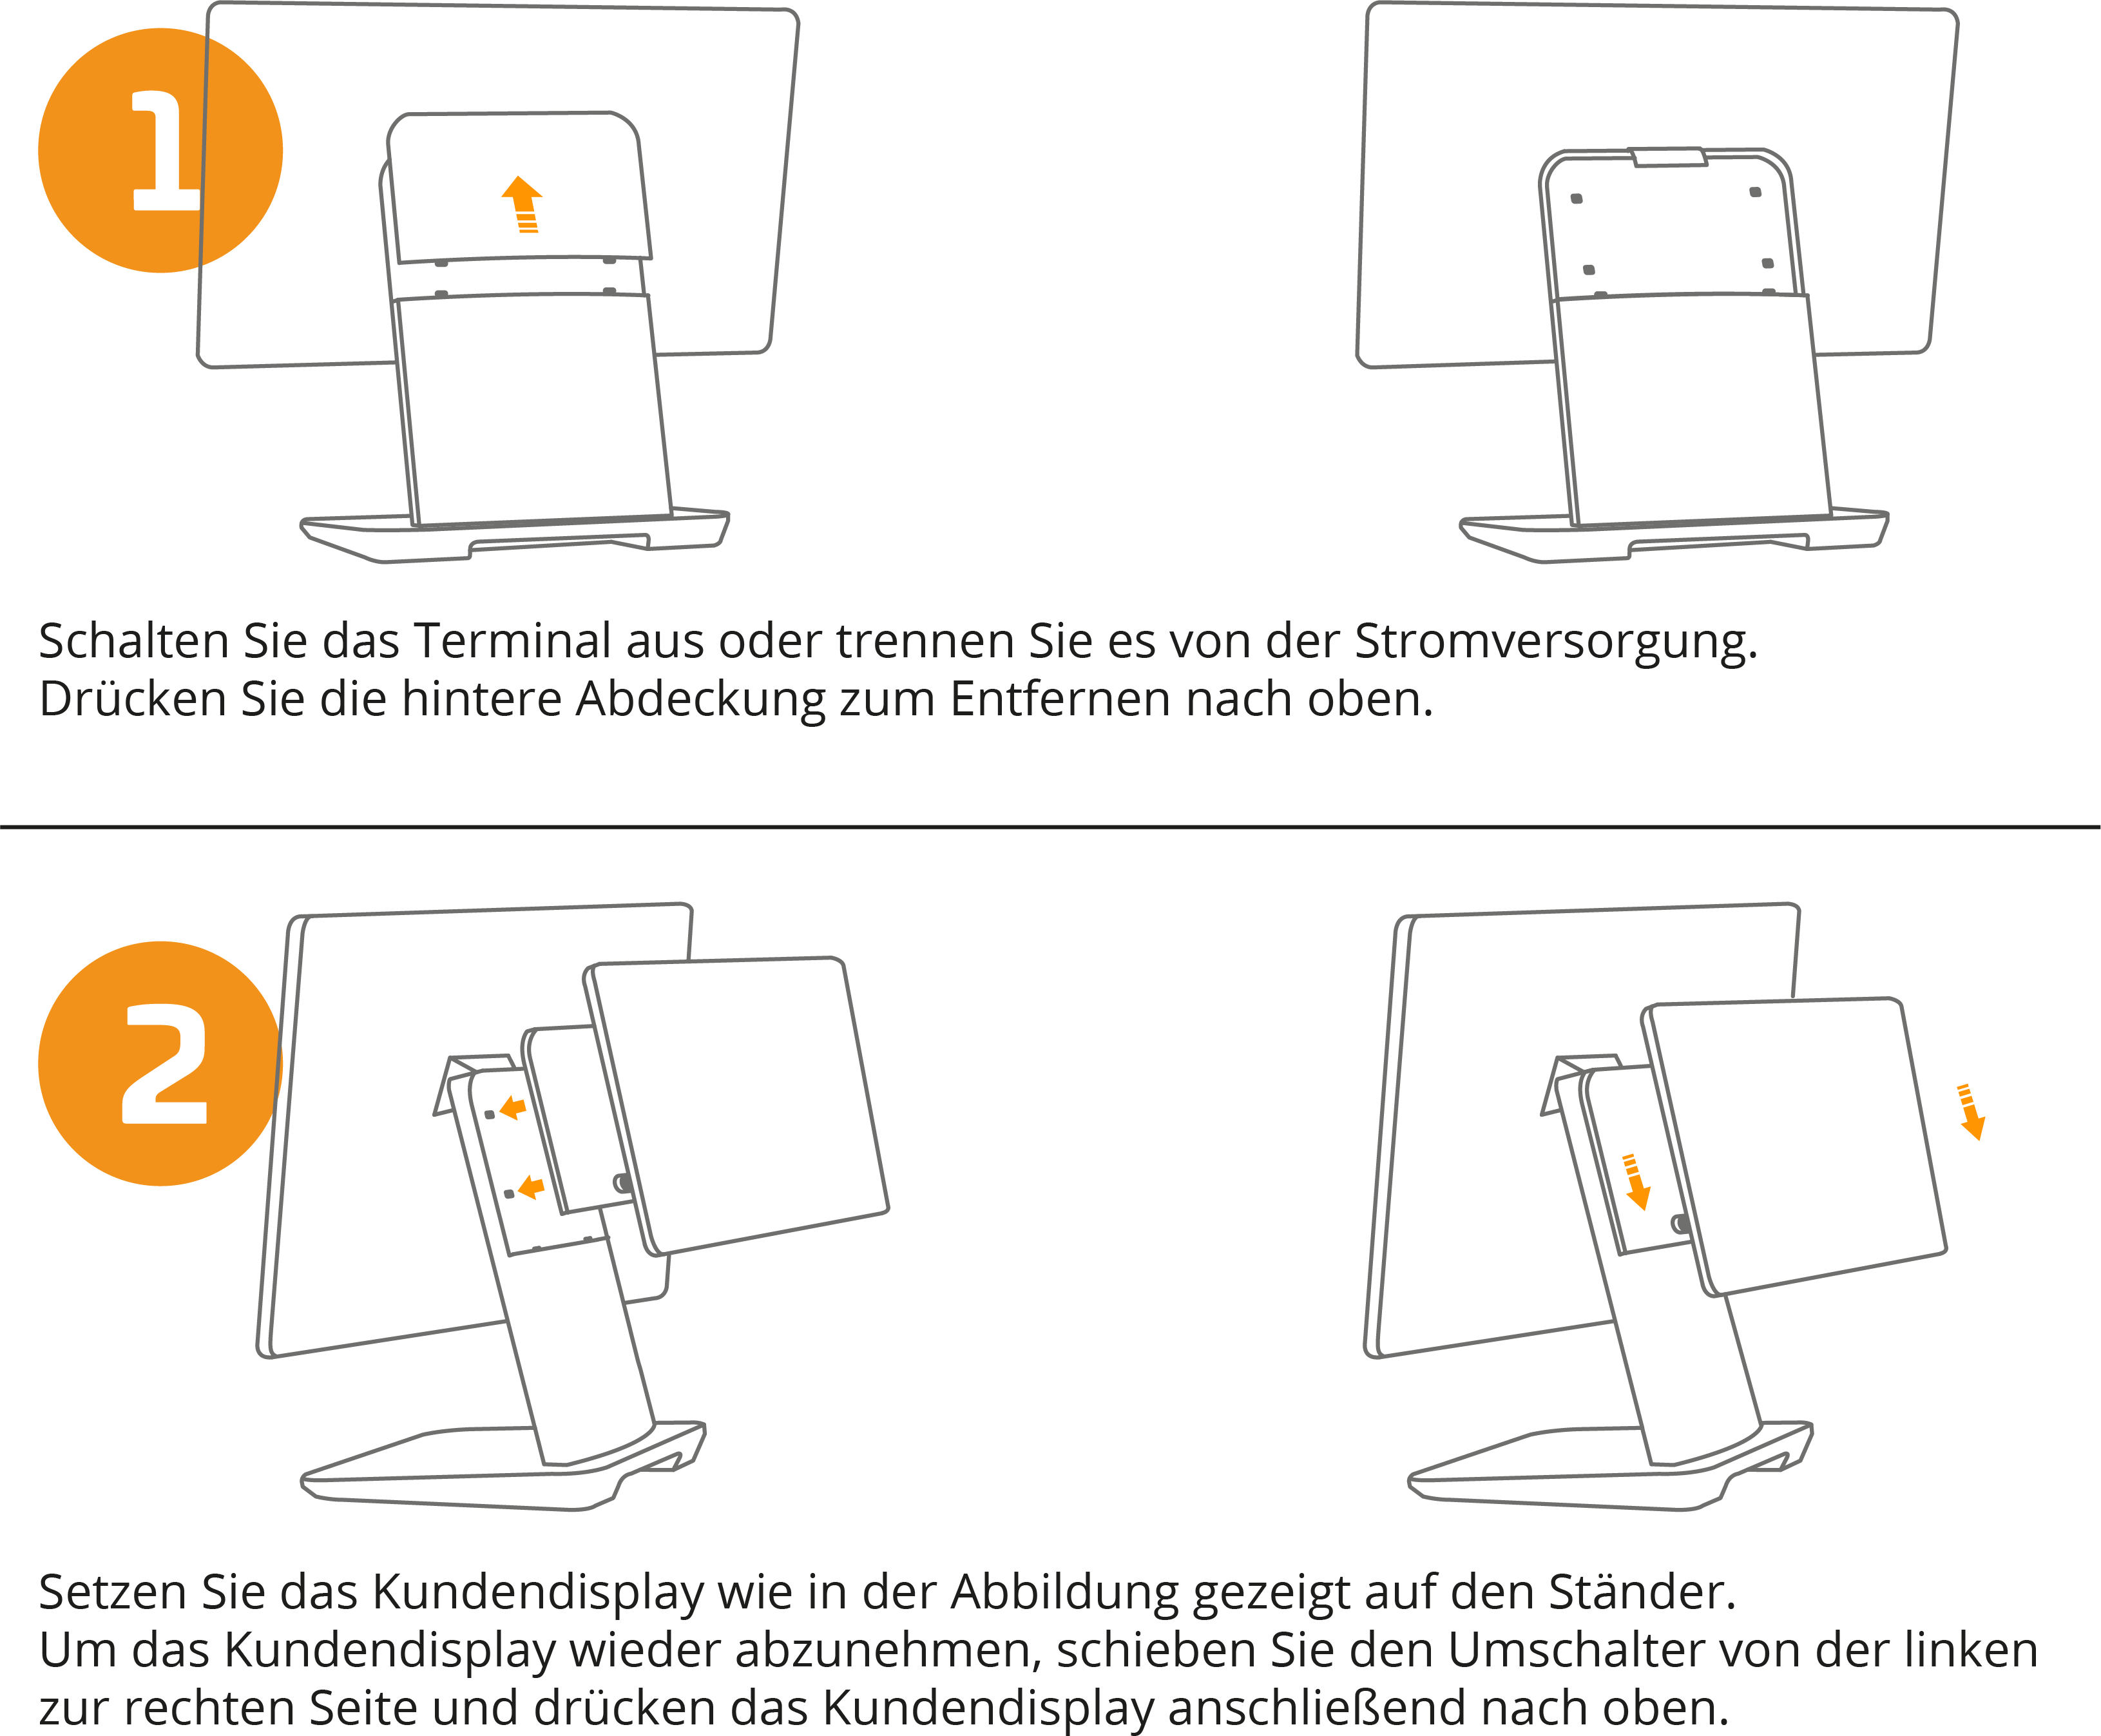
Install customer screen
Switch off the terminal and disconnect it from the power supply. Press the rear cover upwards to remove it.
Place the customer display on the stand as shown in the illustration. To remove the customer display, slide the switch from the left to the right and then push the customer display upwards.
Connect printer
To start up the primasello X380 cash register, the connection between the register and the printer must be established. To do this, the following requirements must be met:
Cash register connected to power supply
Cash register switched on
Printer connected to power supply
Printer switched on
Thermal paper roll inserted in printer
If all requirements are met, the printer can be used for the initialisation process and further operation.
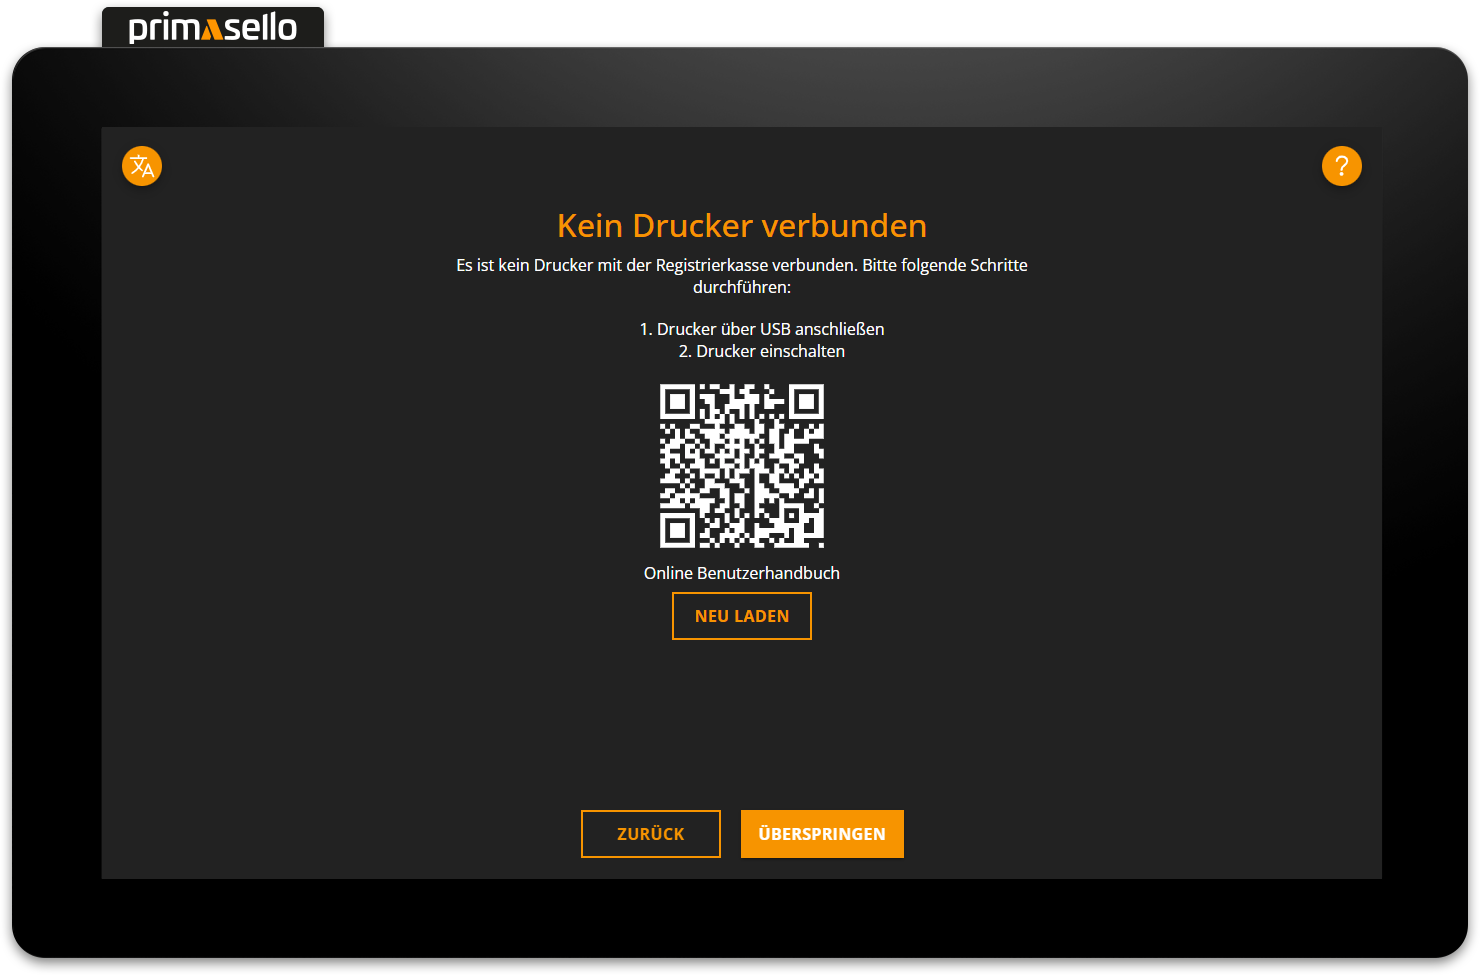
If the printer is not connected during initialisation, an error message will appear.
It is also possible to start up the system without a printer. However, this is strongly discouraged, as several printouts have to be made during the initial setup.
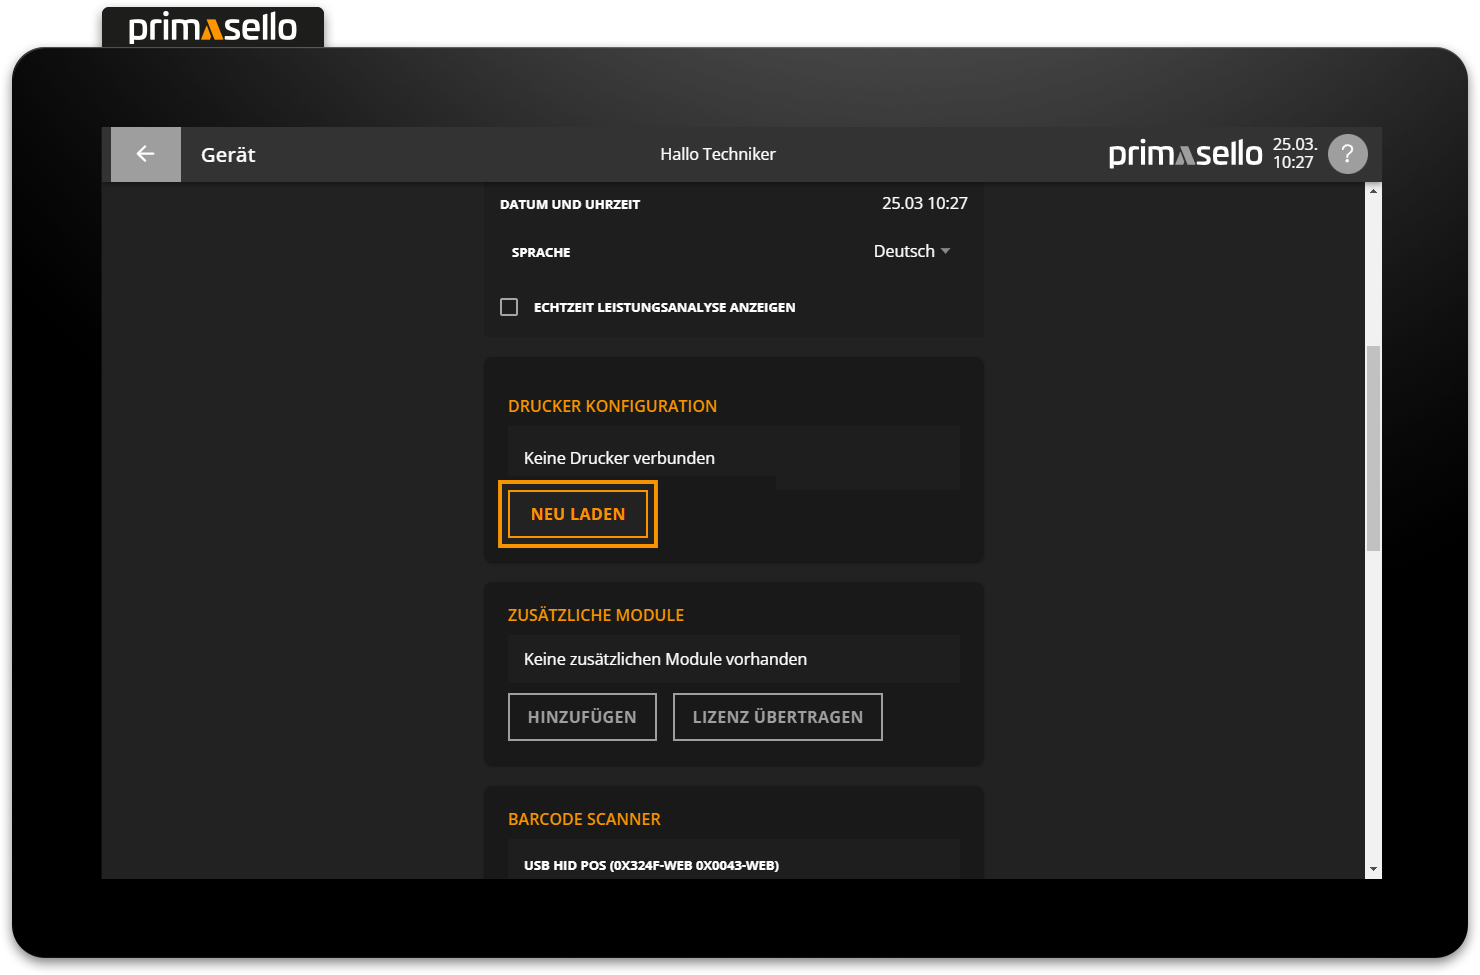
The status of the printer can be viewed at any time under the ‘Device’ menu item.