X340
Before you start using your primasello cash register, please read the quick start guide provided carefully. Alternatively, you can also find all the important information in the Getting Started chapter.
Scope of delivery
The package includes:
1x primasello X340 cash register
1x quick start guide (including product certificate)
1x power supply unit with power cable
1x 80mm thermal paper for printers
1x security module

Components
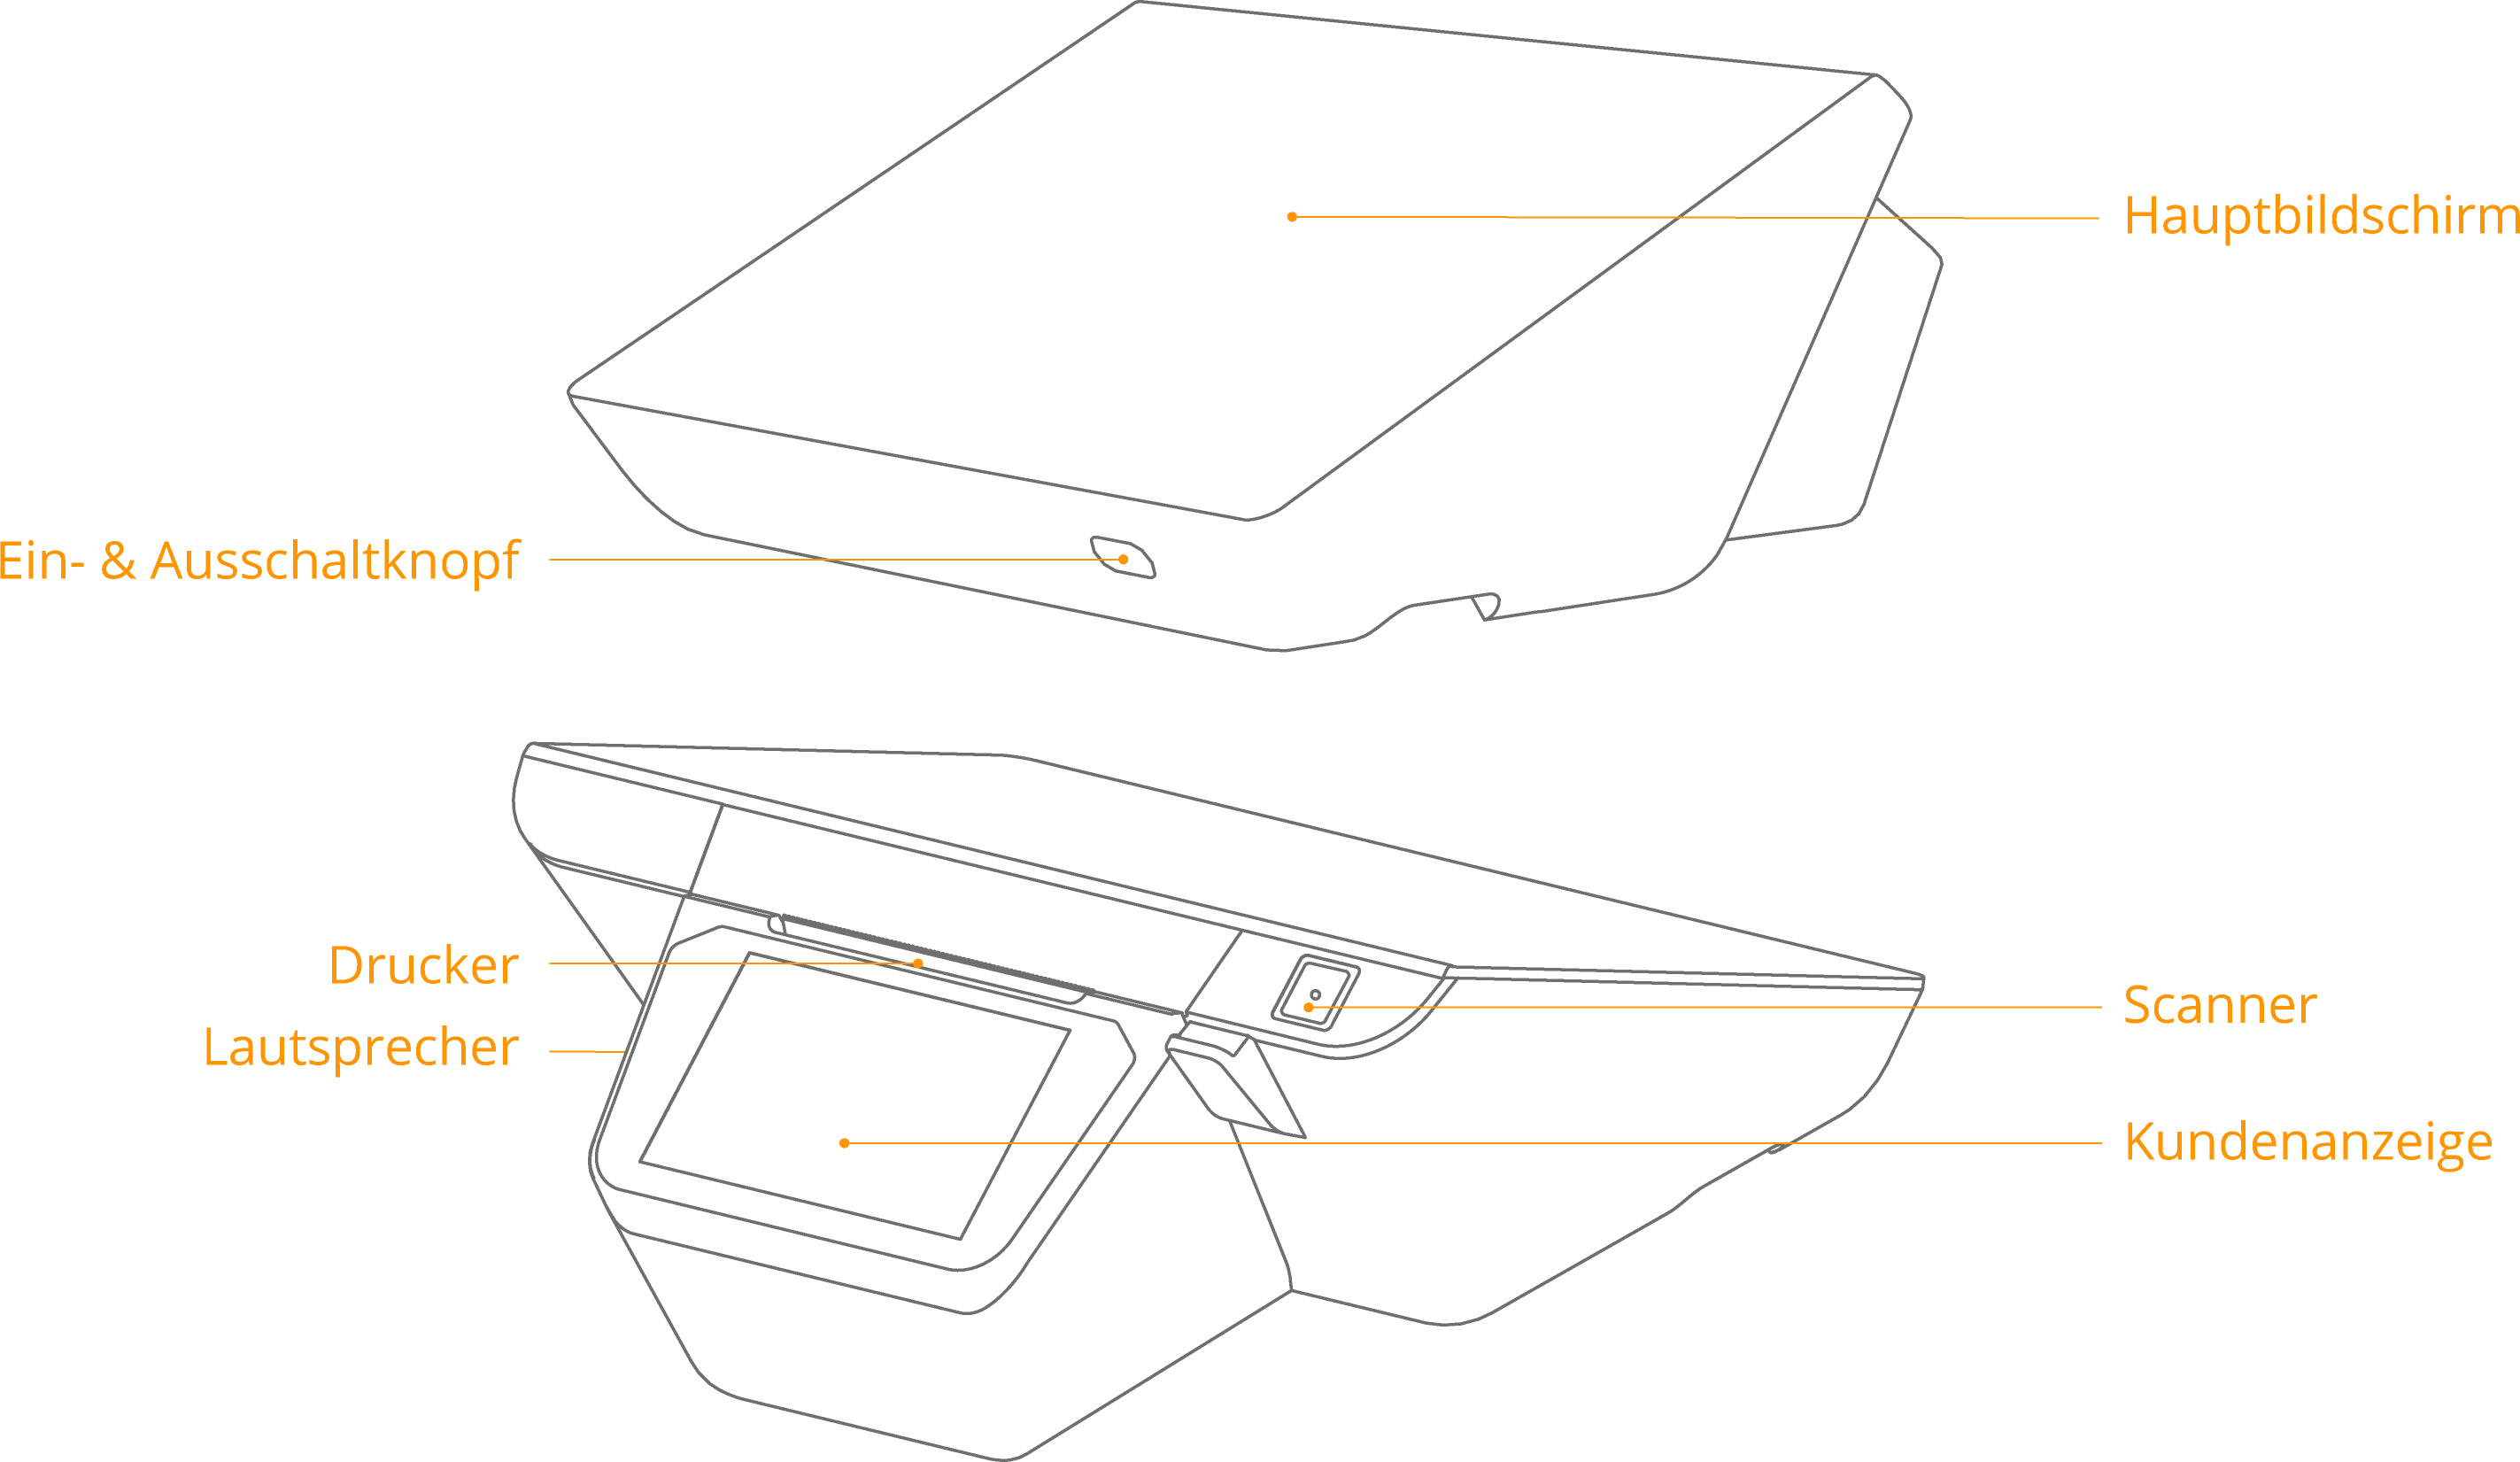
Main screen
Touch screen for operation.
Printer
Prints the created receipts when switched on.
Customer display
Screen for customers with information about the open receipt.
On/off button
If the device is switched off, press briefly to start it up. Press and hold the power button for 2-3 seconds to choose between ‘Shut down’ or ‘Restart’. To force the device to switch off, press and hold the power button for 11 seconds. The system will shut down.
Speaker
The speaker for outputting signal tones.
Connectors
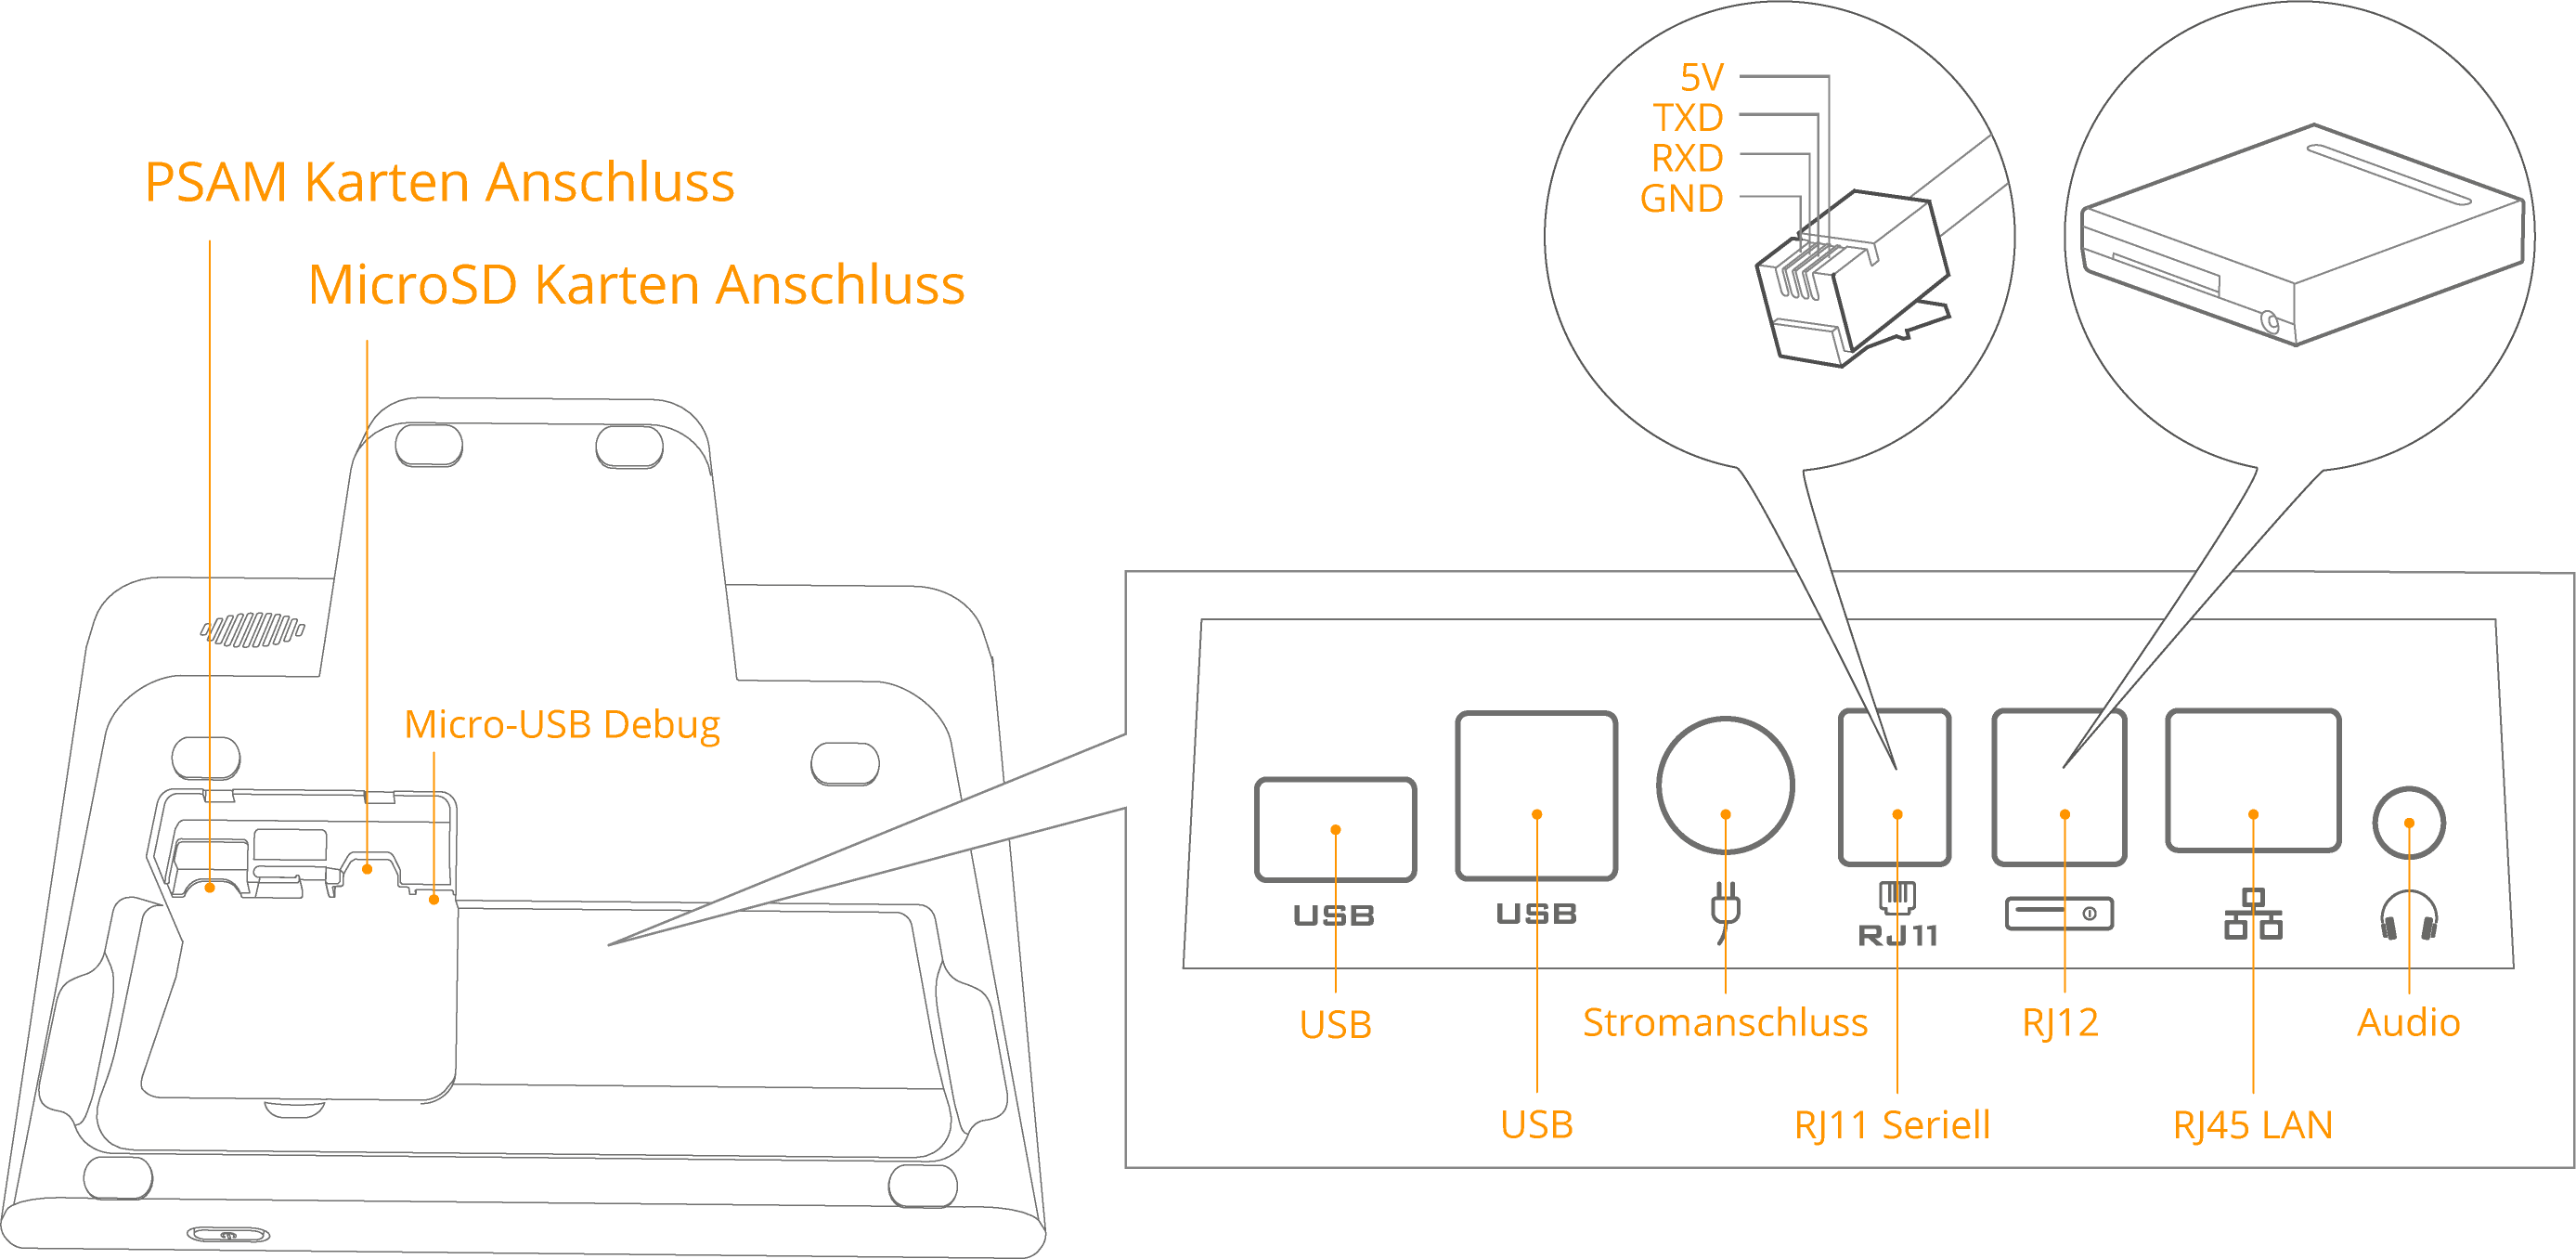
Micro USB DEBUG port
For troubleshooting purposes only. During debug mode, the USB ports on the bottom of the device will not function. Only the debug USB port next to the power button can be used.
MicroSD card connector
For expanding the internal data storage using a MicroSD card (max. 64GB).
Audio Jack
An audio jack for connecting external speakers or headphones.
USB port
USB 2.0 port for connecting peripheral devices.
Serial connector (RJ11)
Connection of peripheral devices via a serial port.
Ethernet / LAN (RJ45)
Ethernet connection for an internet connection in the local network.
Cash drawer connection (RJ12)
For connecting an external cash drawer. The connection is not permanently energised, but sends current pulses with a frequency of 100ms. Different types of 9-24V cash drawers are supported.
Power connection
Connection of the power supply unit for the power supply.
Insert receipt roll
To insert the receipt roll, first open the printer lid in the direction of the arrow, then insert the 60x80mm thermal paper roll and finally close the printer lid. The primasello X340 cash register also supports 58mm receipt rolls, to do this, the fixers must be inserted into the printer.

Notice
When changing the receipt roll, please ensure that the core of the last roll has been removed before inserting the new roll.
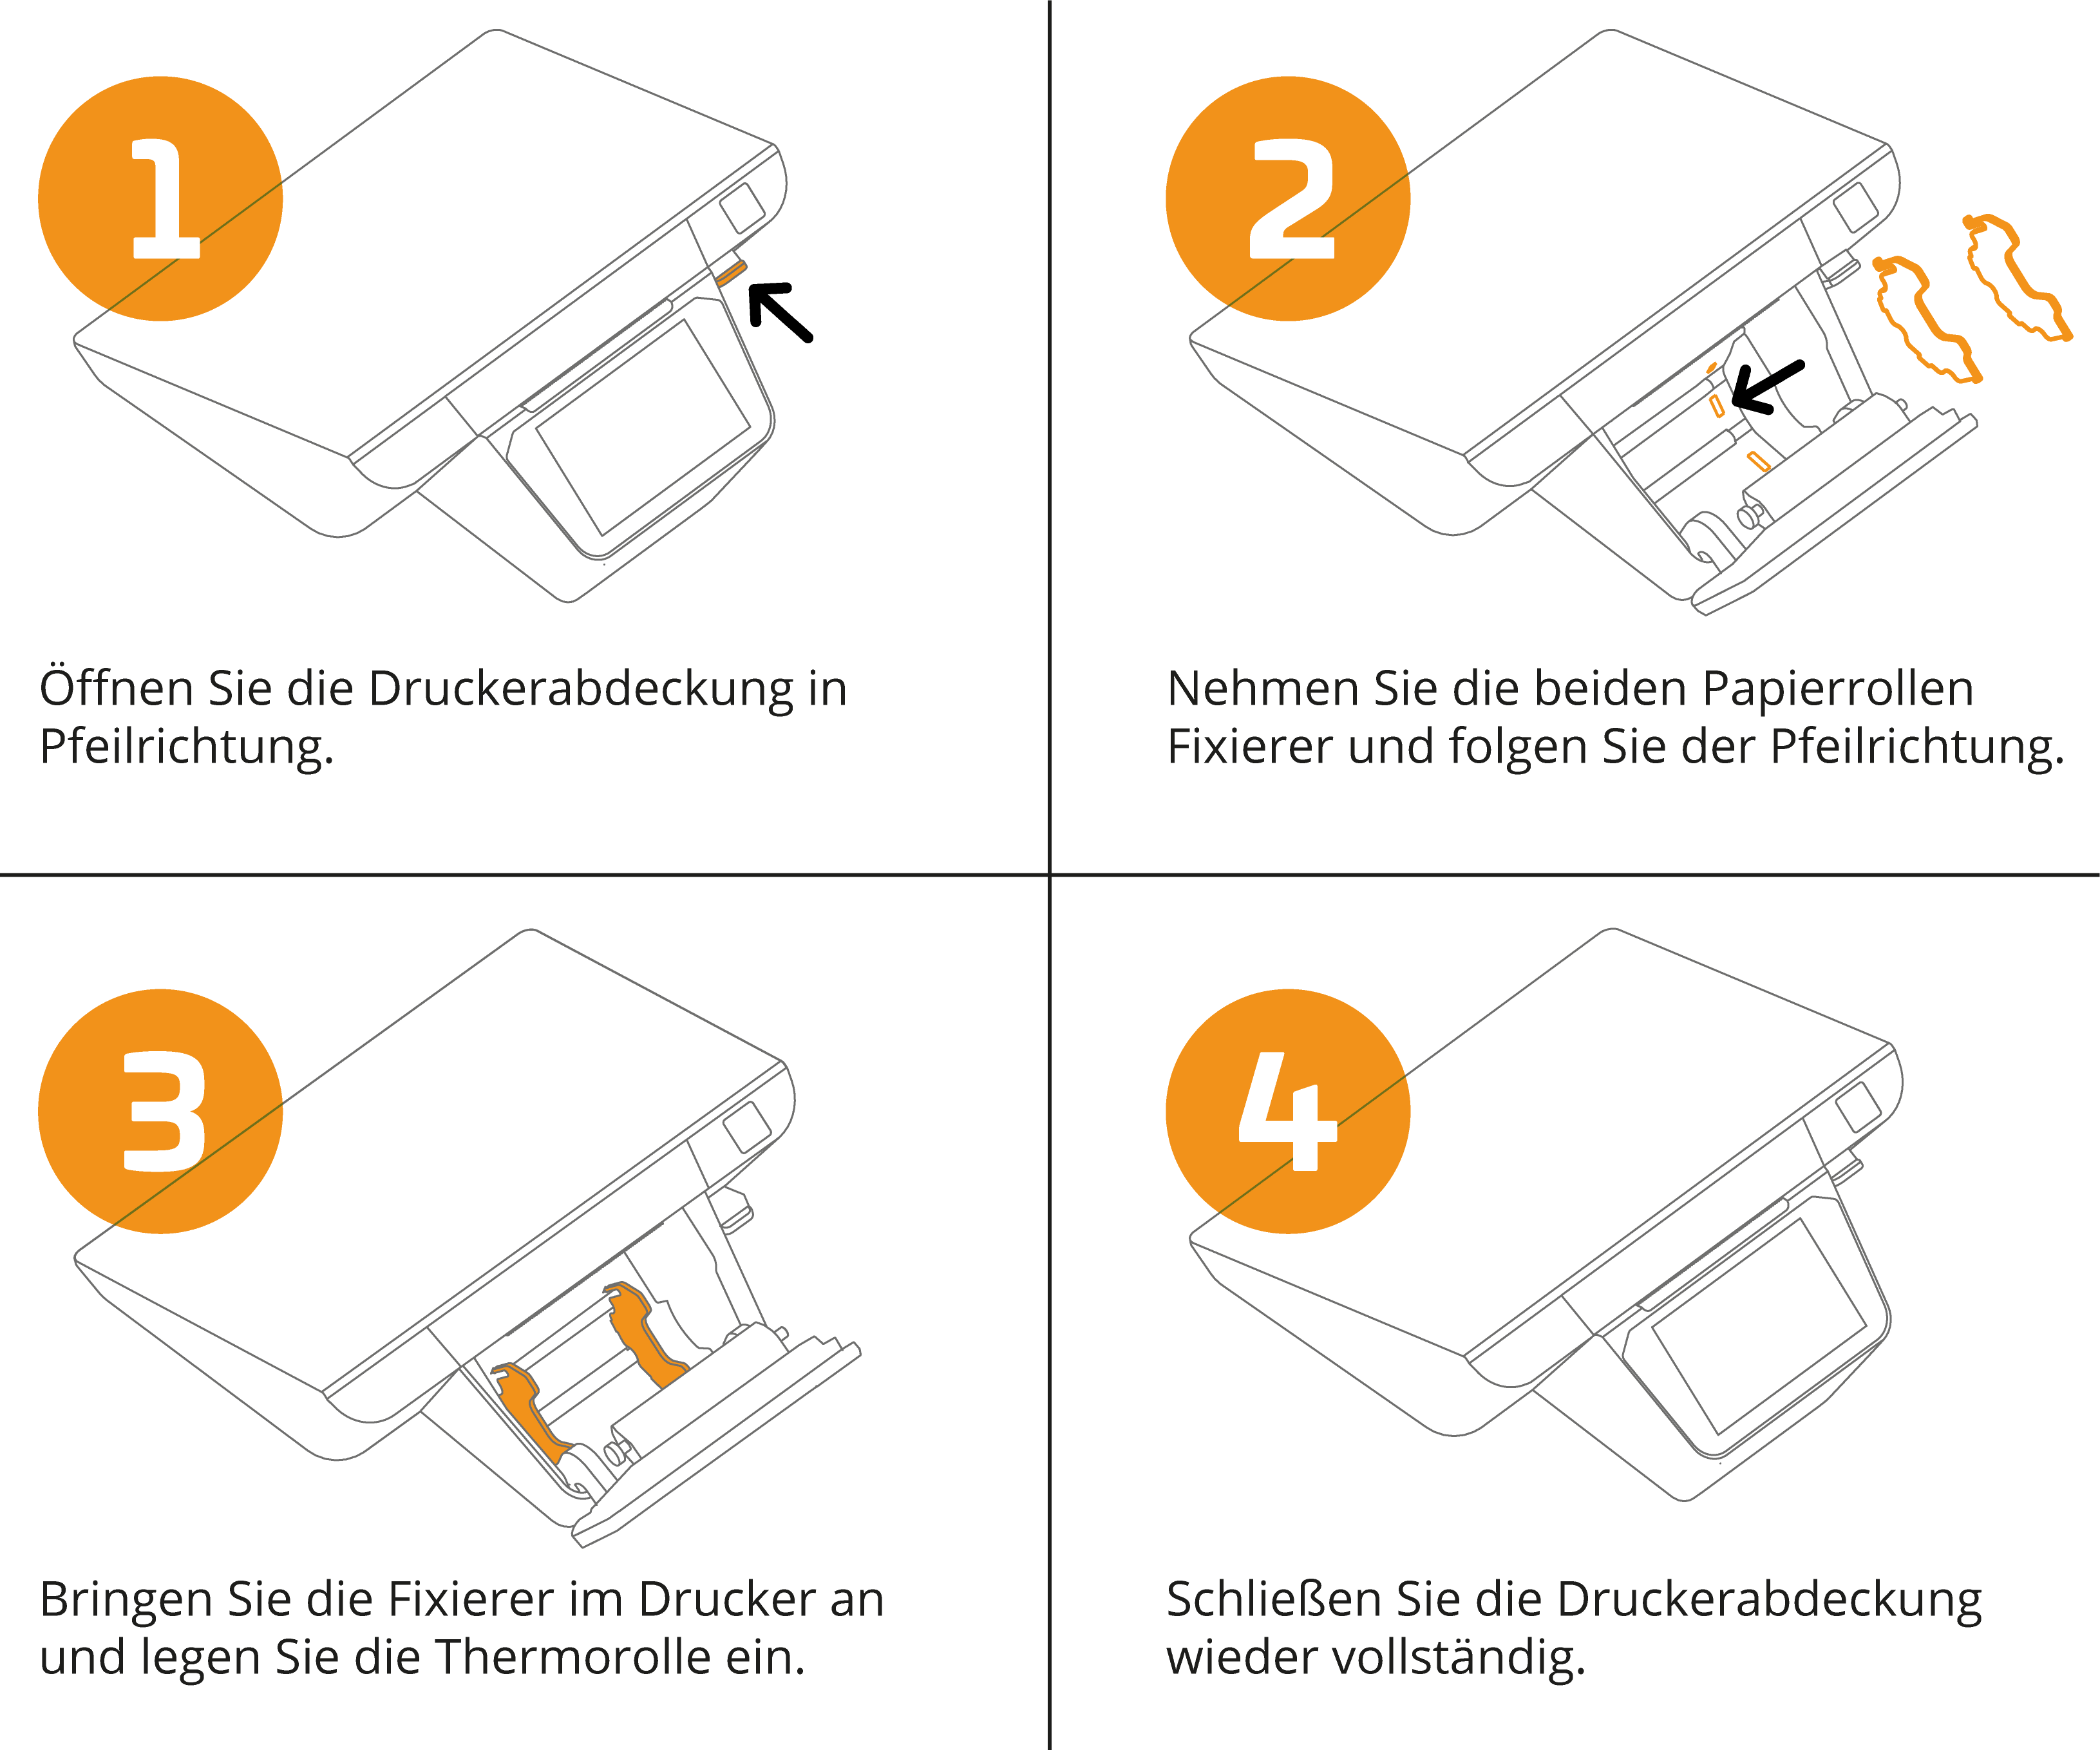
Installing paper roll fixers
Open the printer lid in the direction of the arrow.
Remove the two paper roll fixers from the packaging and follow the direction of the arrow.
Attach the fixers into the printer and insert the thermal paper roll.
Close the printer lid completely.
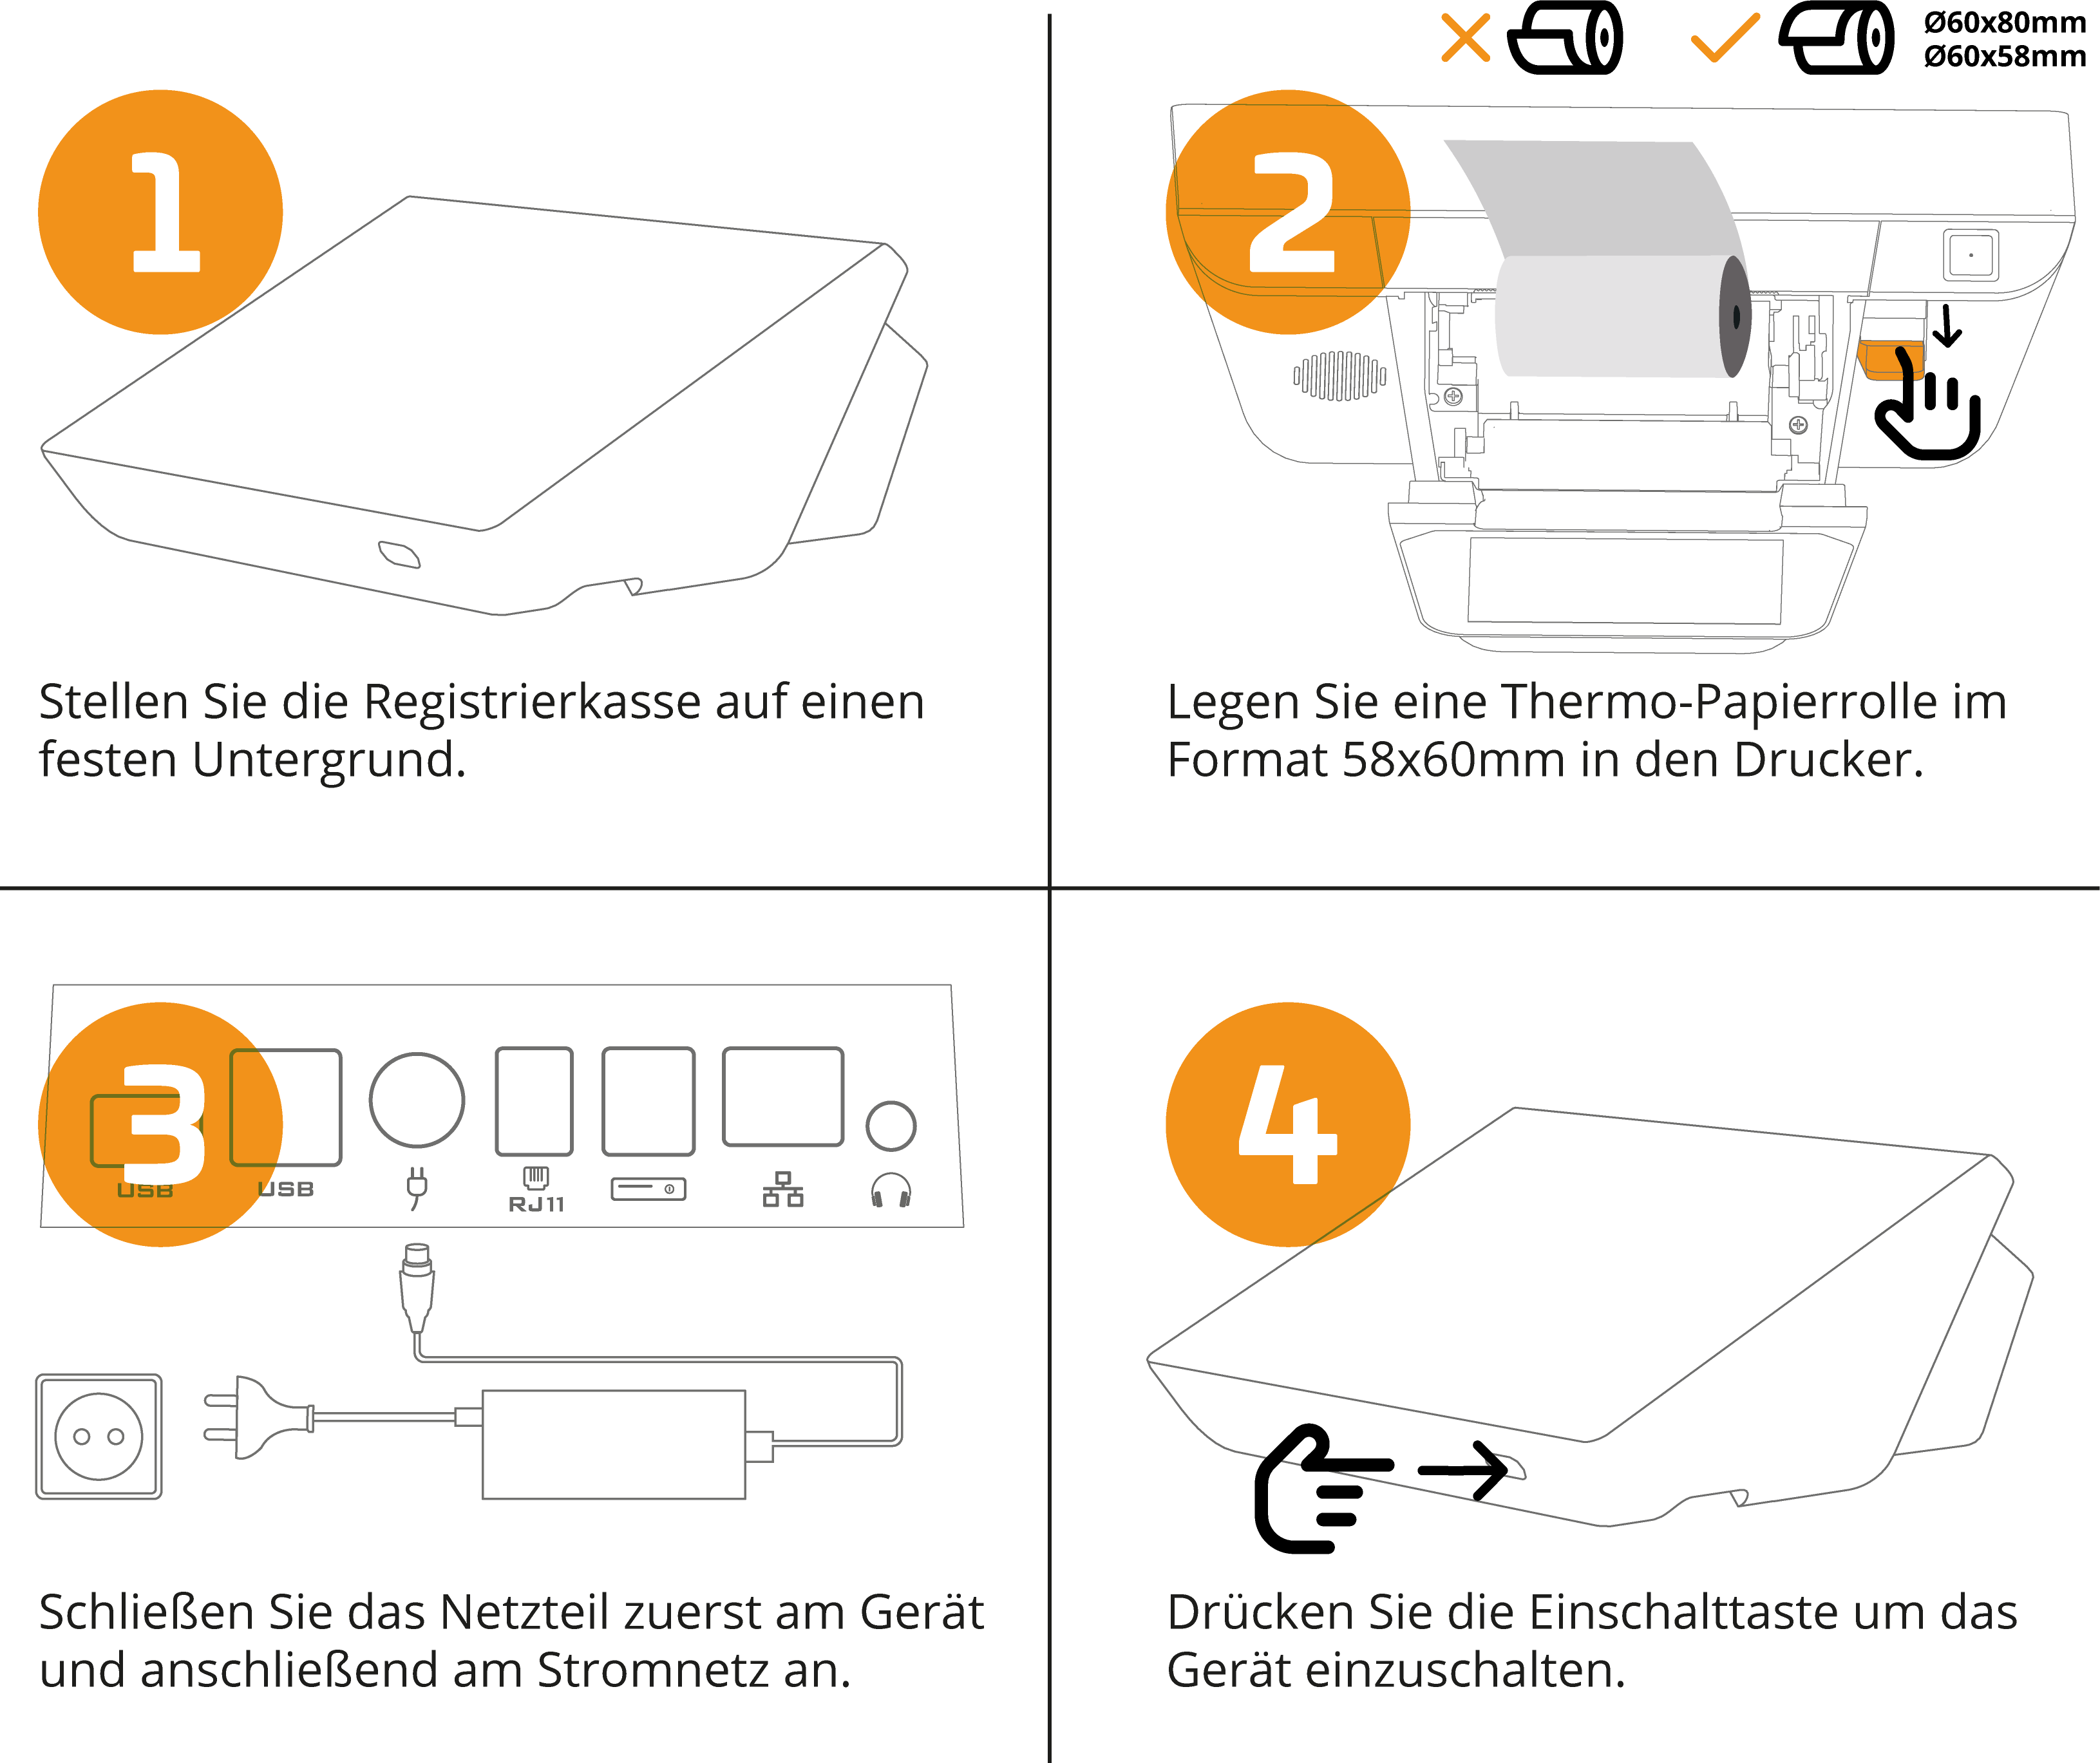
Quick Start
Place the cash register on a stable surface.
Insert the 50x58mm / 60x80mm thermal paper roll into the printer.
First connect the power supply to the device and then to the mains.
Press the power button to switch on the device.