A1060
Before you start using your primasello cash register, please read the quick start guide provided carefully. Alternatively, you can also find all the important information in the Getting Started chapter.
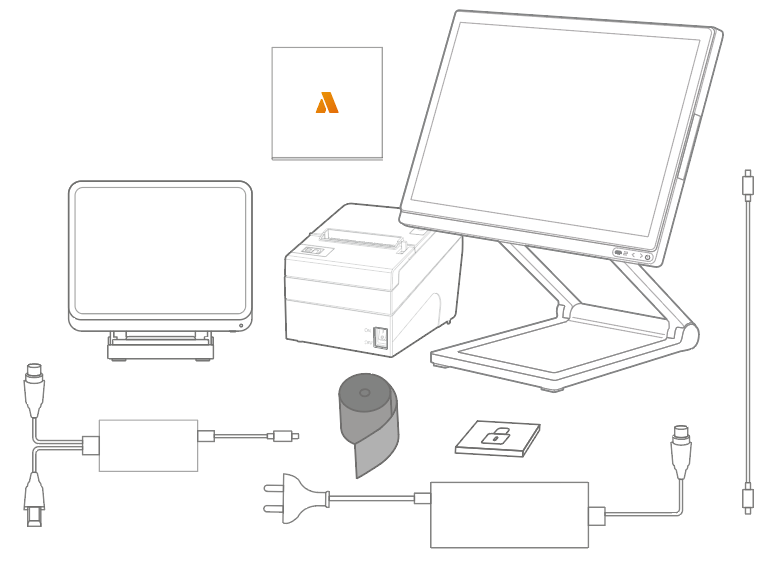
Scope of delivery
The package includes:
1x primasello A1060 cash register
1x quick start guide
1x power supply unit with power cable
1x 80mm printer
1x 80mm thermal paper for printer
1x printer cable
1x security module
1x customer screen
1x USB connection cable
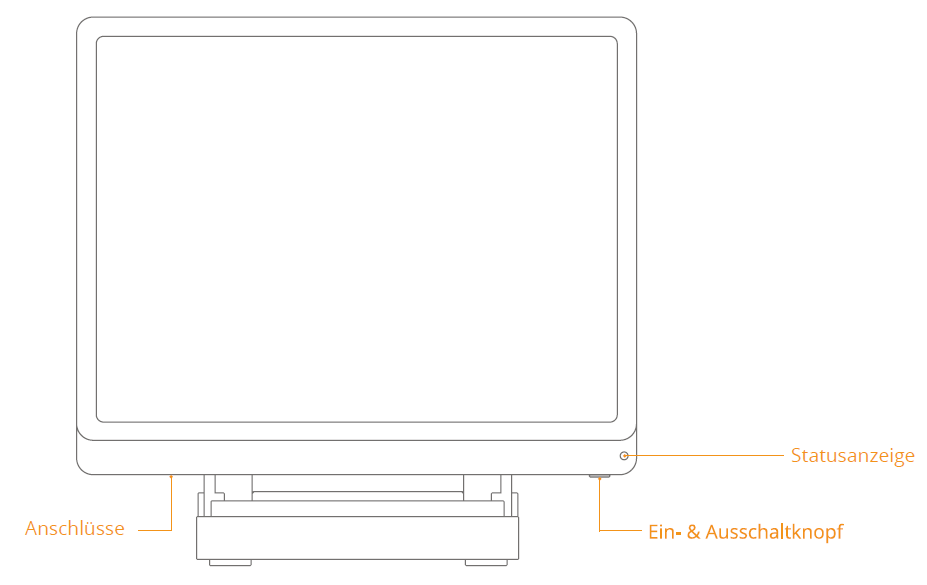
Screen components
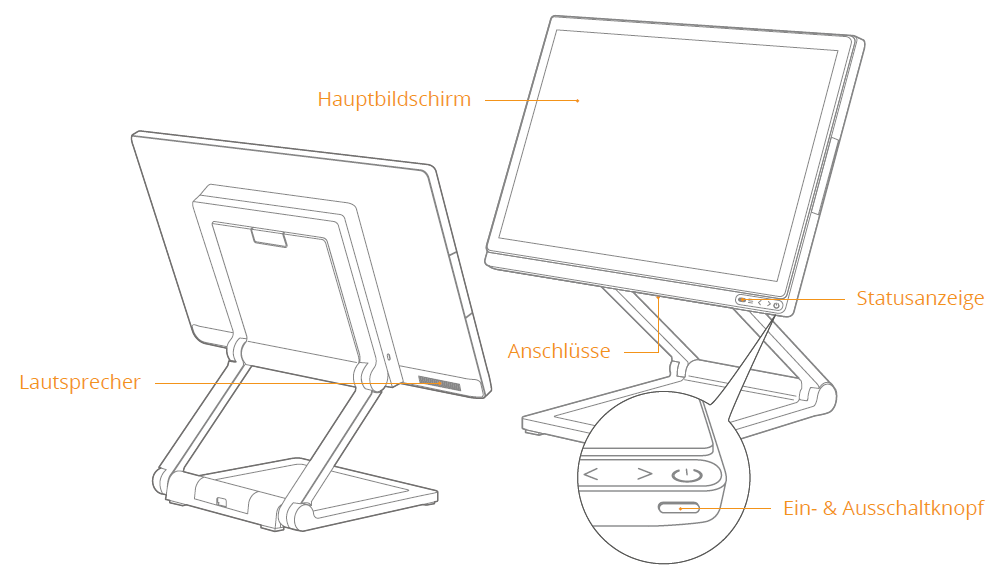
Main screen
Touch screen for operation.
Status indicator
Lights up green when the cash register is switched on.
Customer screen
Screen for customers with information about the open receipt.
On/off button
If the device is switched off, press briefly to start it. To switch off the device, press and hold the on/off button for 11 seconds. The system will shut down.
Connectors
The connectors are located at the bottom of the main screen.
Connectors screen
Remove cover
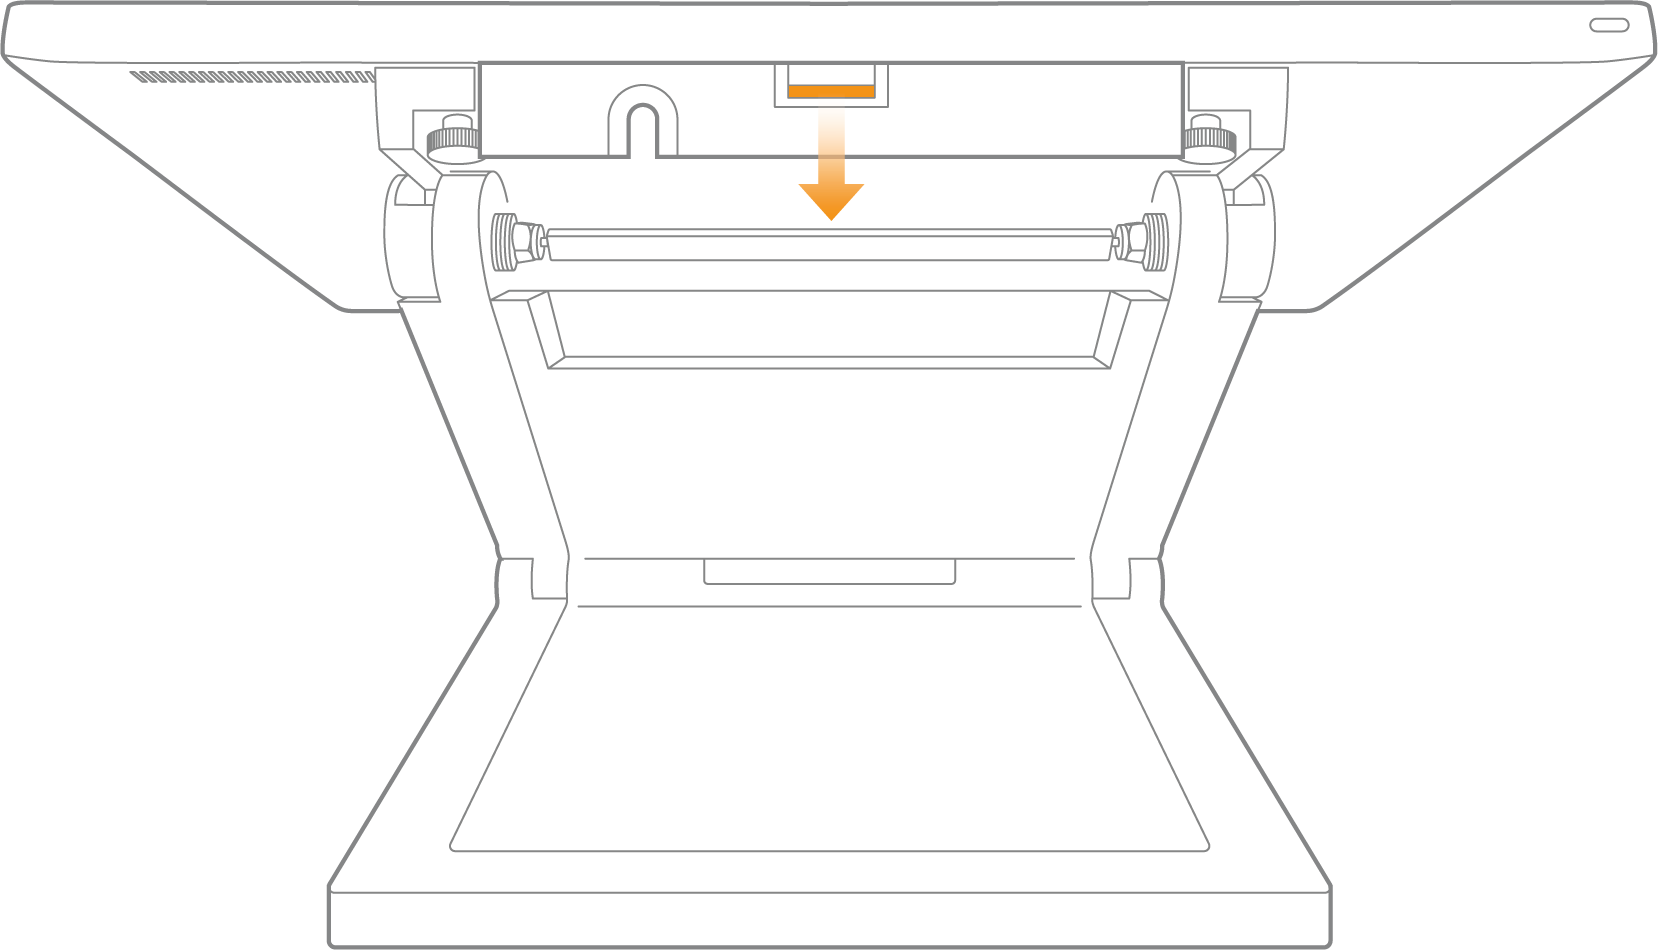
The connectors at the bottom of the screen are protected by a cover. To remove the cover, press the small raised area in the centre (marked orange in the illustration) and pull the entire cover straight towards you.
After connecting additional devices, the cover should be reinstalled. To do this, slide the rear part with the four U-shaped notches into the side slots and press the cover straight back until you hear a ‘click’.
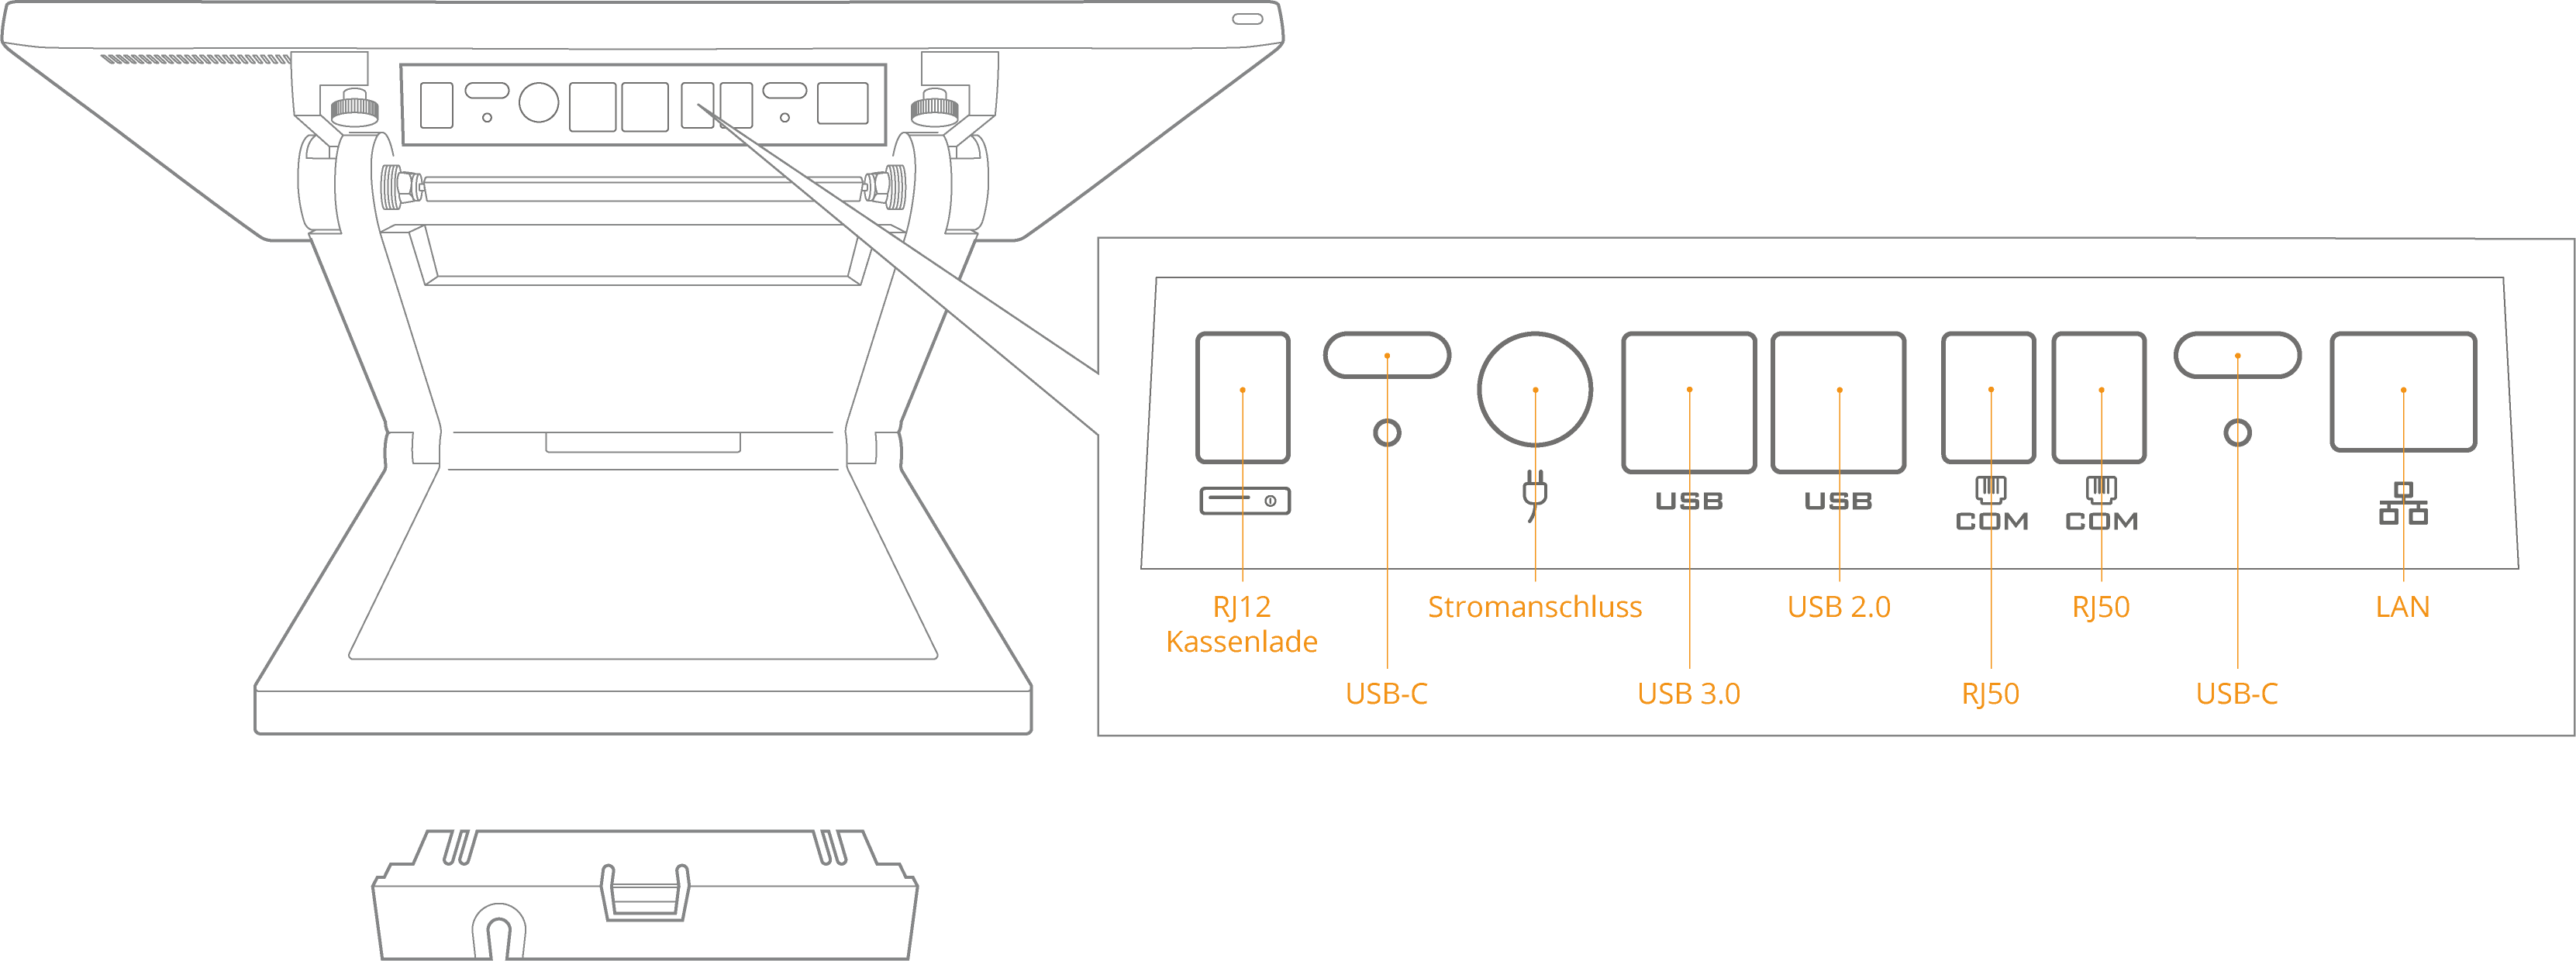
USB-C port
Peripheral devices, such as printers, are connected to the cash register via the USB-C connector. You can find out how to connect the printer correctly below.
LAN port
For connecting the cash register to the Internet via a LAN connection.
USB port
The customer display is already connected to the cash register via one of the USB ports. The supplied security module is connected to another USB port. Do not disconnect the security module unless the system advises you to do so or the security module needs to be replaced.
Components of the customer display
Connectors
The connectors are located on the bottom of the customer display.
Status indicator
If the customer display is connected correctly, the ‘Power’ lamp lights up.
On & off button
To switch on the customer display, press the small button on the bottom right-hand side of the display. To switch off the customer display, press the button again.
Bottom of the customer display
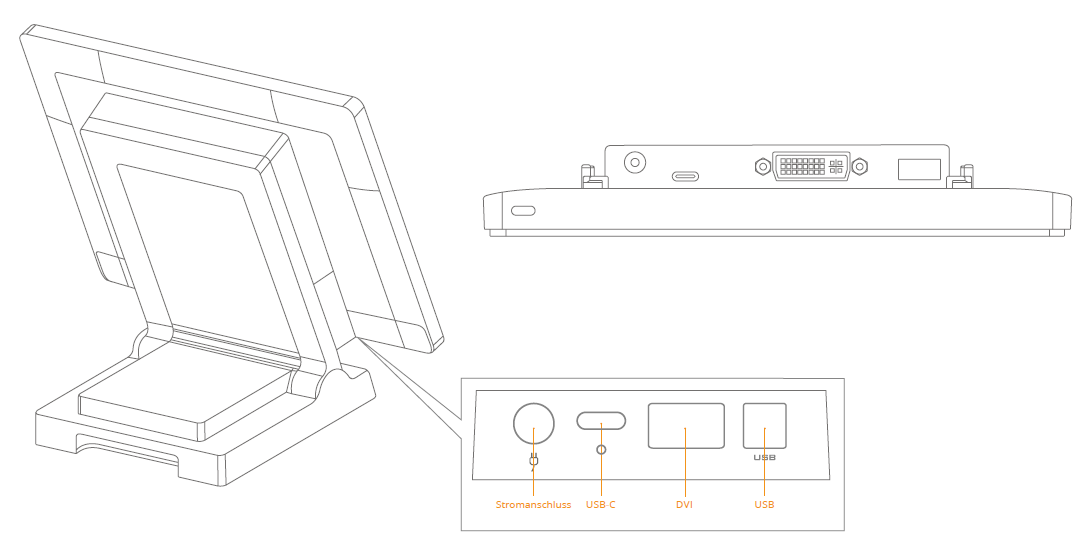
Power connection
Supplies the customer display with power via the connector to the screen.
USB-C
The printer communicates with the cash register via the USB-C cable. Connect the supplied printer cable here.
DVI-USB
Alternatively, the customer display can be connected to the cash register via the USB or DVI cable.
Printer components
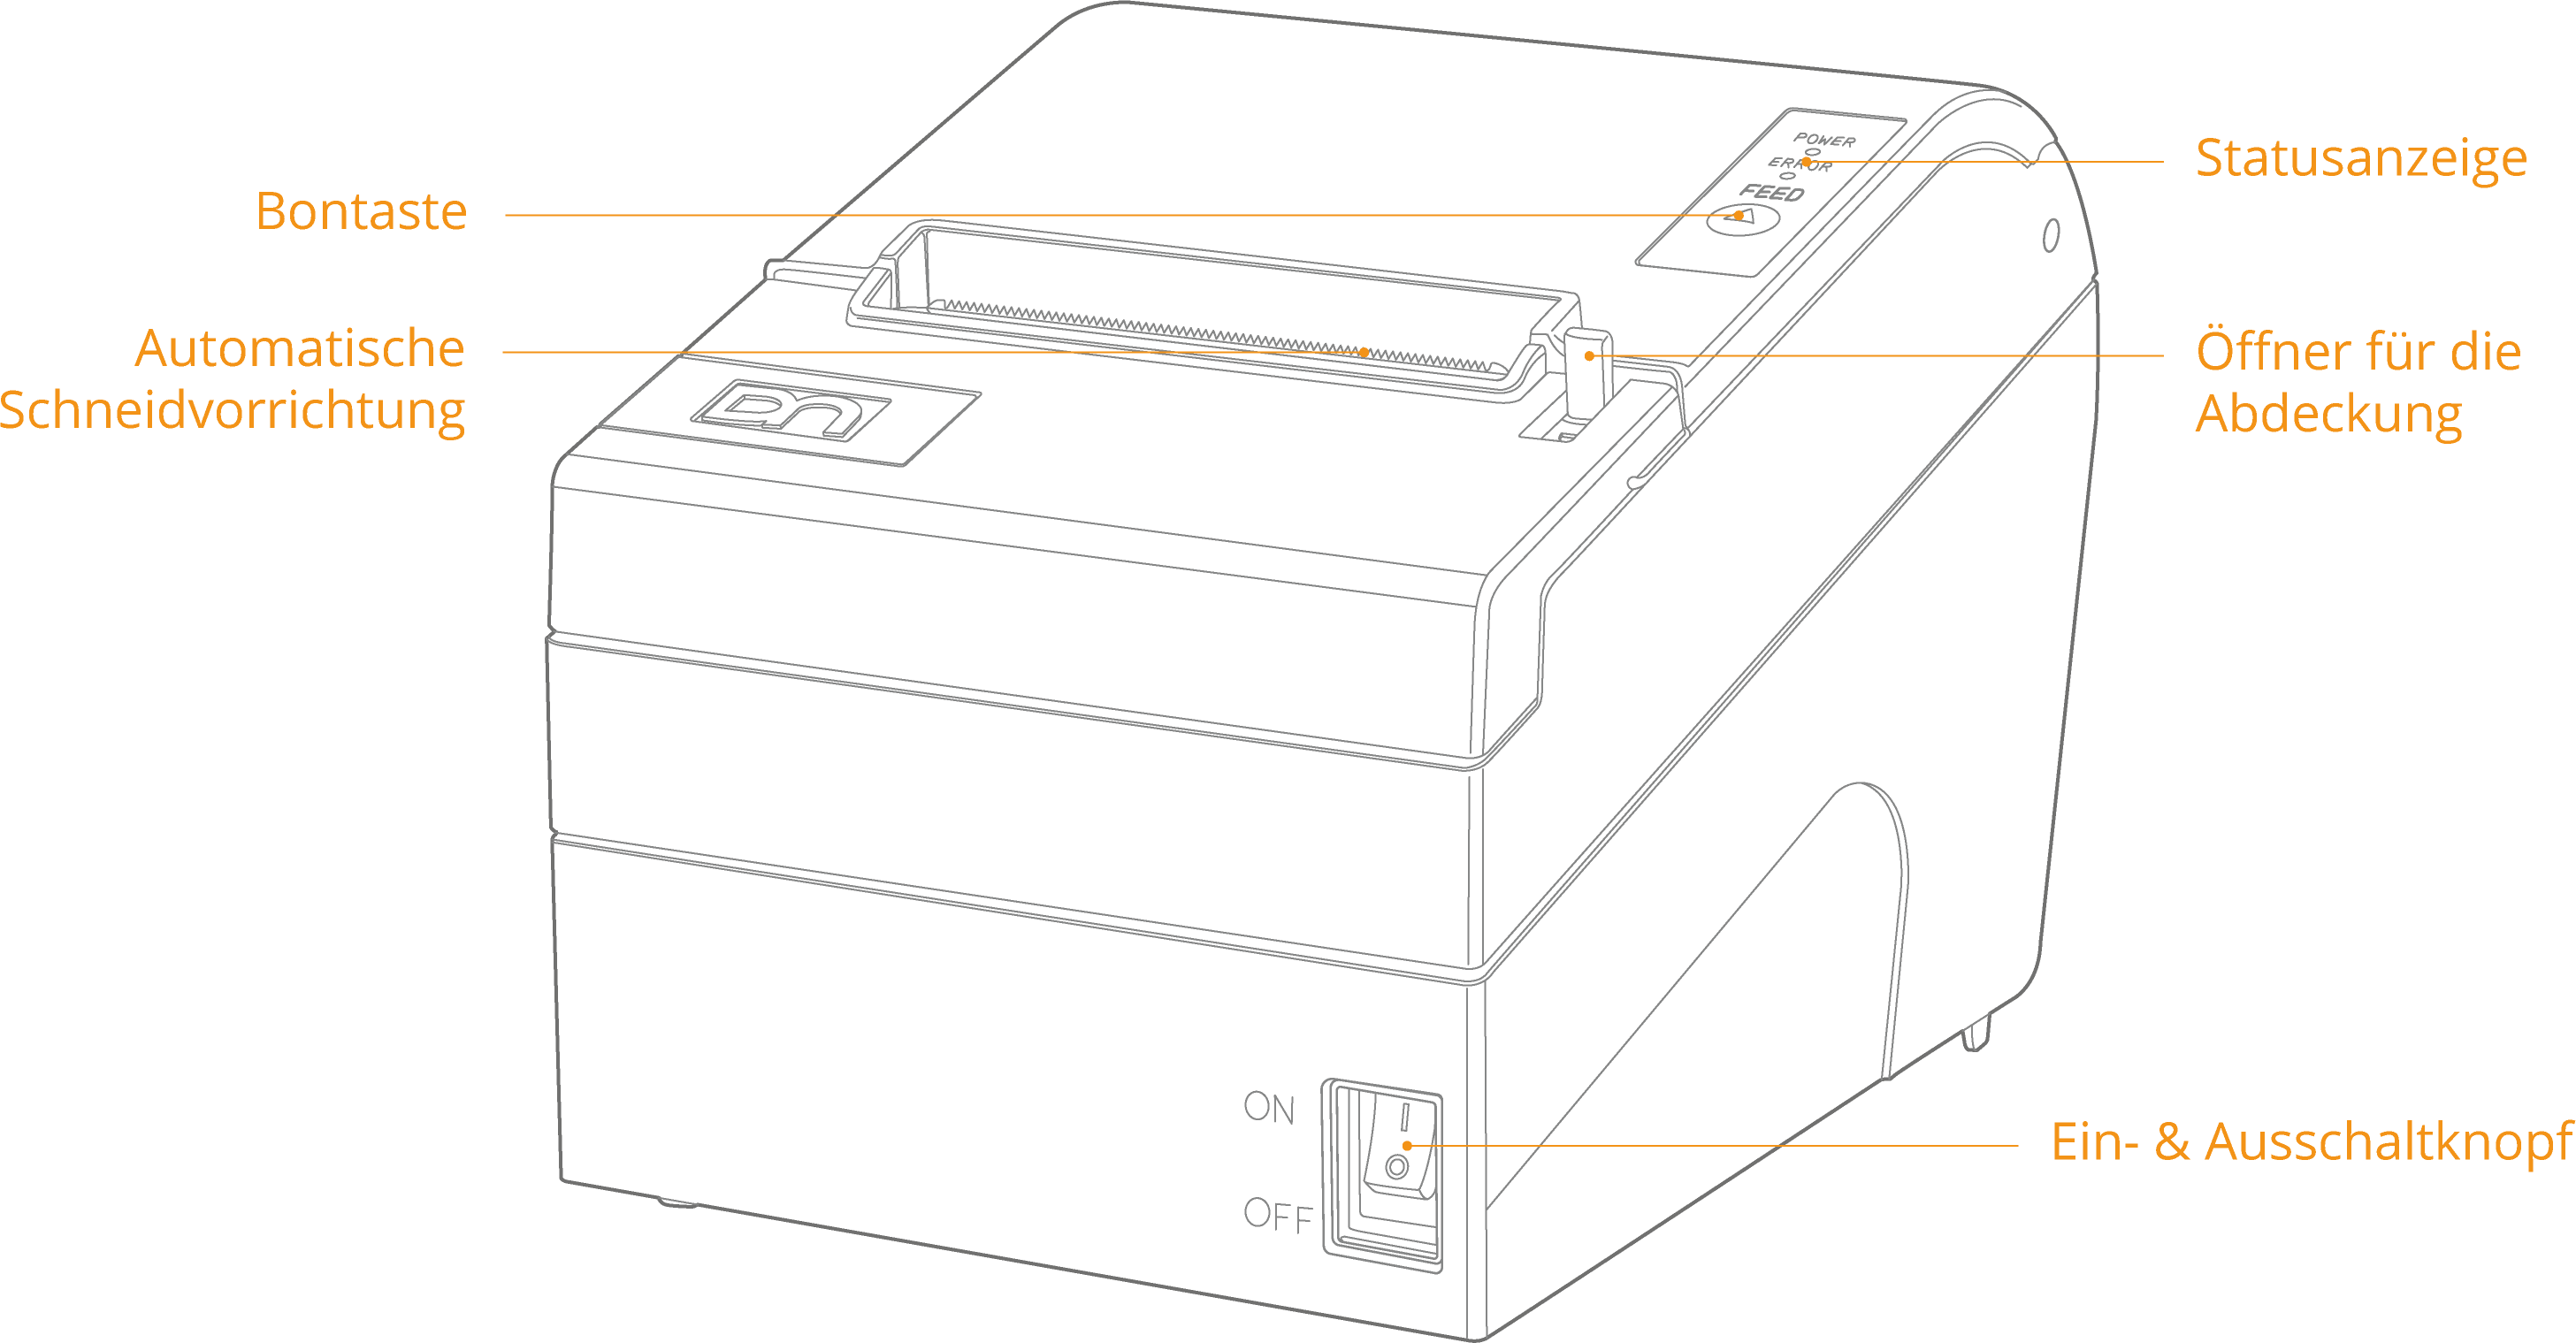
Feed button
The ‘Feed’ button feeds a piece of unprinted receipt paper from the printer. Should be pressed after inserting a new roll of receipts.
Status indicator
If the printer is connected correctly, the 'Power' light will illuminate. If there is an error (e.g. out of paper), the 'Error' light will flash red.
Opener for the lid
Press the switch down to open the printer lid.
On & off button
To switch on the printer, press the toggle switch upwards. To switch off the printer, press the toggle switch downwards. Caution: Do not switch off the printer during a print job.
Connectors printer
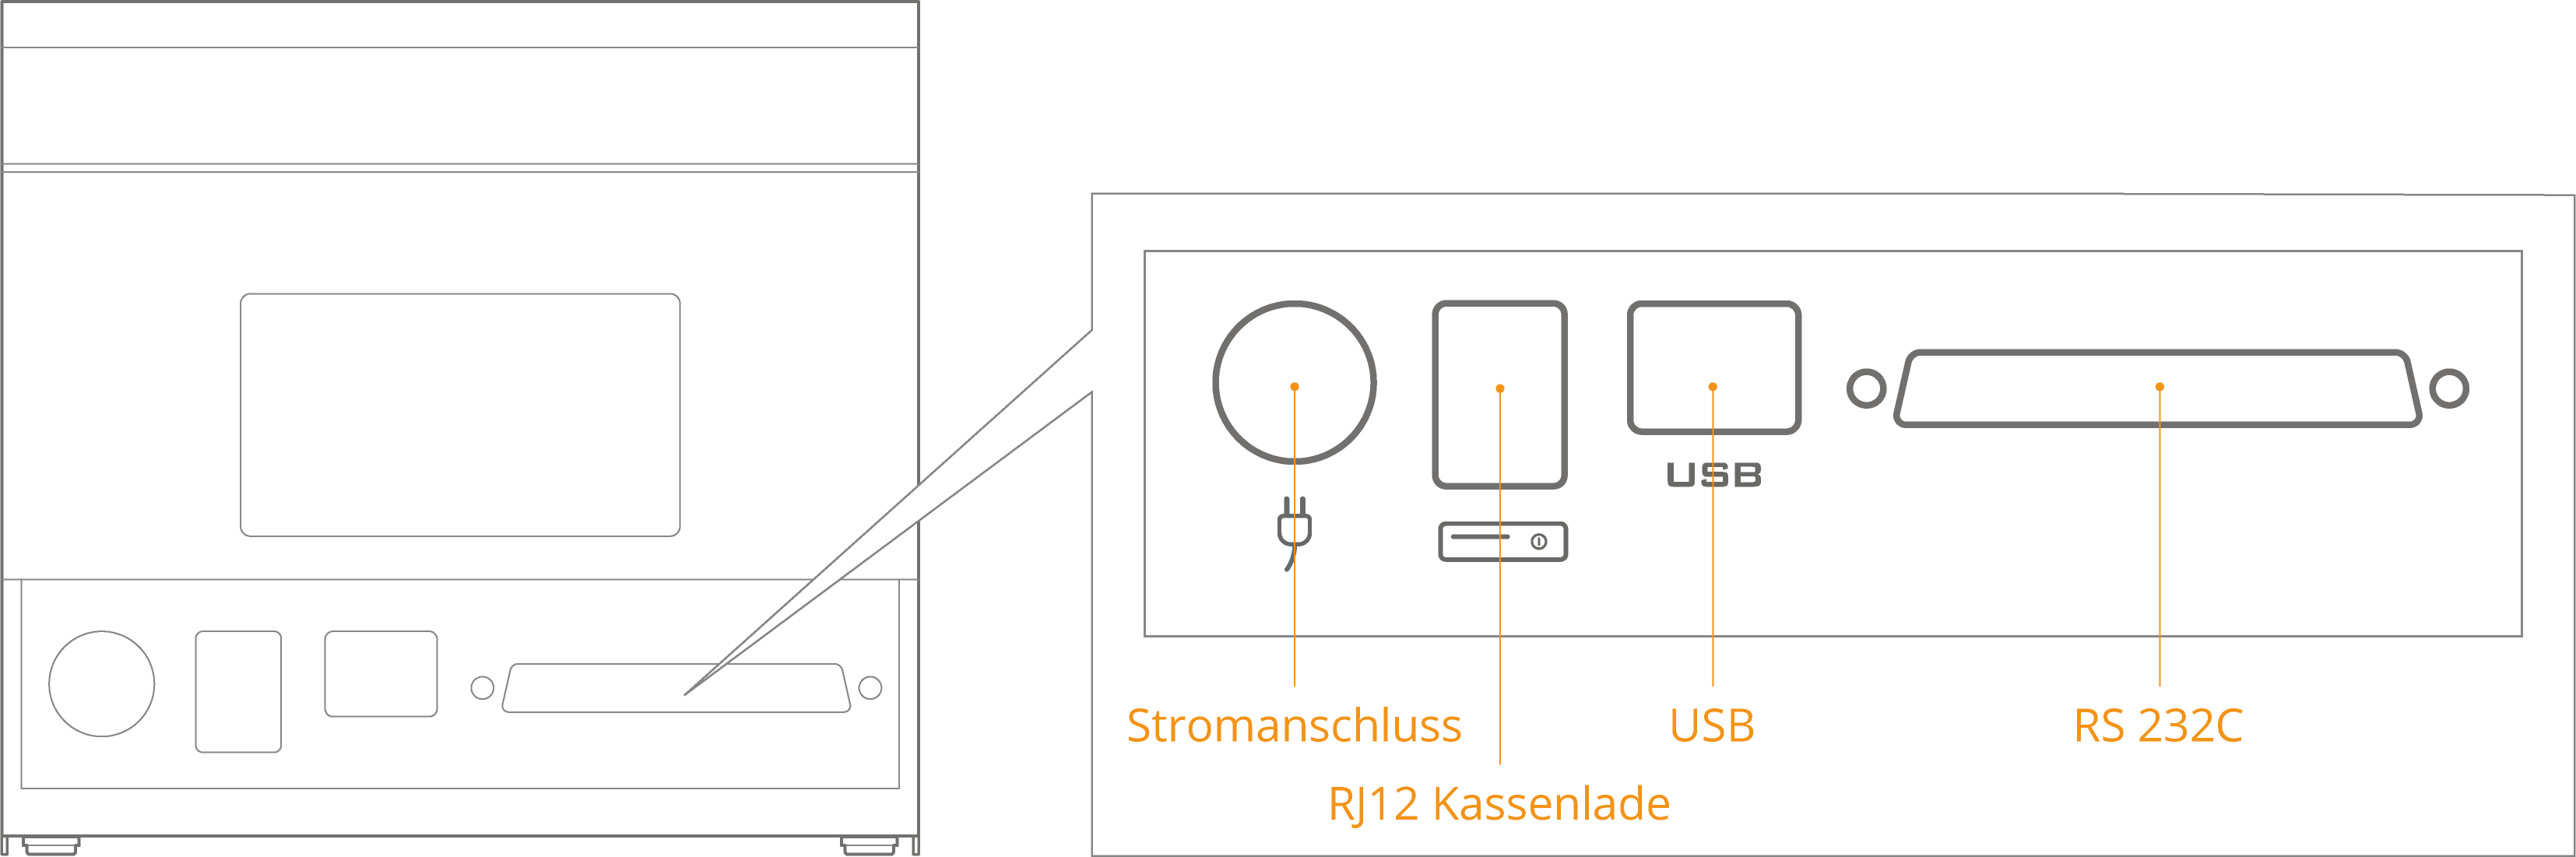
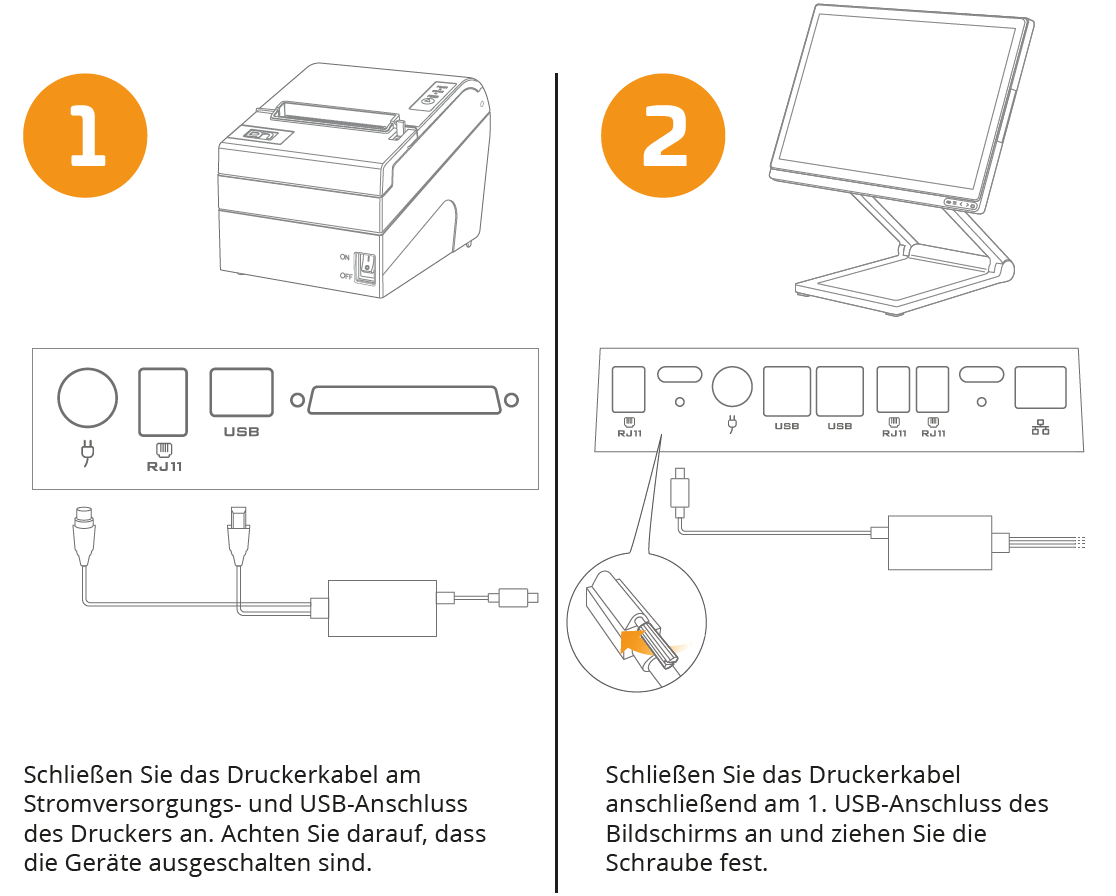
Power connection
Supplies power to the printer via the connector to the monitor. First connect the printer cable to the printer and then to the monitor.
USB
The printer communicates with the cash register via the USB cable. Connect the supplied printer cable here.
Cash drawer connection (RJ12)
For connecting an external cash drawer. The connector is not permanently energised, but sends power pulses at a frequency of 120 ms. Only 24V/1A cash drawers are supported. Each cash drawer should be connected to the printer to ensure functionality.
Insert receipt roll
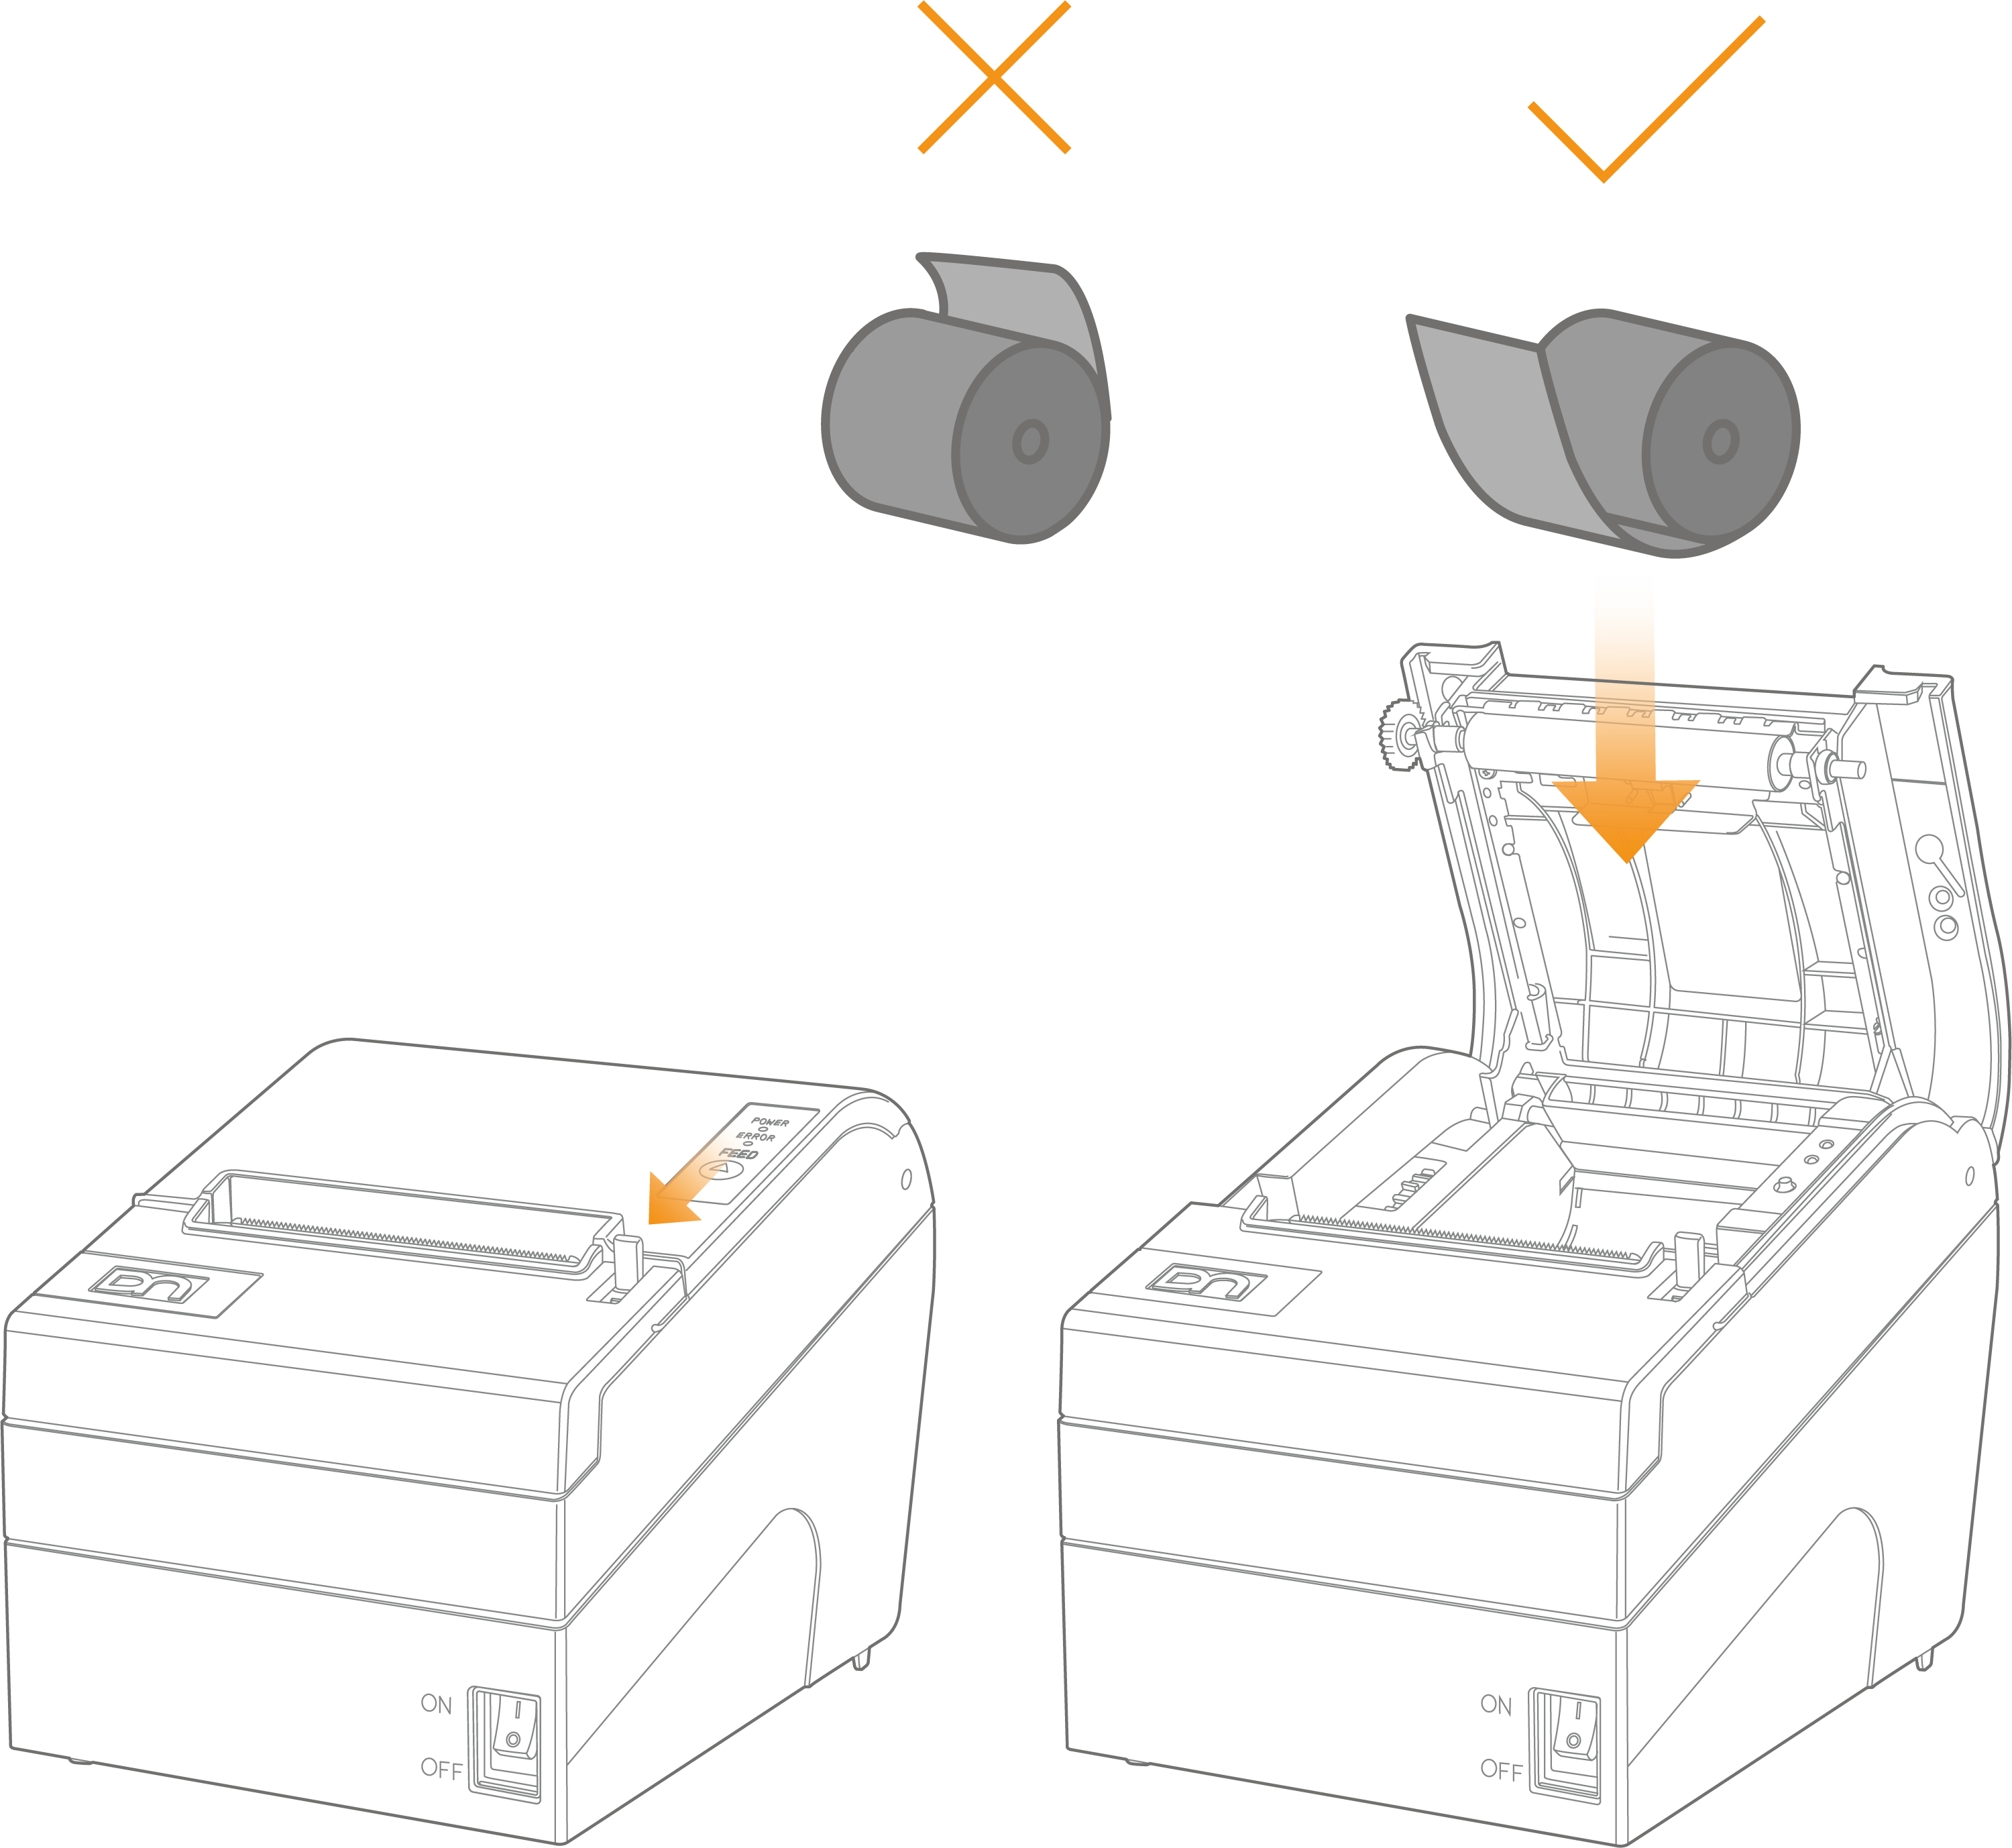
Note
When changing the receipt roll, please ensure that the core of the last roll has been removed before inserting the new roll.
Connecting the customer display
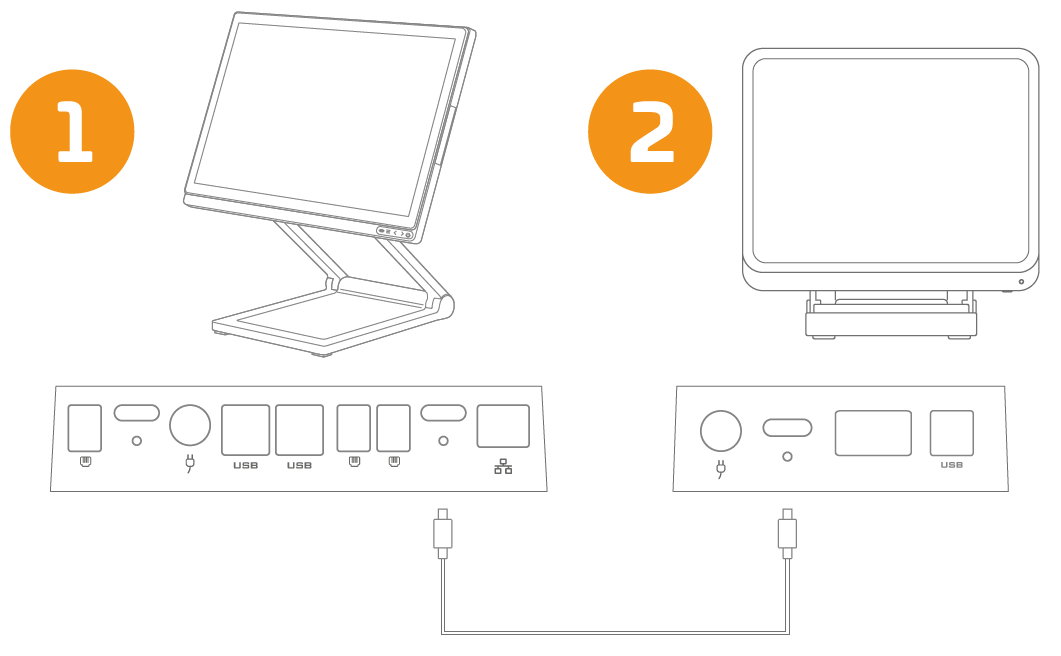
Connect one end of the USB cable to the cash register, and the other end to the customer display. The connectors are located at the bottom of the screen.
Connecting the printer
Quick Start
